Admin -page can be found from the top right corner behind gear-icon

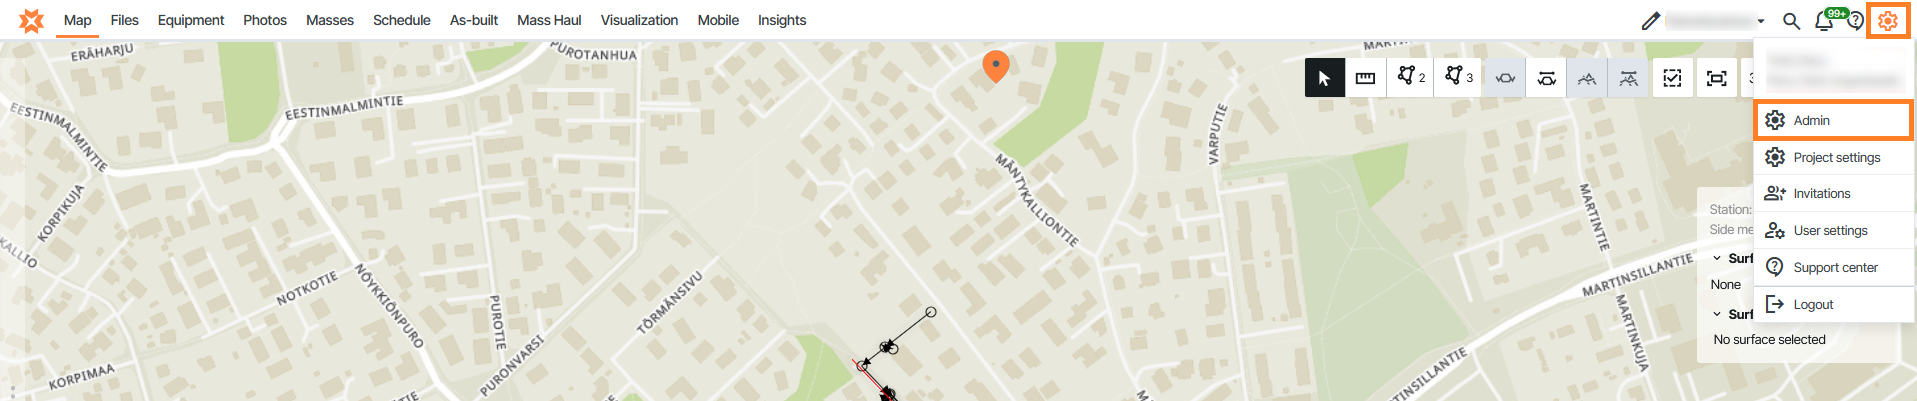
Admin Page
From this page you can:
Manage Organizations
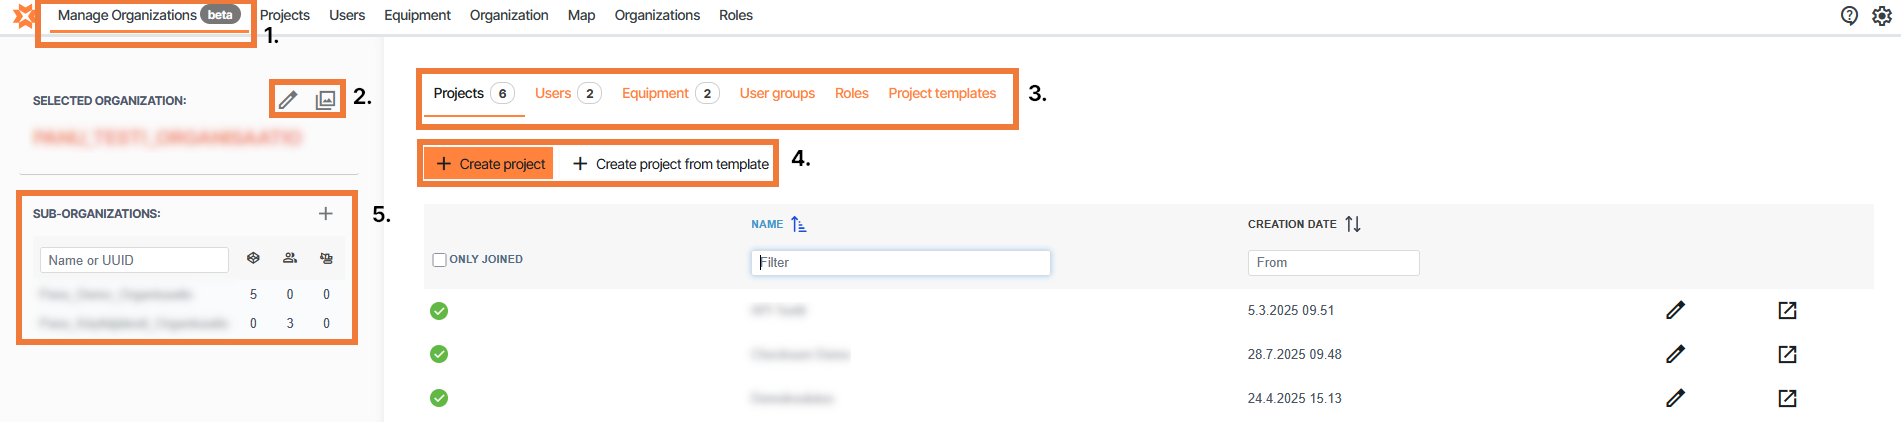
1. Manage organizations tab
2. Edit selected organization and company logo(if one provided)
3. In this ribbon you can select Projects, Users, Equipment or User groups
4. Create new project from scratch or from a template
Manage Sub-Organizations (Only for super users)
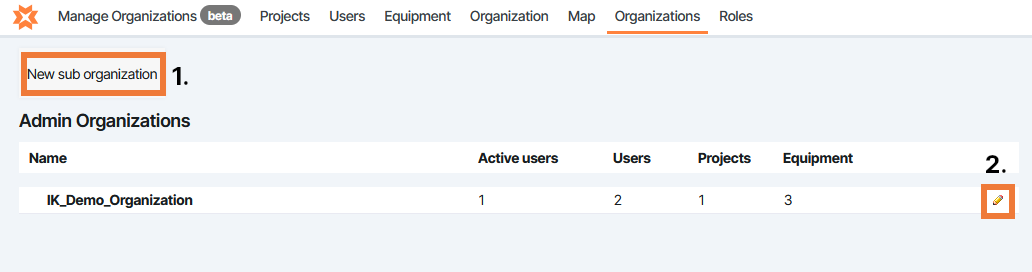
Manage Organizations - Sub-Organizations
Sub-Organizations can be managed from the "Manage Organizations" tab
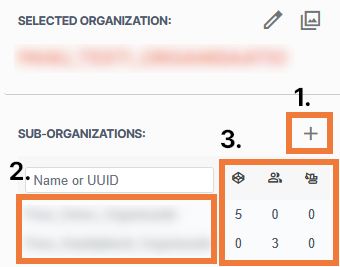
In this view a user can
Create and edit sub-organizations
The selected organization can be edited from the pencil icon above the name of the selected organization
Navigate between sub-organizations by left-clicking on the name
View the number of projects, users and equipment in sub-organizations
Create and edit sub-organizations
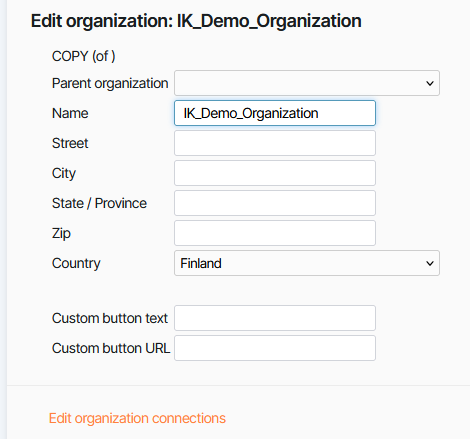
Only super users can create new sub-organizations. To create new sub-organization only the field "Name" is mandatory. Other fields are additional information.
To edit organization connections select "Edit organization connections" or go to the "Organization" Page on the Admin page.
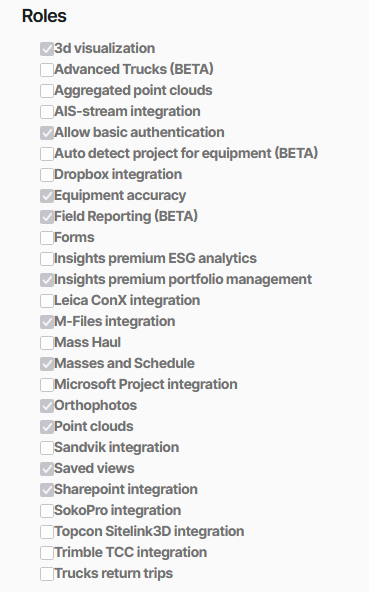
The roles menu shows which features are active in the selected organization. Only Infrakit super users can change these settings.
Manage Organizations - Projects
Navigating the page
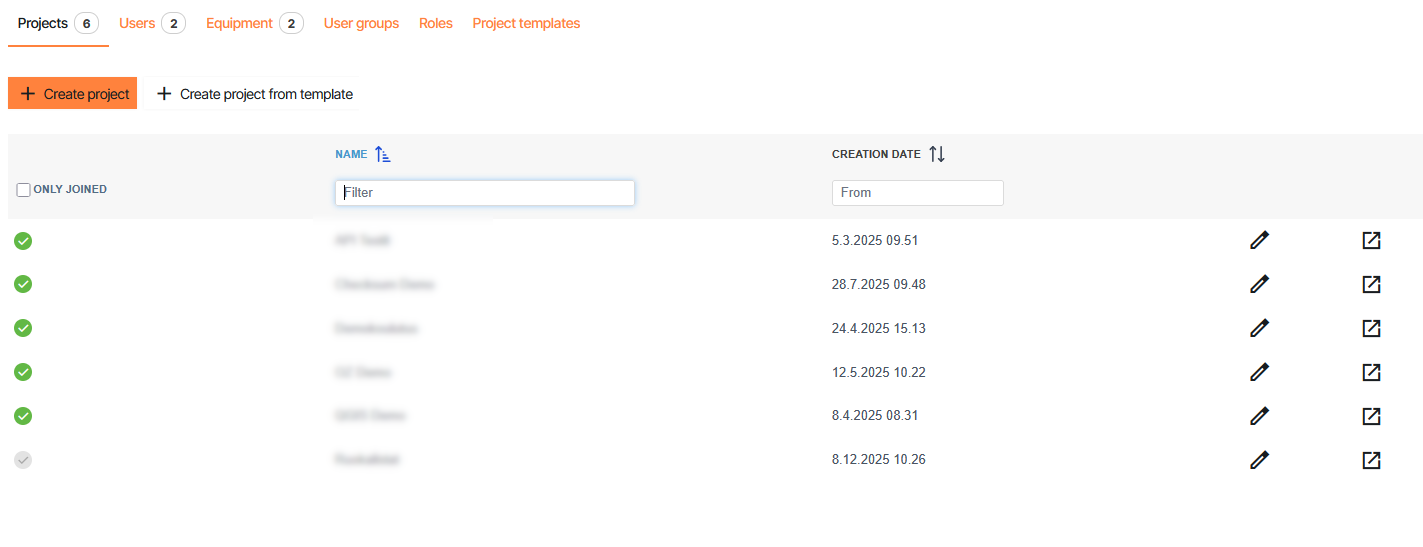
This tab contains the projects that are inside the selected organization.
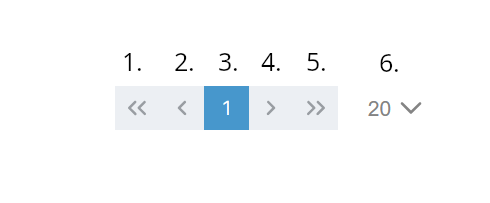
Jump to first page
Jump to previous page
Current page
Jump to next page
Jump to last page
Select how many projects are shown on one page
Projects tab inside the Manage Organizations page allows admin or super user-level users to:
Create new projects from scratch or using a template
Filter and sort projects
Add or remove admin user from projects
Edit projects
Export project logs
Create new projects

New projects can be created by selecting "Create project" or "Create project from template".
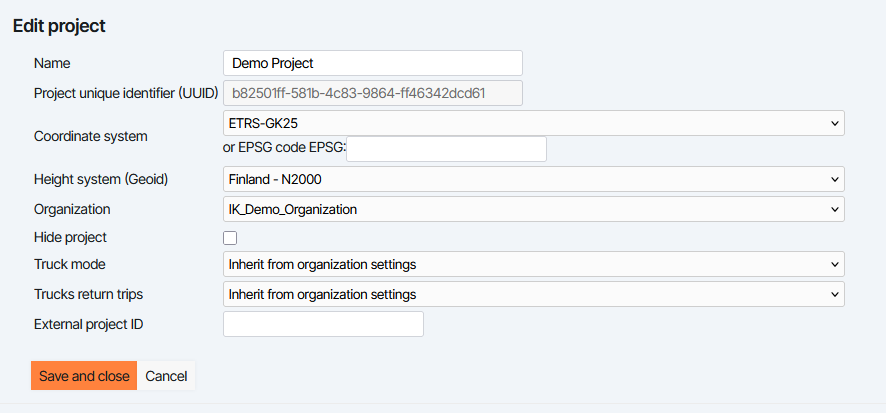
While creating or editing the project you can edit some fields in the menu.
Project name - Name of the project, this is mandatory field
Project unique identifier (UUID) - The unique code used to identify the project. Generated automatically while creating the project
Coordinate system - Select one from the list or write the EPSG code
Height system - Select the height system used by the project
Hide project - If this checkbox is selected, only super users will see the project
Truck mode - Select whether Advanced trucks function is selected
Trucks return trips - Select whether return trips are created from mass haul trips
External project ID - Optional external project ID.
For more info about equipment, user and integration management see article:
For more instructions on how to create a project view article:
Project templates can be created in the "Project templates" tab:
Filter and sort projects
Filtering

Projects can be filtered by three different ways.
Toggling the "Only joined" checkbox allows user to only view projects it has joined
Writing text in the text box under the "Name" column only shows projects that have a name containing the input
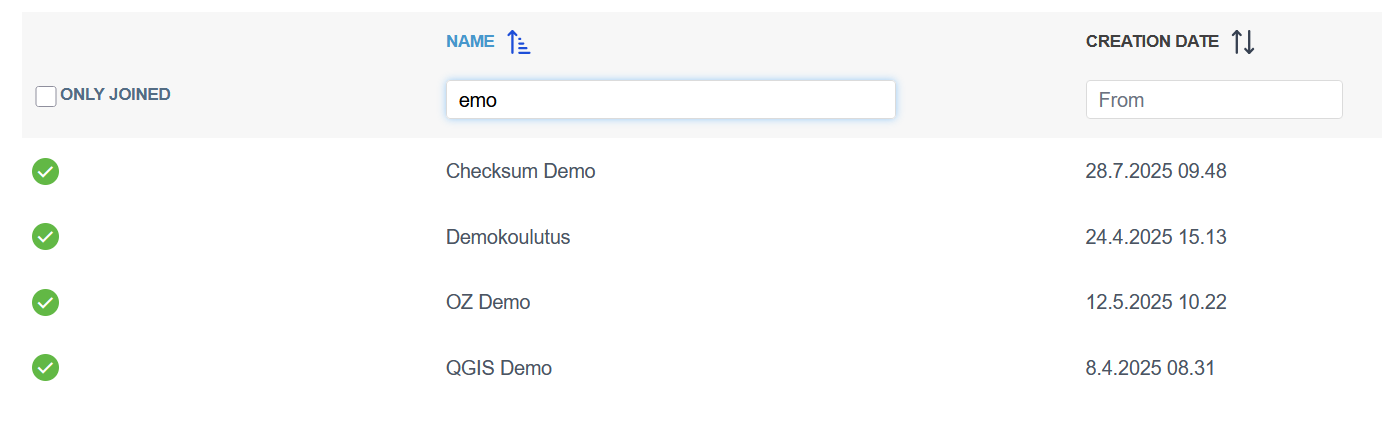
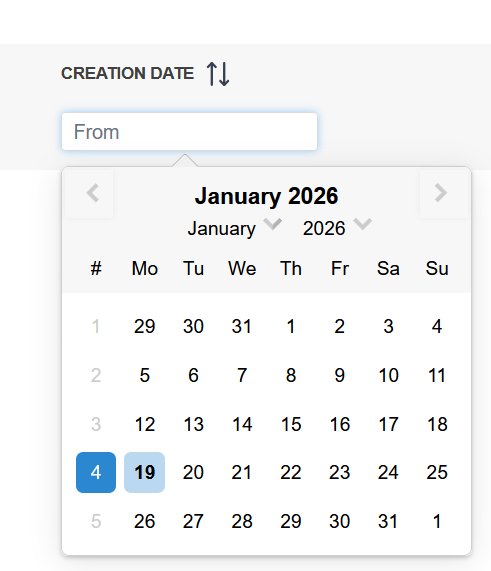
Selecting a date from the box under the "Creation date" column.
Selecting a date will show all projects that are created during or after the selected date
Sorting
Projects can be sorted by name or creation date.
Sorting can be selected by left clicking either the "Name" or "Creation date" text.
Clicking the text again will change wether the sorting is done in ascending or descending order.

Add or remove admin user from projects
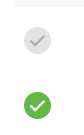
Admin or super user can easily add or remove themselves from a project clicking the checkmark on the left side of a project name.
Green checkmark means the user has joined the project
Grey checkmark means the user has not joined the project
Edit projects

Projects can be edited by selecting the pencil icon on the right side of the row.
More info about editing projects can be found in article:
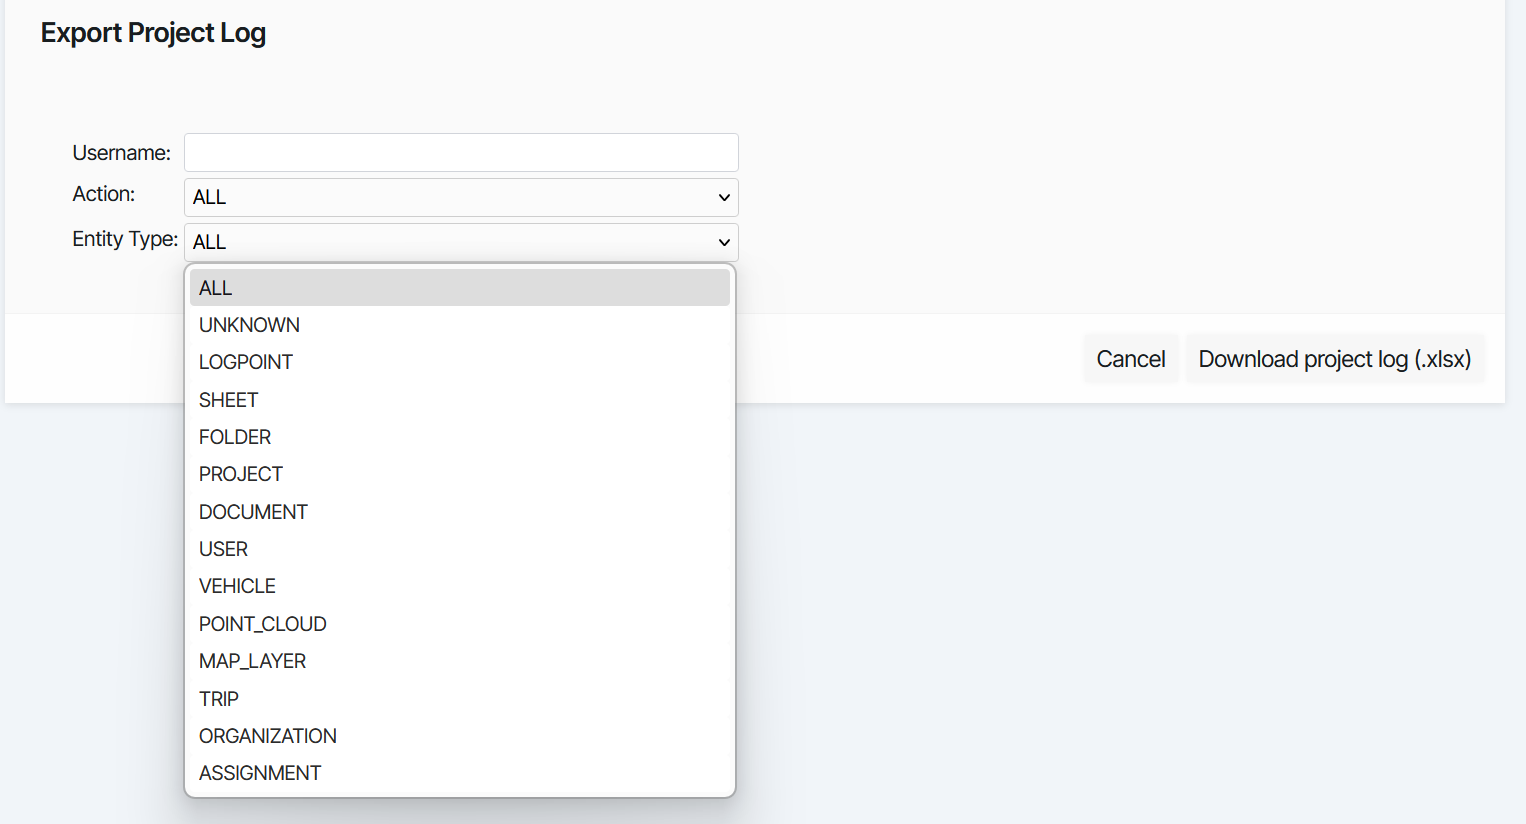
Export project logs
Project logs containining actions made by users to different entity types.
To open the "Export Project Log" menu select the icon on the right side of the row

From the menu a log can be generated by selecting "Download project log (.xlsx)"
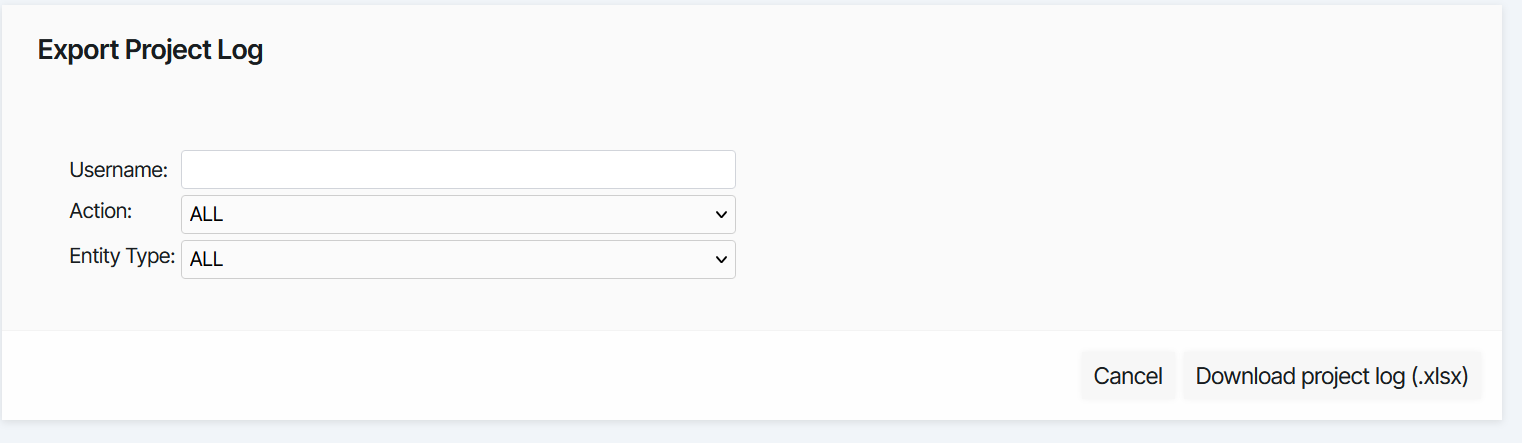
The logged events saved to the file can be filtered by three values.
Username
Username filters actions only made by the selected user. Leaving this field empty will include all users to the project log
Action
Action defines the type of action that are included in the exported file. This could be for example all updates that have been made.
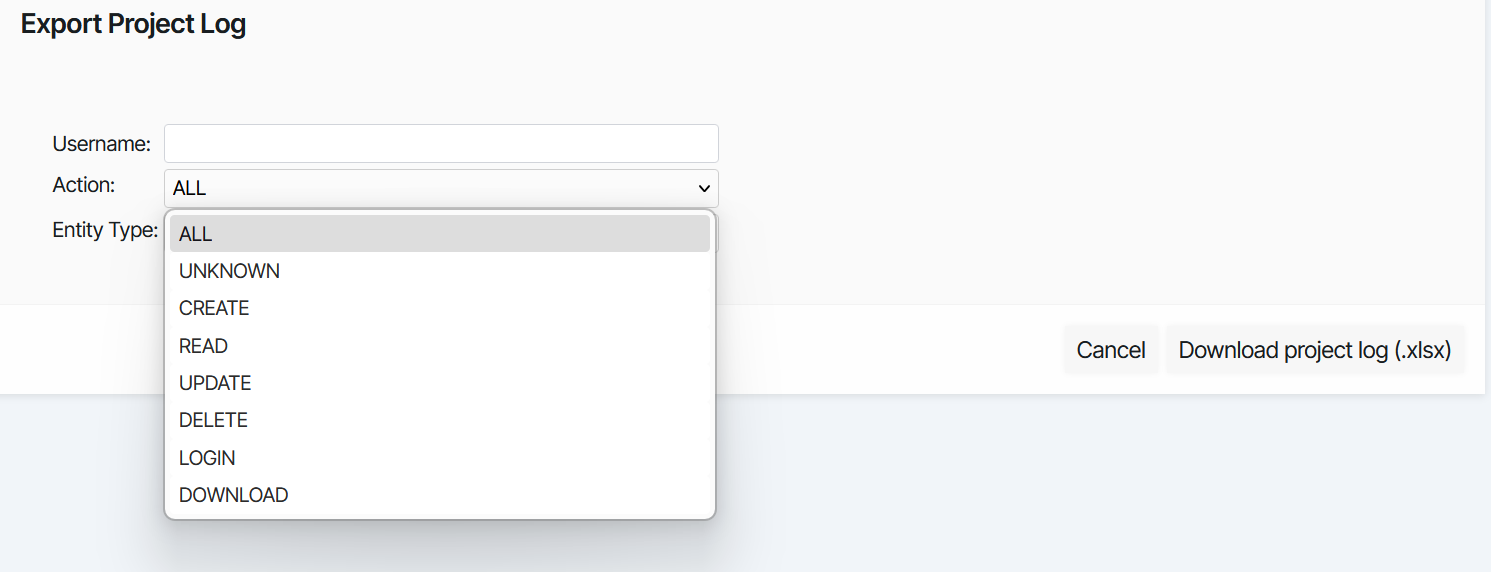
Entity type
Entity type defines the type of entities that are included in the exported file. This could be for example all actions that have to do with log points.
Manage Organizations - Users
Navigating the page
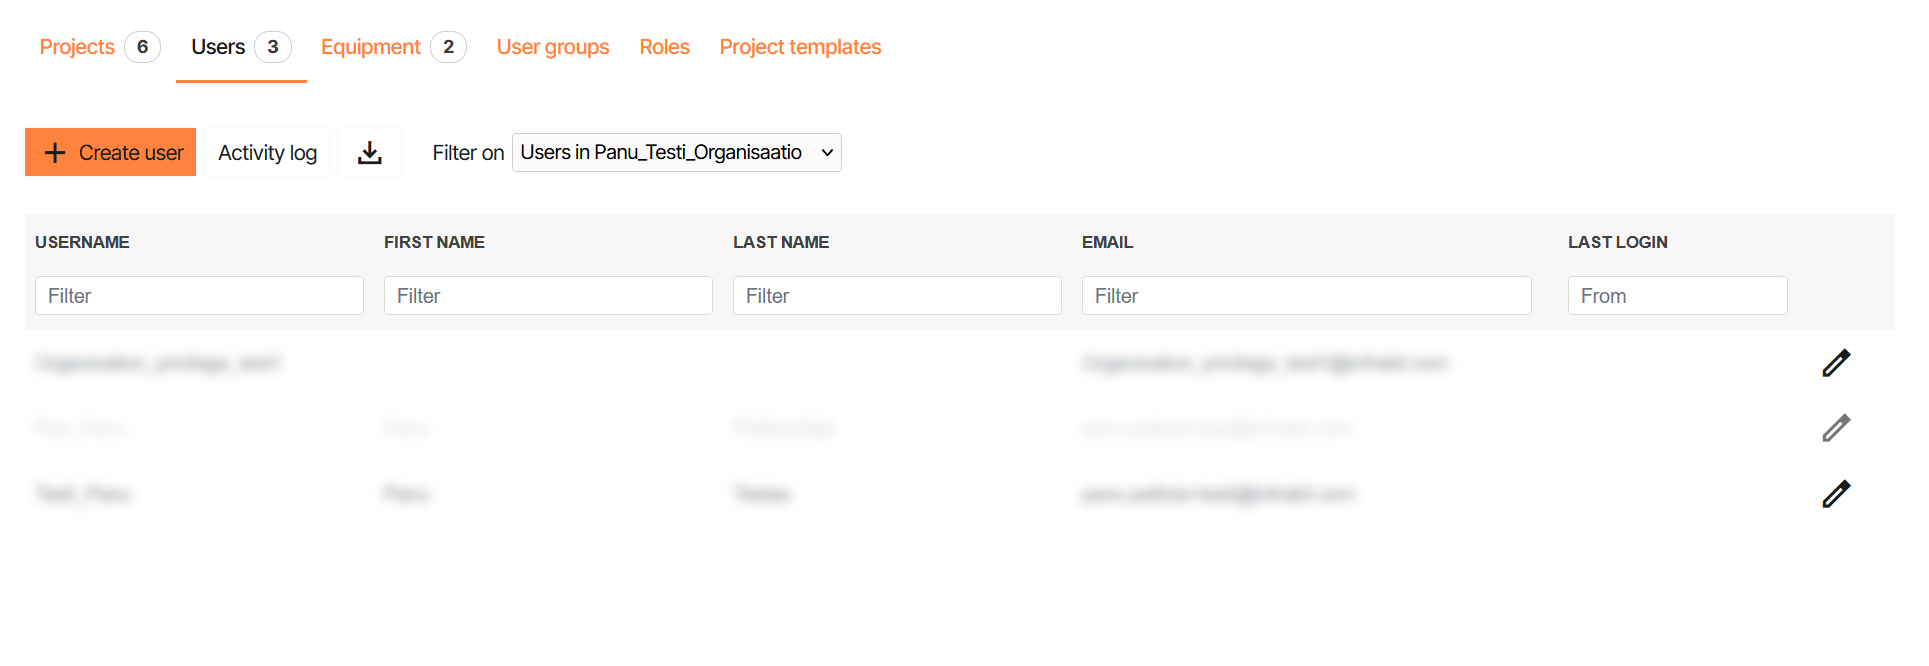
This tab contains the users that are inside the selected organization. Active users are shown as black text while deactivated users are light gray on the list.
Jump to first page
Jump to previous page
Current page
Jump to next page
Jump to last page
Select how many users are shown on one page
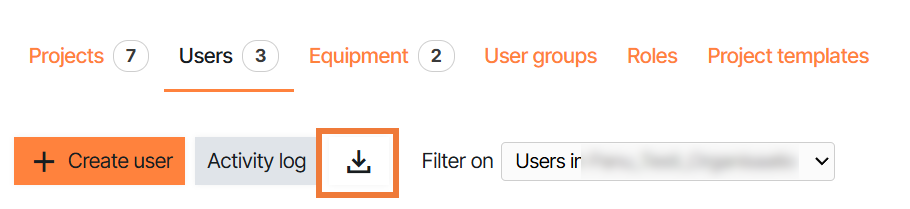
Users tab inside the Manage Organizations page allows admin or super user-level users to:
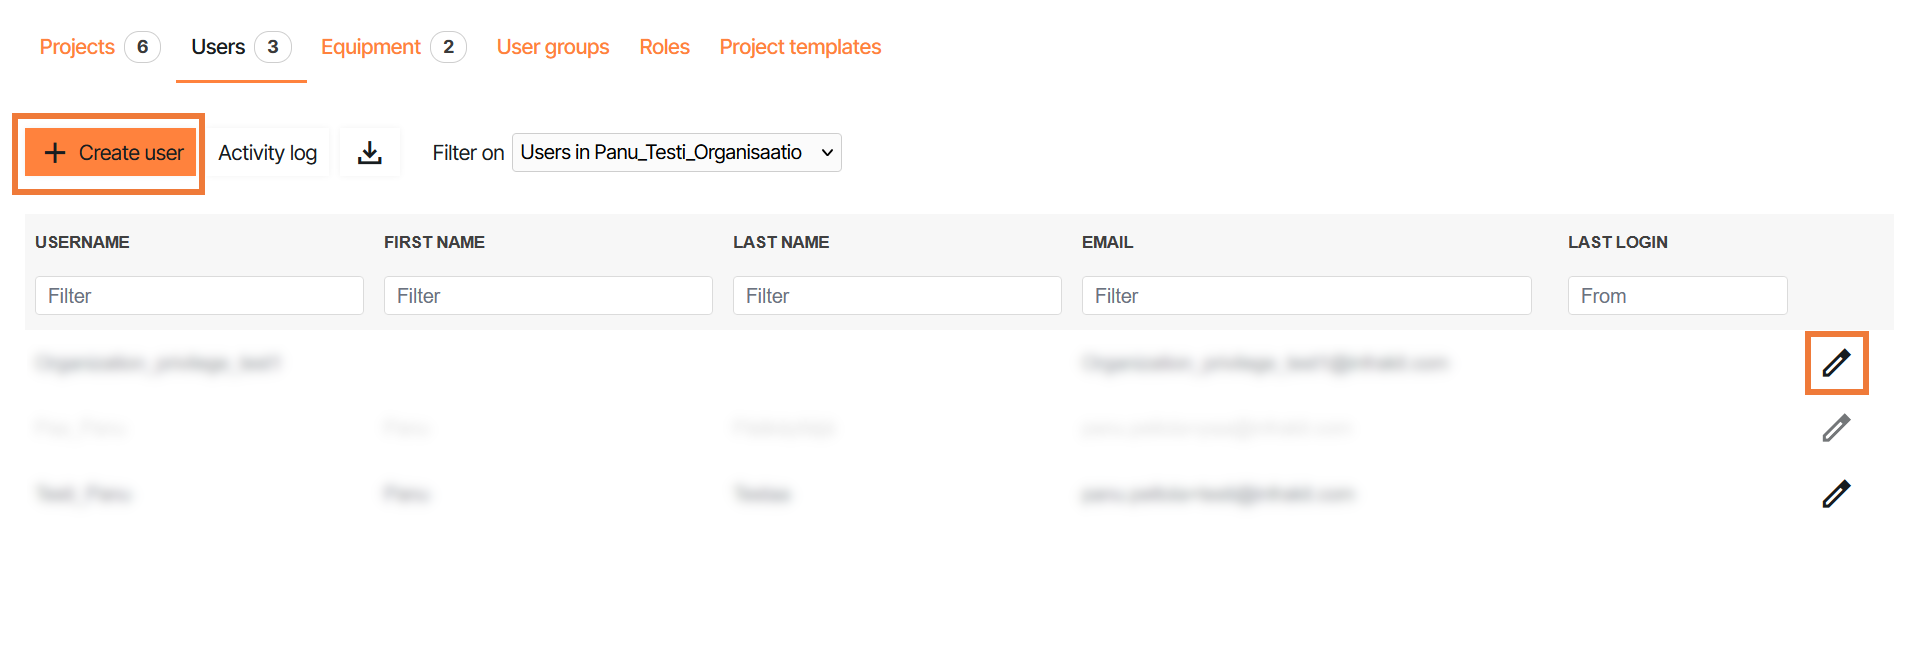
Create or edit users
Download user list
Filter and sort users
Create and edit users
New users can be created from the "Create user" button
Existing users can be edited from the pencil icon on the right screen next to the user.
New User
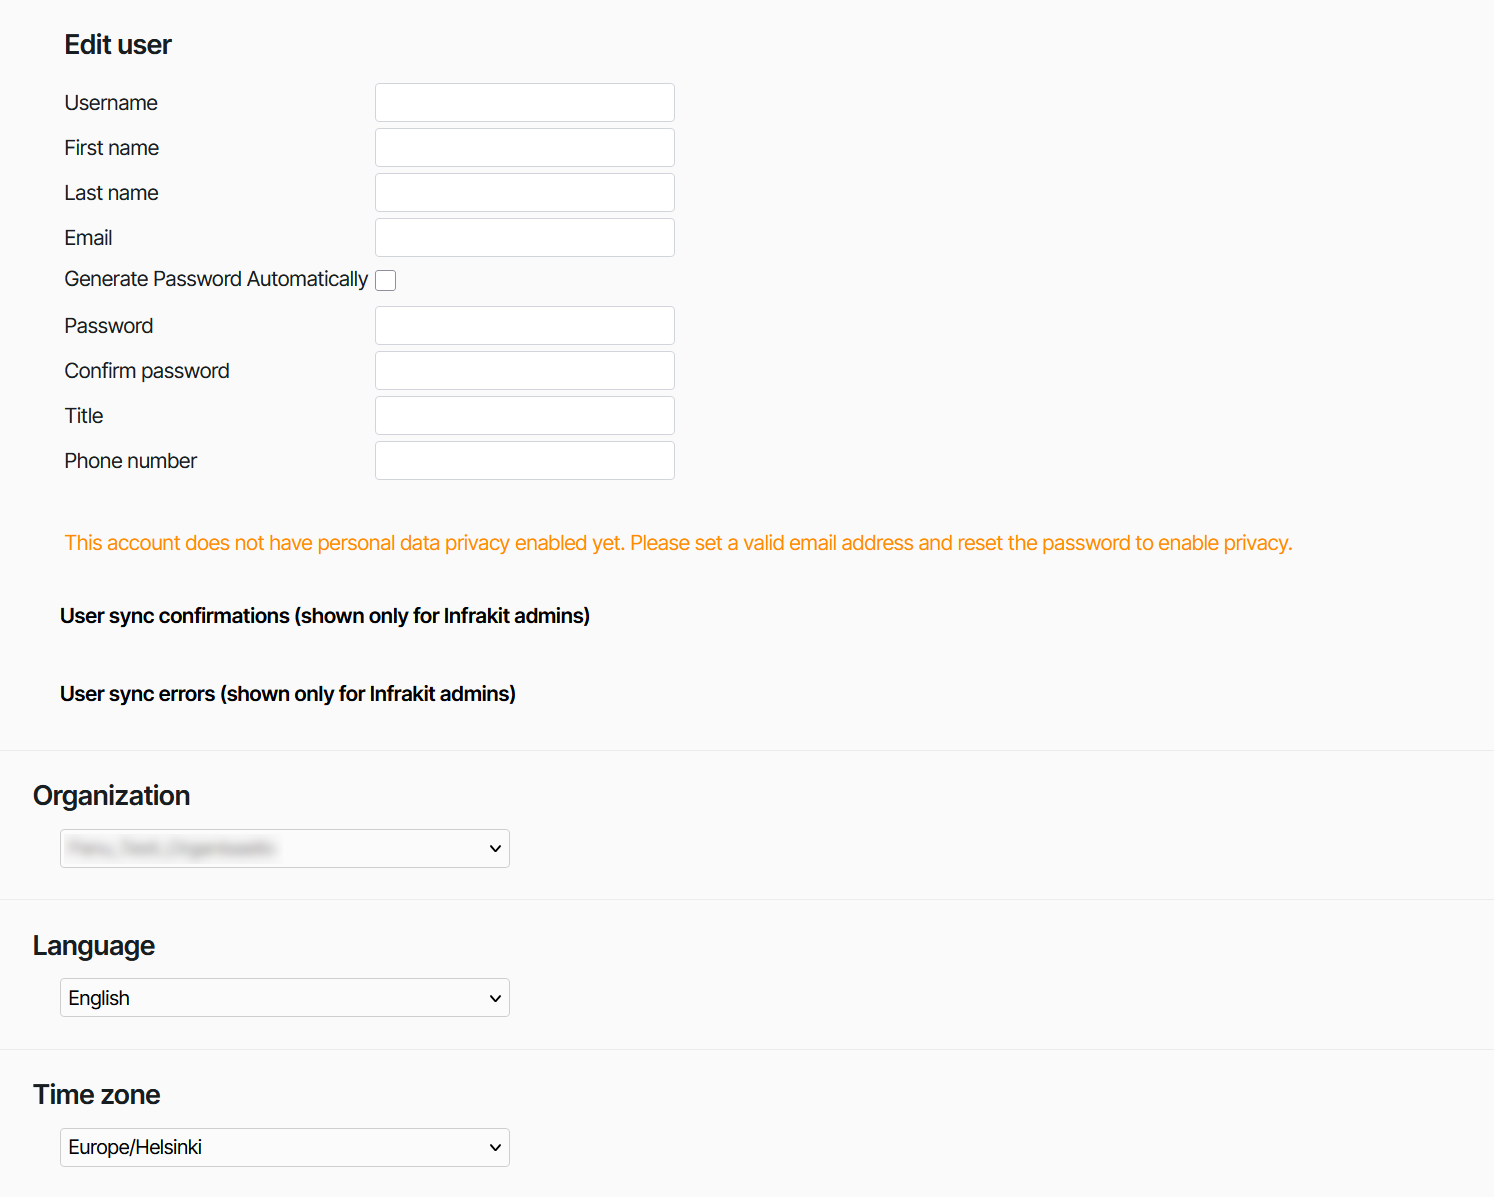
To create or edit an user you have to fill in the following fields:
Username - The name used to log in and shown to other users. It is recommended to use the email of the user as username
First Name - Given first name of the user. Shown in management pages. First name field can contain spaces
Last Name - Given last name of the user. Shown in management pages. First name field can contain spaces
Email - The email used for invitations, notifications and information by Infrakit. The given email is also used to reset password if it is forgotten or lost
To see how to set up multiple accounts on the same email address see article:
Password - Password can be automatically generated by selecting "Automatically Generate Password" checkbox or input manually. The password set or generated will be sent to the email in the "Email" field
For more info about strong passwords see article:
Microsoft - Create and use strong passwords
Title - Give the title of the user. This is optional info
Phone number - The phone number of the user. This is optional info
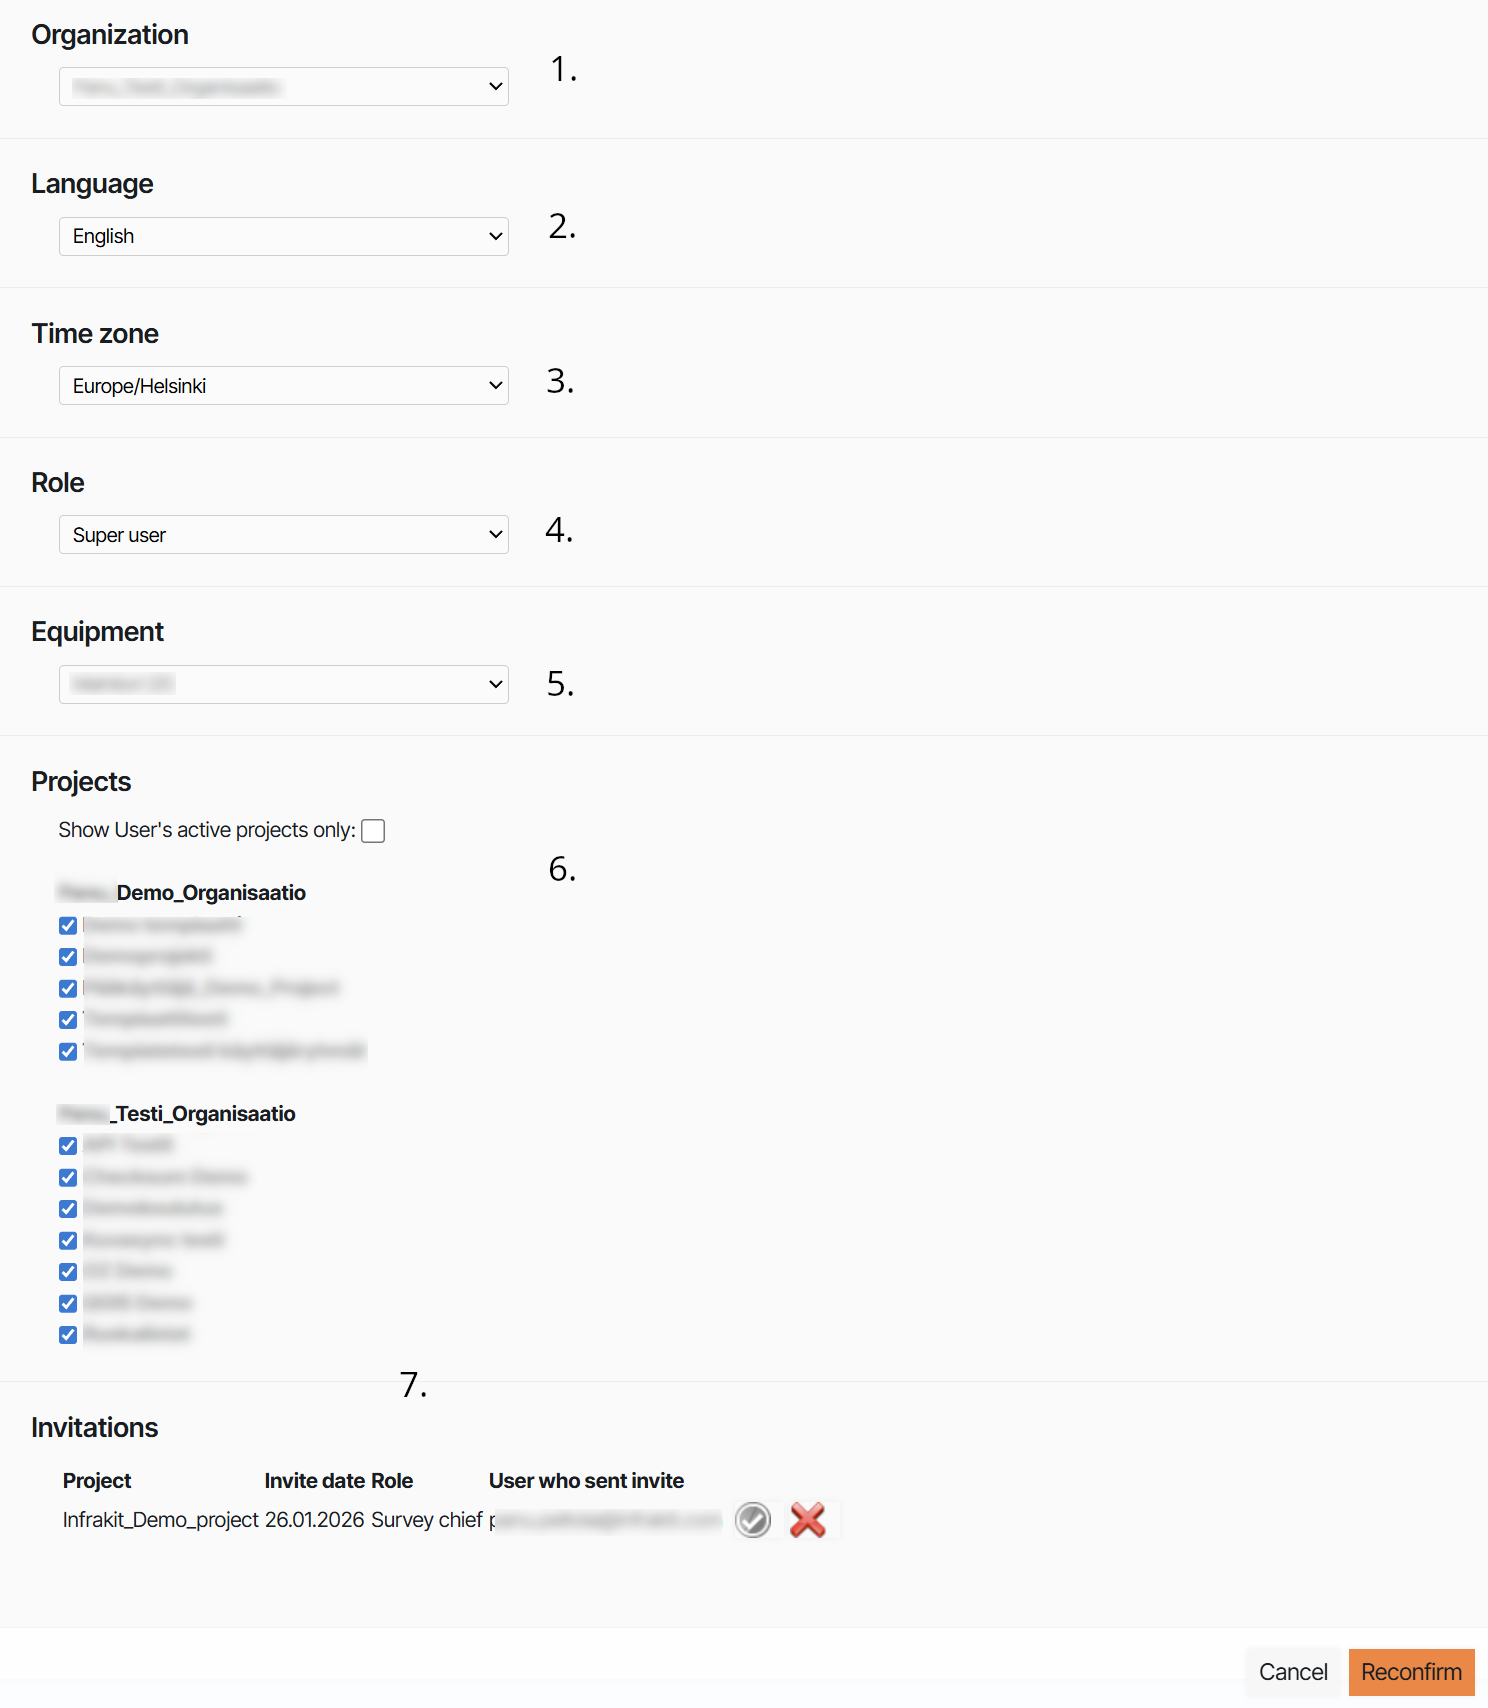
Select the organization user is added to
Select the default language of user
Select the time zone of the user
Select the role of the user
For more info about roles see:
Create or attach equipment to the user if needed
Select which projects the user will be added to. The projects shown in the list depends on the organization the user is added to
See all projects the user has been invited to
Download user list
To download the user list of the selected organization select the download users button. This will download a .xlsx file containing the users of the selected organization
Filter and sort users
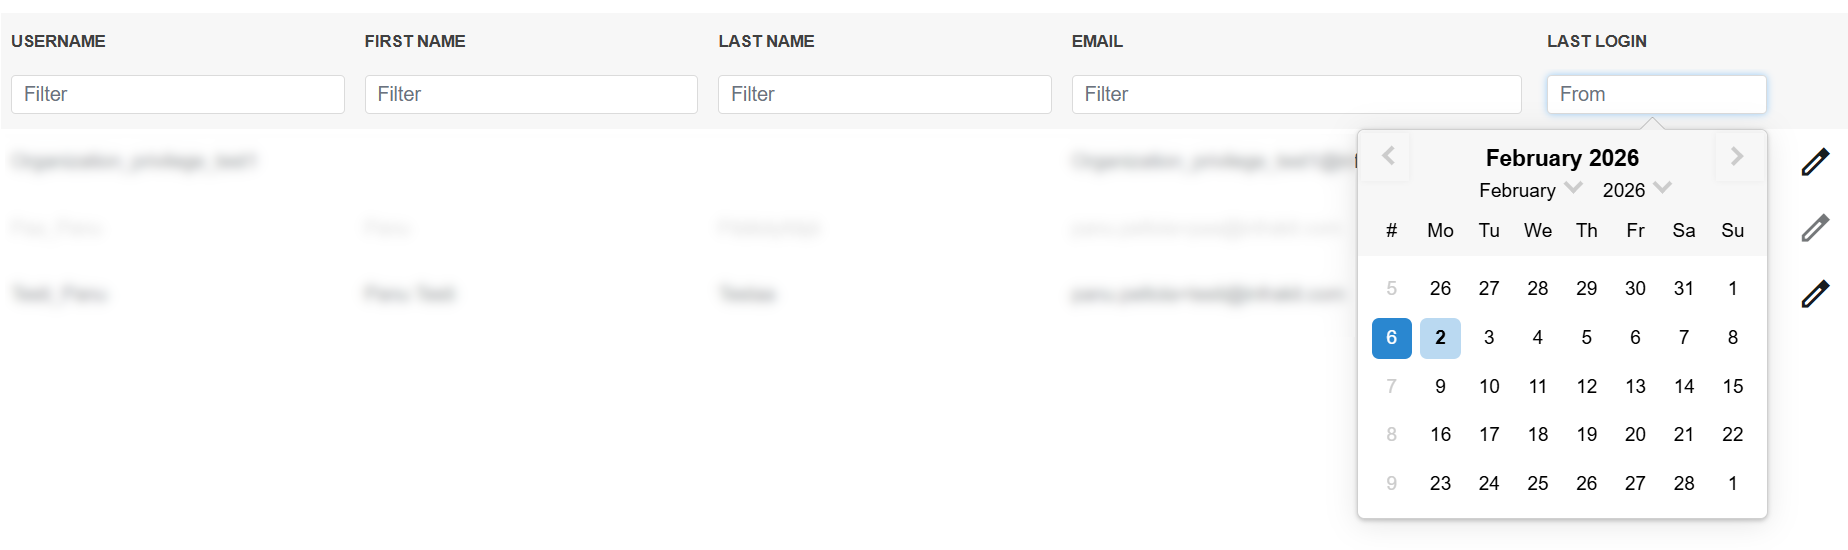
Users can be filtered by:
Username
First Name
Last Name
Email
Users that have logged in after selected date
Manage Organizations - Equipment
Navigating the page
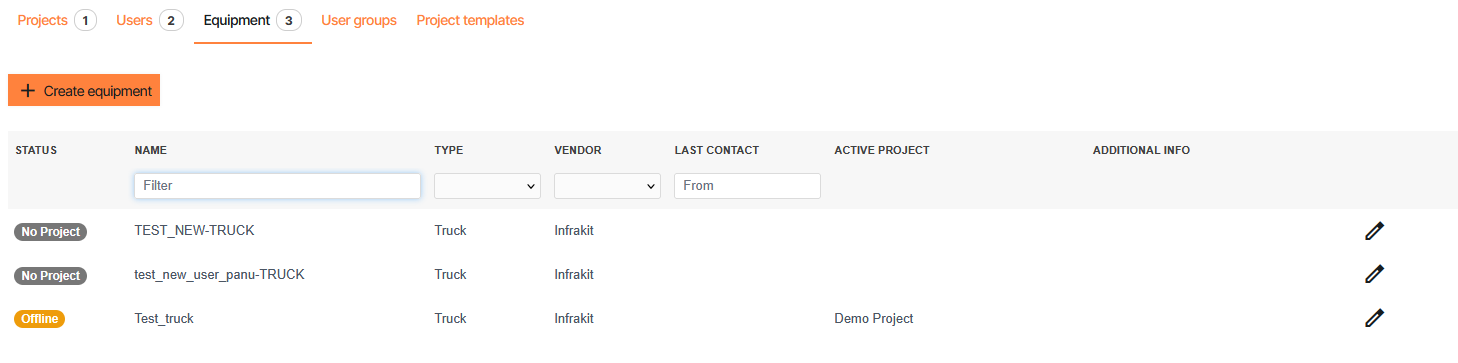
This tab contains the users that are inside the selected organization. Active users are shown as black text while deactivated users are light gray on the list.

Jump to first page
Jump to previous page
Current page
Jump to next page
Jump to last page
Select how many projects are shown on one page
Projects tab inside the Manage Organizations page allows admin or super user-level users to:
Create or edit equipment
Filter equipment
Create or edit equipment
To create new equipment select "Create equipment". To edit equipment select the pencil icon on the right side of the name.

While creating a new equipment mandatory fields are:
Equipment name - The name of the equipment shown in Infrakit
Equipment id - The id of the machine. To see instructions on how to get the equipment id of equipment being added see Integrations.
Equipment type - The type of equipment being added
Machine control - Machine control vendor of the equipment being added. In case of trucks see
Other fields are optional but can give more information about the equipment:
Driver's name - Shown in the info of the equipment
Driver's phone number - Shown in the info of the equipment
Additional information - Shown in the info of the equipment
Volume m3 - Additional information
On hold - If the "On hold" box is checked, the equipment will appear as inactive
Set position - From the "Set position" bars, a predetermined location can be set for the equipment by inserting latitude and longitude values. By clicking "Set," the location will be confirmed.
Once the machine is ready it can be saved by selecting "Save" on the bottom of the screen.
For instructions on how to edit equipment see article:
Filter equipment
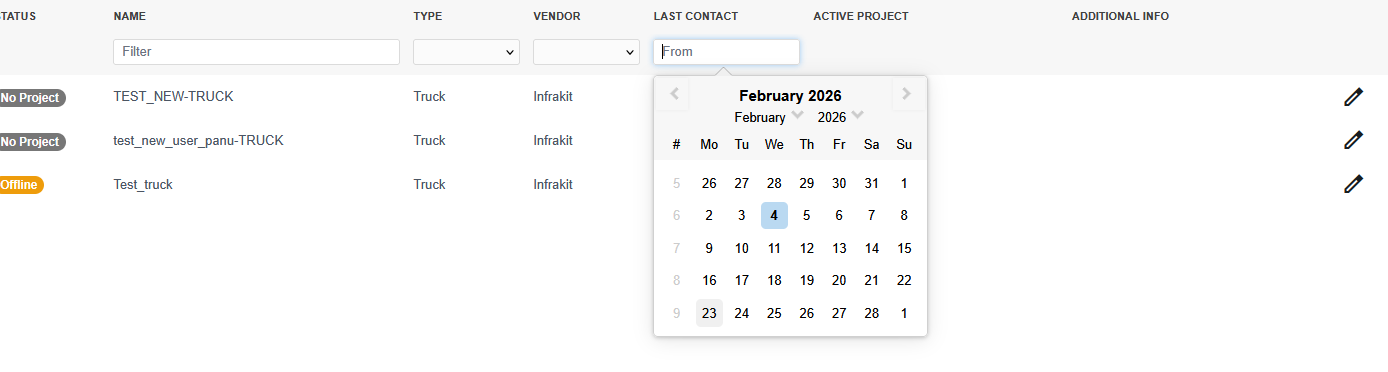
Equipment can be filtered in the Manage Organizations menu by:
Name
Equipment type
Machine control vendor
Equipment that have had contact after selected date
Manage Organizations - Project templates
Navigating the page

In this page project templates can be created or edited.
For more information about Project templates see article:
Projects page
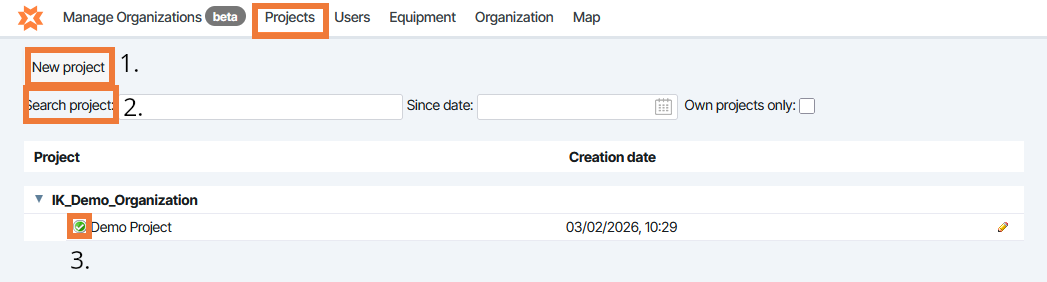
1. Create new project
2. Search project
3. Join project. This indicator is green, you are on that project, if grey then you are not.
4. Edit project
To see more about the editing or creating projects see the chapter Manage Organizations - Projects in this article
Users page

From the Users page the user can:
Create new users
Filter by name, Date logged in or activated users
Edit users by the pencil icon next to their name
Equipment page
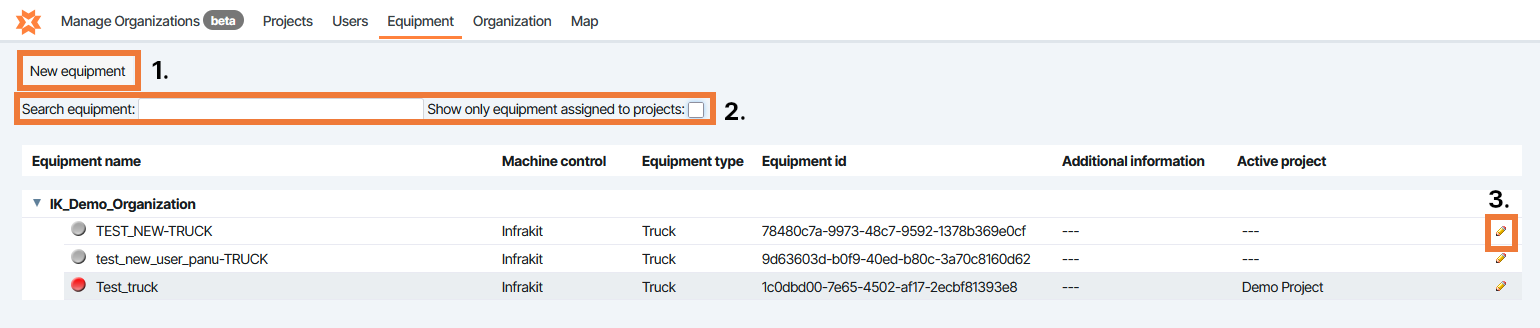
From the Equipment page the user can:
Create new equipment
Filter by name or if the equipment is assigned to project
Edit equipment by the pencil icon next to their name
Organization page
Some connections are managed from the Organization page.
From this page you can:
Add or edit M-Files connections
Add or edit Topcon Sitelink3D connections
Add or edit SharePoint connections
View the Organization UUID and API-token
View the total amount of roles in the organization
Organizations page
From the Organizations page you can:
Create new sub-organizations
Edit sub-organizations
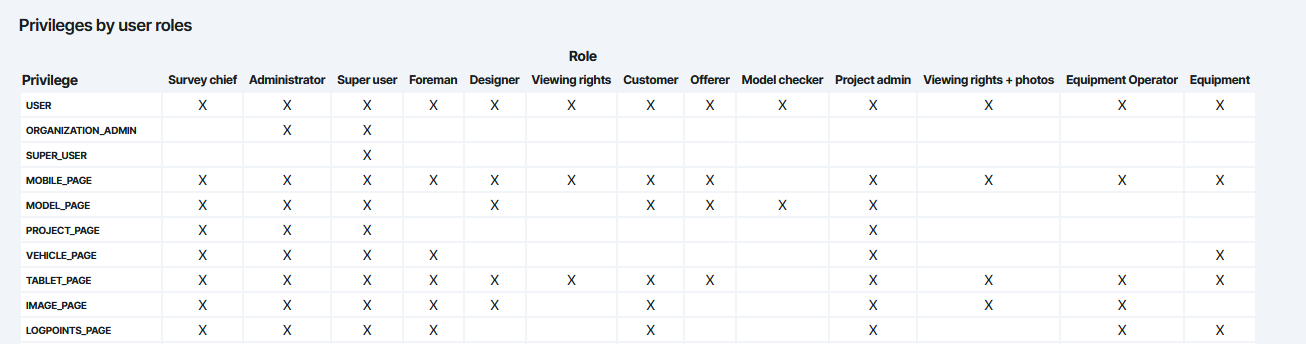
Roles page
From this page you can see all privileges the different user roles have.
For a simpler list see article: