Linked pages:
By clicking the name, you will be directed to a new page.
Leica Geosystems MC1
Leica Geosystems iCon/Visual machine
1. Basic Functions
Edit Project
In this section, the user can alter the initialization properties of the project.
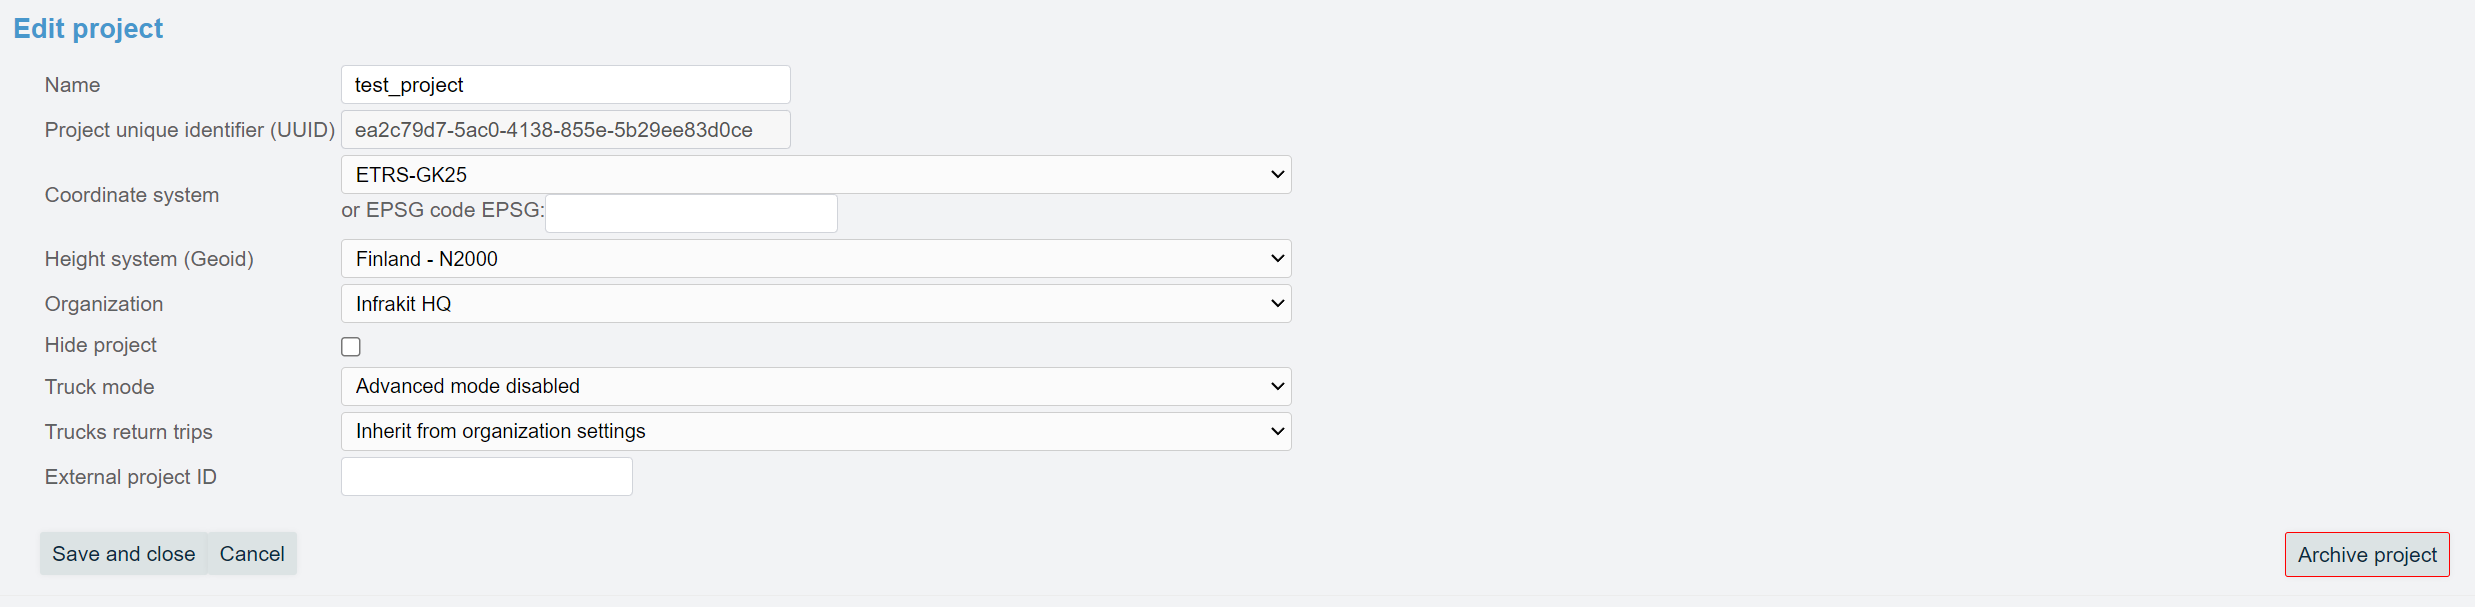
The user can change the name of the project by inserting a new name in the "Name" bar.
A "Project unique identifier (UUID)" will be generated for each project. This variable cannot be modified.
The coordinate system and the height system can be changed through the "Coordinate system" and the "Height system (Geoid)" drop-down bars. Also, the coordinate system can be inserted as an EPSG value in the "EPSG" bar.
The organization to which the project belongs can be altered through the "Organization" drop-down box.
If the "Hide project" box is checked, only the user who created the project will see the project on the projects list in the "Projects" page.
From the "Truck mode" drop-down bar, the user can choose if the project inherits the truck mode from the organization to which it belongs. The user can also enable or disable the advanced mode manually, which will only be applied to the current project.
From the "Trucks return trips" drop-down bar, the user can choose if the return trips are also logged. The user can select if the setting is inherited from the organization to which it belongs or if the setting is project-specific.
In the "External project ID" bar, the user can insert an optional external project ID.
By clicking the "Archive project" button, the user can archive the project. When the project is archived, it will not be available to use anymore.
After the modifications have been done, the "Save and close" button must be clicked to save the changes. If the user wants to withdraw the modifications, the "Cancel" button can be clicked.
Project Users
In this section, the user can add or remove users from the project.
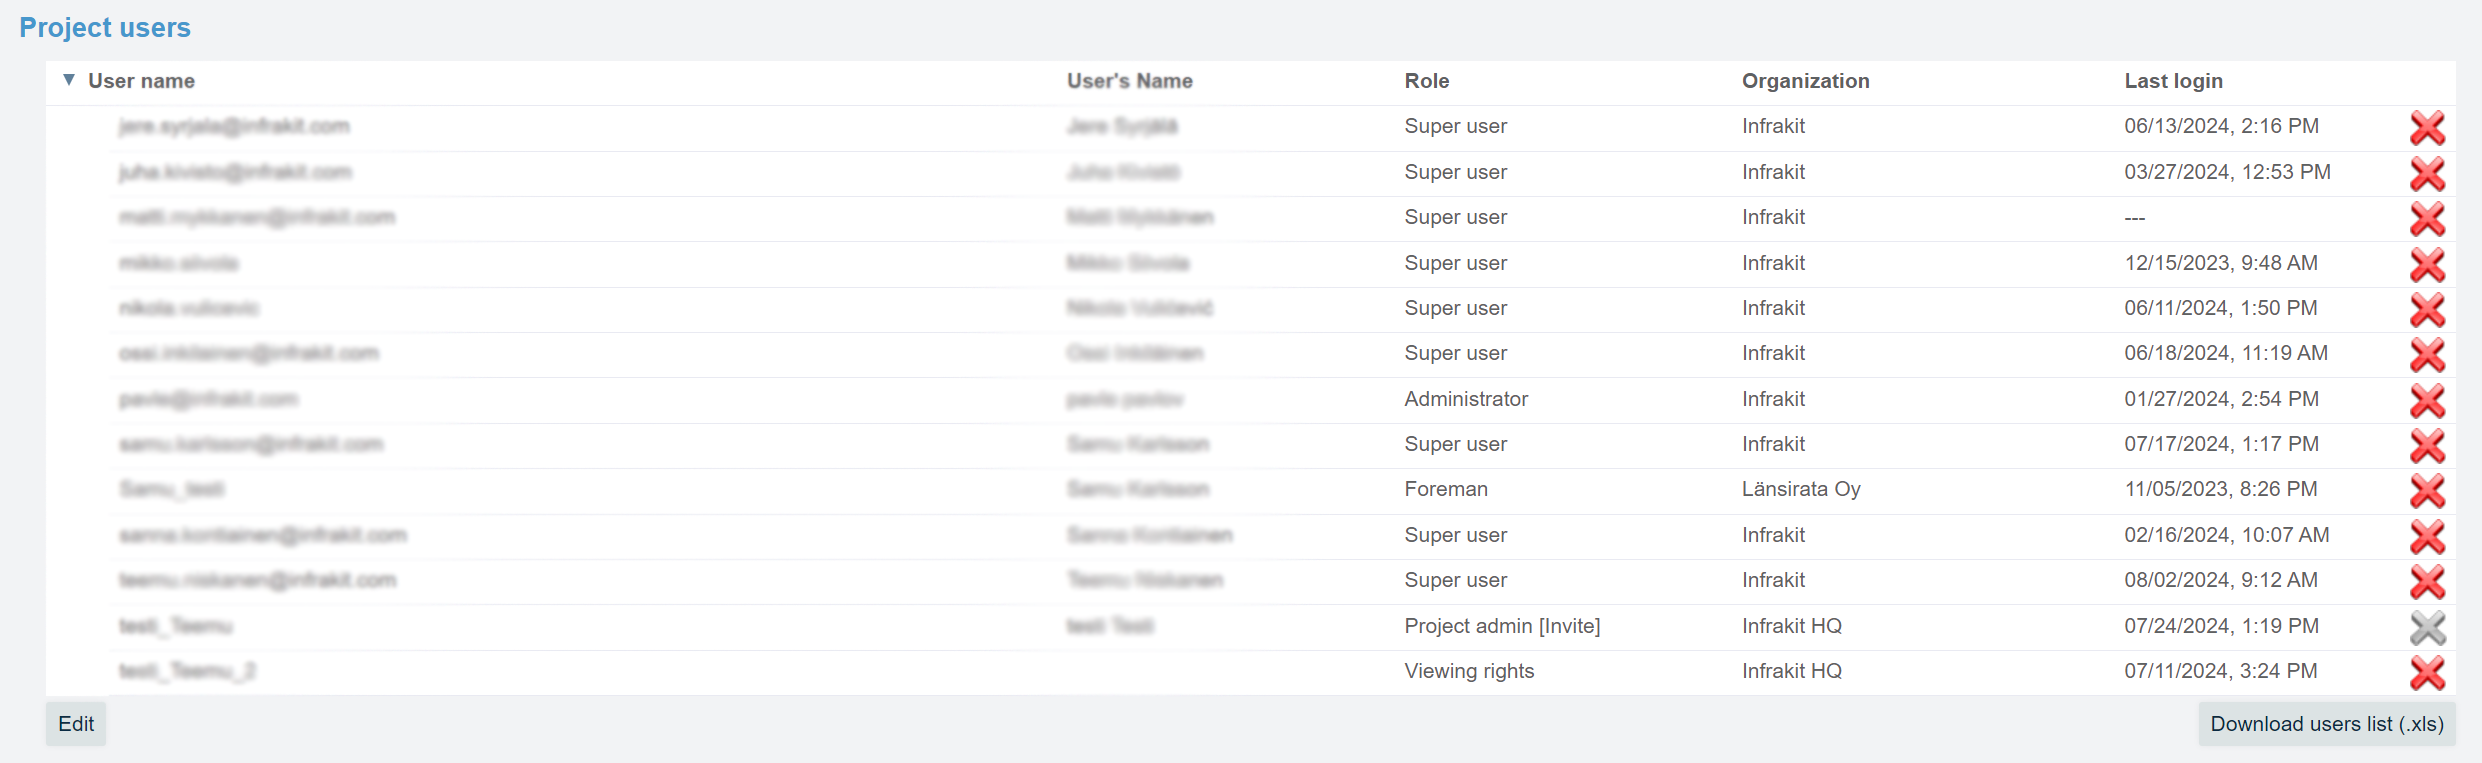
When the "Edit" button is clicked, a list of Infrakit users will open, and the user can check and uncheck users that have project rights. After the modifications have been done, the "Apply" button must be clicked to save the changes. If the user wants to withdraw the changes, the "Cancel" button can be clicked.

By clicking the red cross icon, the user can remove users from the project.

A grey cross indicates that the user has been invited to the project and has to be removed through the section "Invited users/equipment".
By clicking the "Download users list (.xls)" button, the user can download the user list as an XLS file.
Equipment of the Project
In this section, the user can edit, add, or remove equipment from the project.

When the "Edit" button is clicked, a list of equipment will open, and the user can check and uncheck equipment that are available in the project. After the modifications have been done, the "Apply" button must be clicked to save the changes. If the user wants to withdraw the changes, the "Cancel" button can be clicked.
Note: The add and remove functionality through the "Edit" button is currently not available.

By clicking the pen icon, the user will be directed to the "Edit Equipment" page.
By clicking the "Download vehicle activity (.xls)" button, the user can download an Excel worksheet that contains activity data for all of the vehicles in the project.
Invited Users/Equipment
In this section, the user can invite users or equipment to the project.

When the "User invite" button is clicked, a new window will open where a new user can be invited to the project.

By inserting the username at the "Username" bar, the user can determine which user will be invited to the project. By inserting a message in the "Message" box, a message can be sent to the user who will receive the invite. From the "Role" drop-down box, the user can determine the role for the user who will be invited to the project. By clicking the "Invite" button, an invitation will be sent, and by clicking the "Cancel" button, all operations will be revoked.

By clicking the red cross icon, the user can remove invited users from the project.
Project Integrations
In this section, the user can manage the project integrations.

New connections can be created through each designated section for integration type. Every integration has its own instruction page, and by clicking the integration name, the user will be directed to that page.
Active directory connection
Dropbox connection
MS Project connection
Trimble TSC2 connection
SokoPro connection
AIS steam connection