Welcome to Infrakit Knowledge Base
Search our knowledge base for answers or contact support@infrakit.com / +358 9 4257 9297
Beta
(BETA) Admin -page
Admin tools in Infrakit
Updated 2 weeks ago
Admin -page can be found from the top right corner behind gear-icon


Admin Page
From this page you can:
Note: Admin -page is visible for only admin and superuser -level users

1. Manage organizations tab
2. Edit selected organization and company logo(if one provided)
3. In this ribbon you can select Projects, Users, Equipment or User groups
4. Create new project
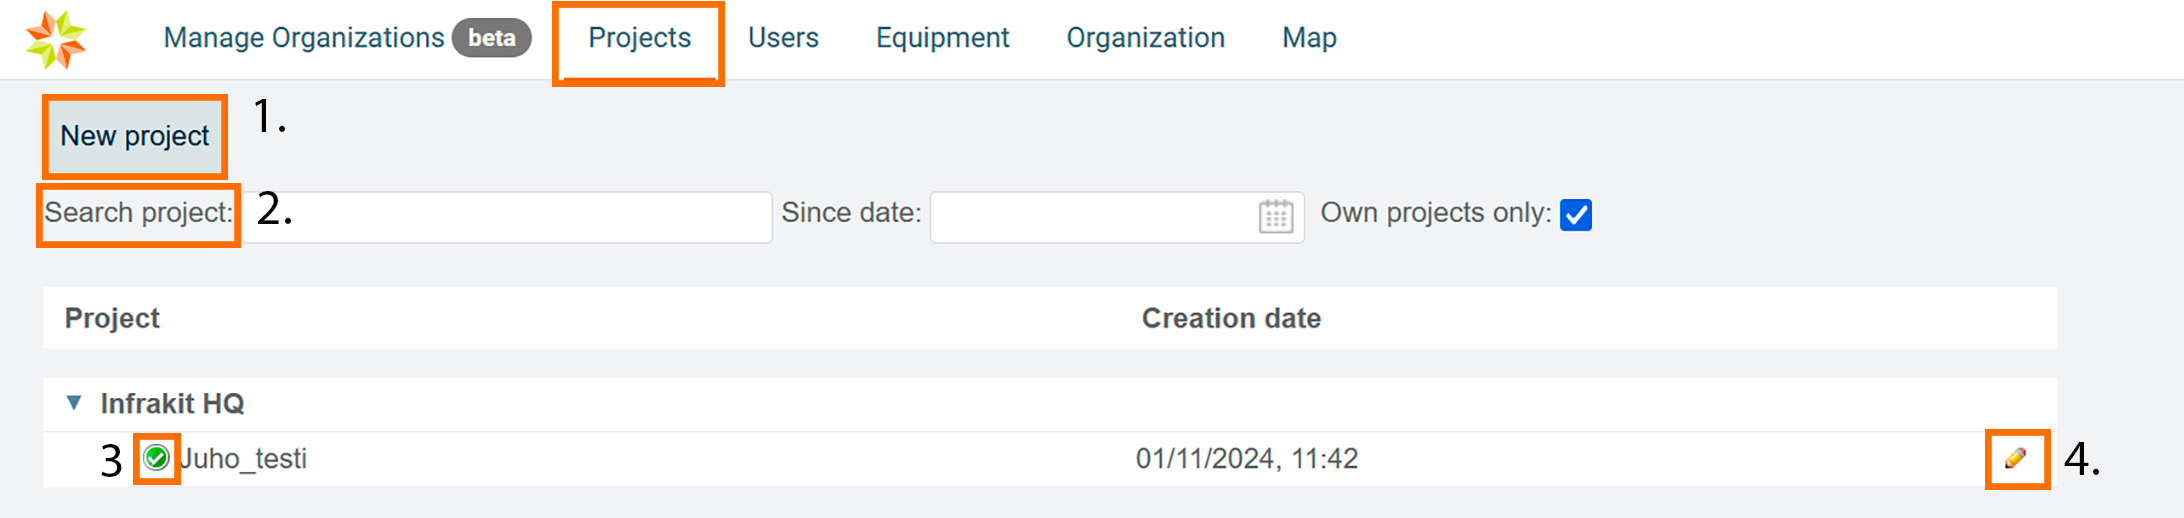
Projects tab
1. Create new project
2. Search project
3. Join project. This indicator is green, you are on that project, if grey then you are not.
4. Edit project
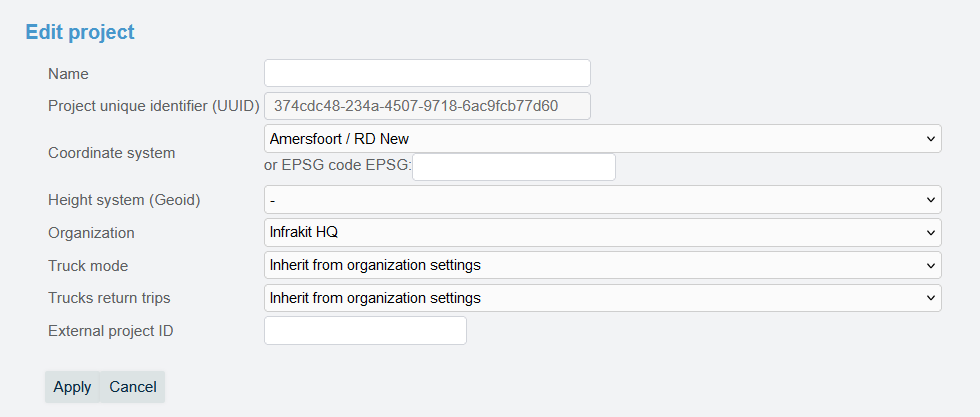
Insert assigned project name in the Name-field
UUID is your projects unique identifier
Set coordinate system
Set height system
Set your organization
Project Integrations ^
In this section, the user can manage the project integrations.

New connections can be created through each designated section for integration type. Every integration has its own instruction page, and by clicking the integration name, the user will be directed to that page.
Active directory connection
Dropbox connection
MS Project connection
Trimble TSC2 connection
SokoPro connection
AIS steam connection
Users tab
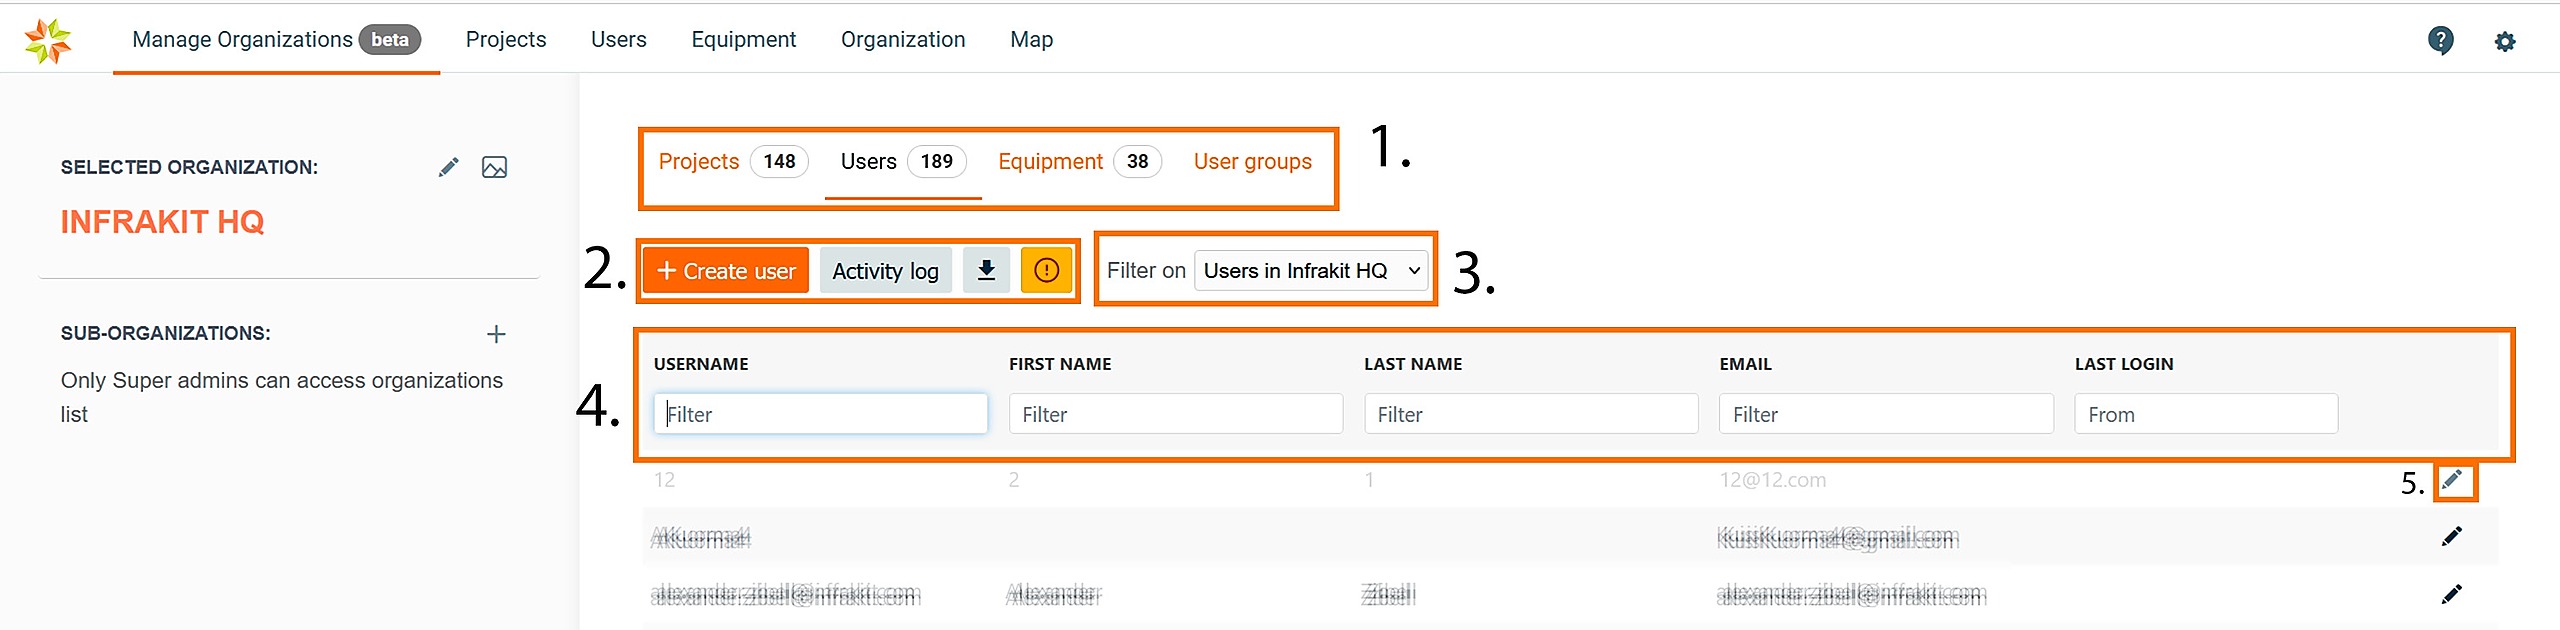
Ribbon where you can select Projects, Users, Equipment or User groups
Here you can create New user, download log or download project users
Filters users
Search user
Edit user

New user
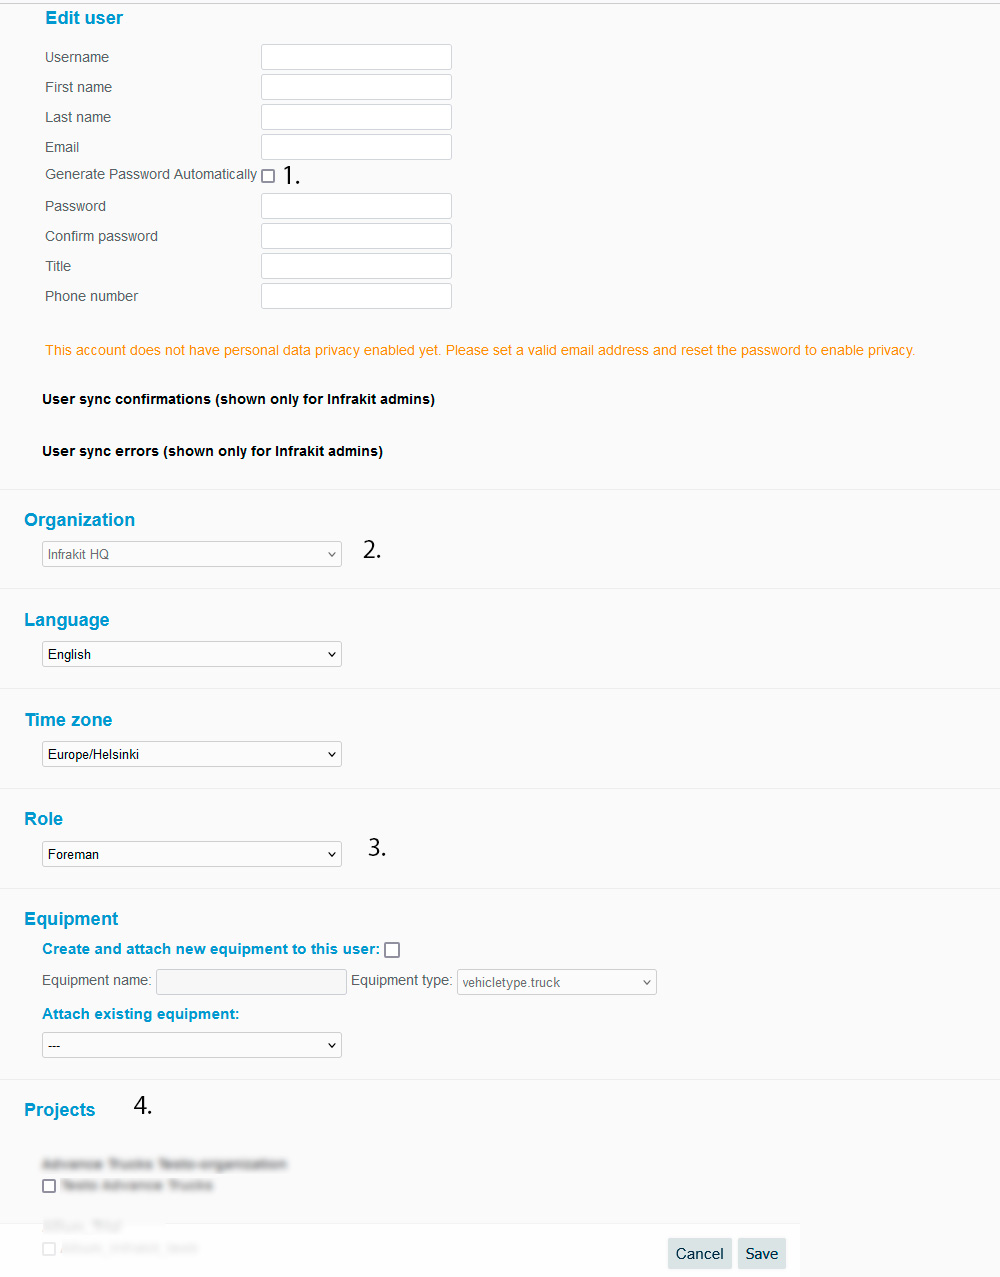
Insert wanted username and rest of user information.
Infrakit generates password automatically if click the option on. If so you have to have correct email address, because password will be send to users email. Or you can also create your own password.
Select organization from the dropdown menu.
Select user role on the project. More about roles HERE.
Your projects listed
4. Projects
In this section, the user can select all the projects where the equipment will be included. All the available projects in the selected organization are listed at the bottom of the page.

From the drop-down bar, the user can select the current active project where the equipment will be included.
By clicking the "Save" button, the user can save the modifications.

By clicking the "Cancel" button, the user can leave the page without saving any modifications.

Equipment tab
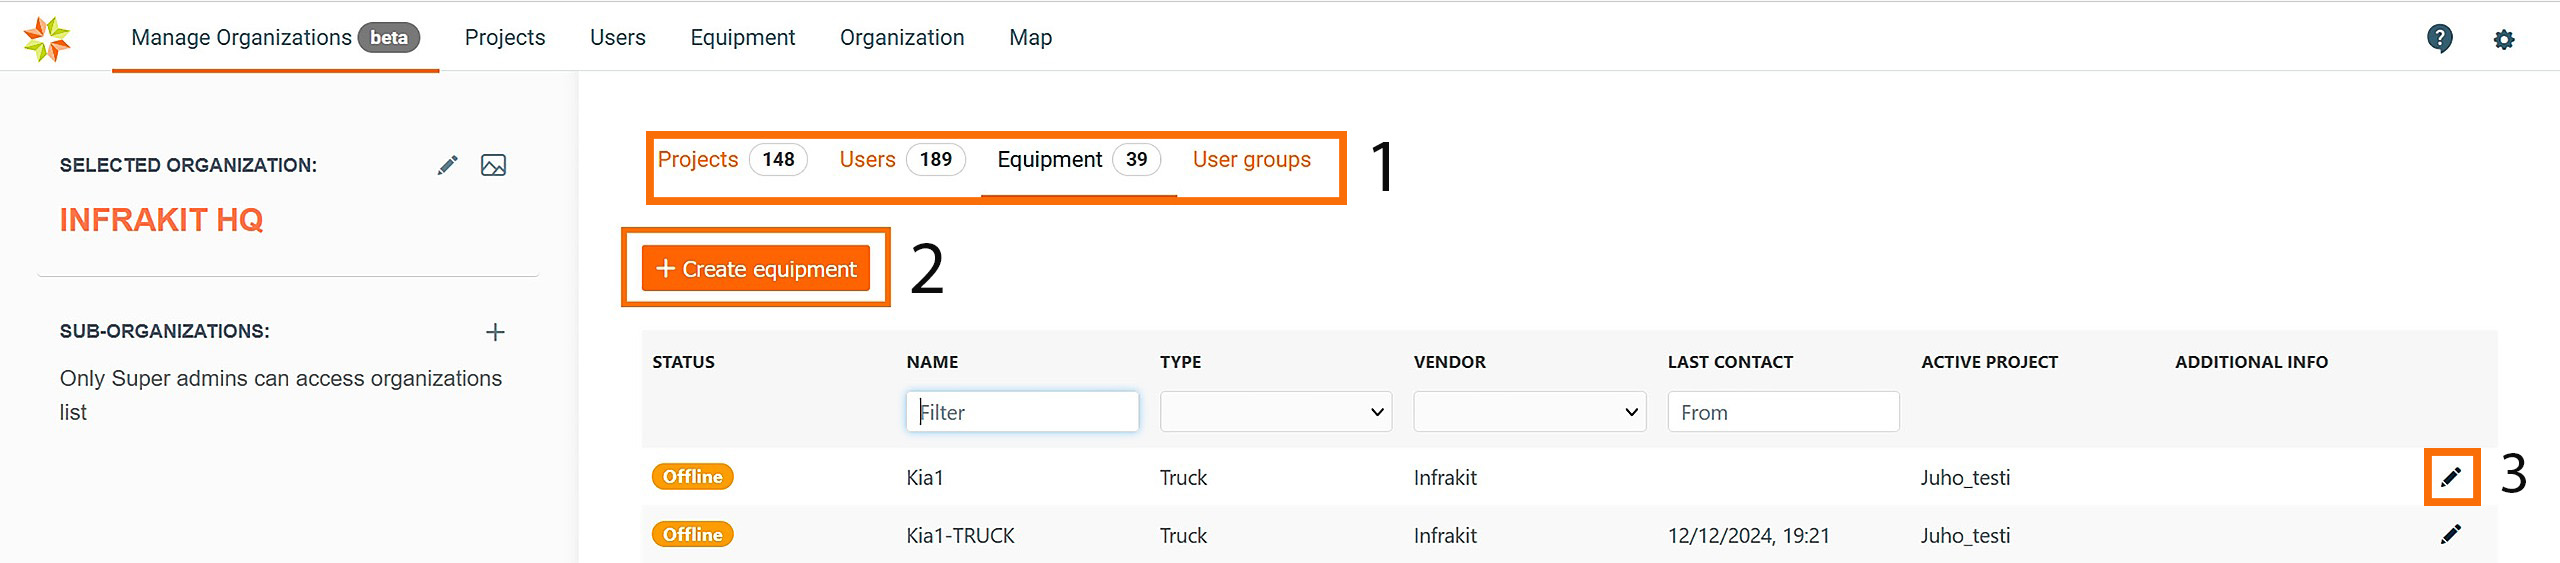
Ribbon
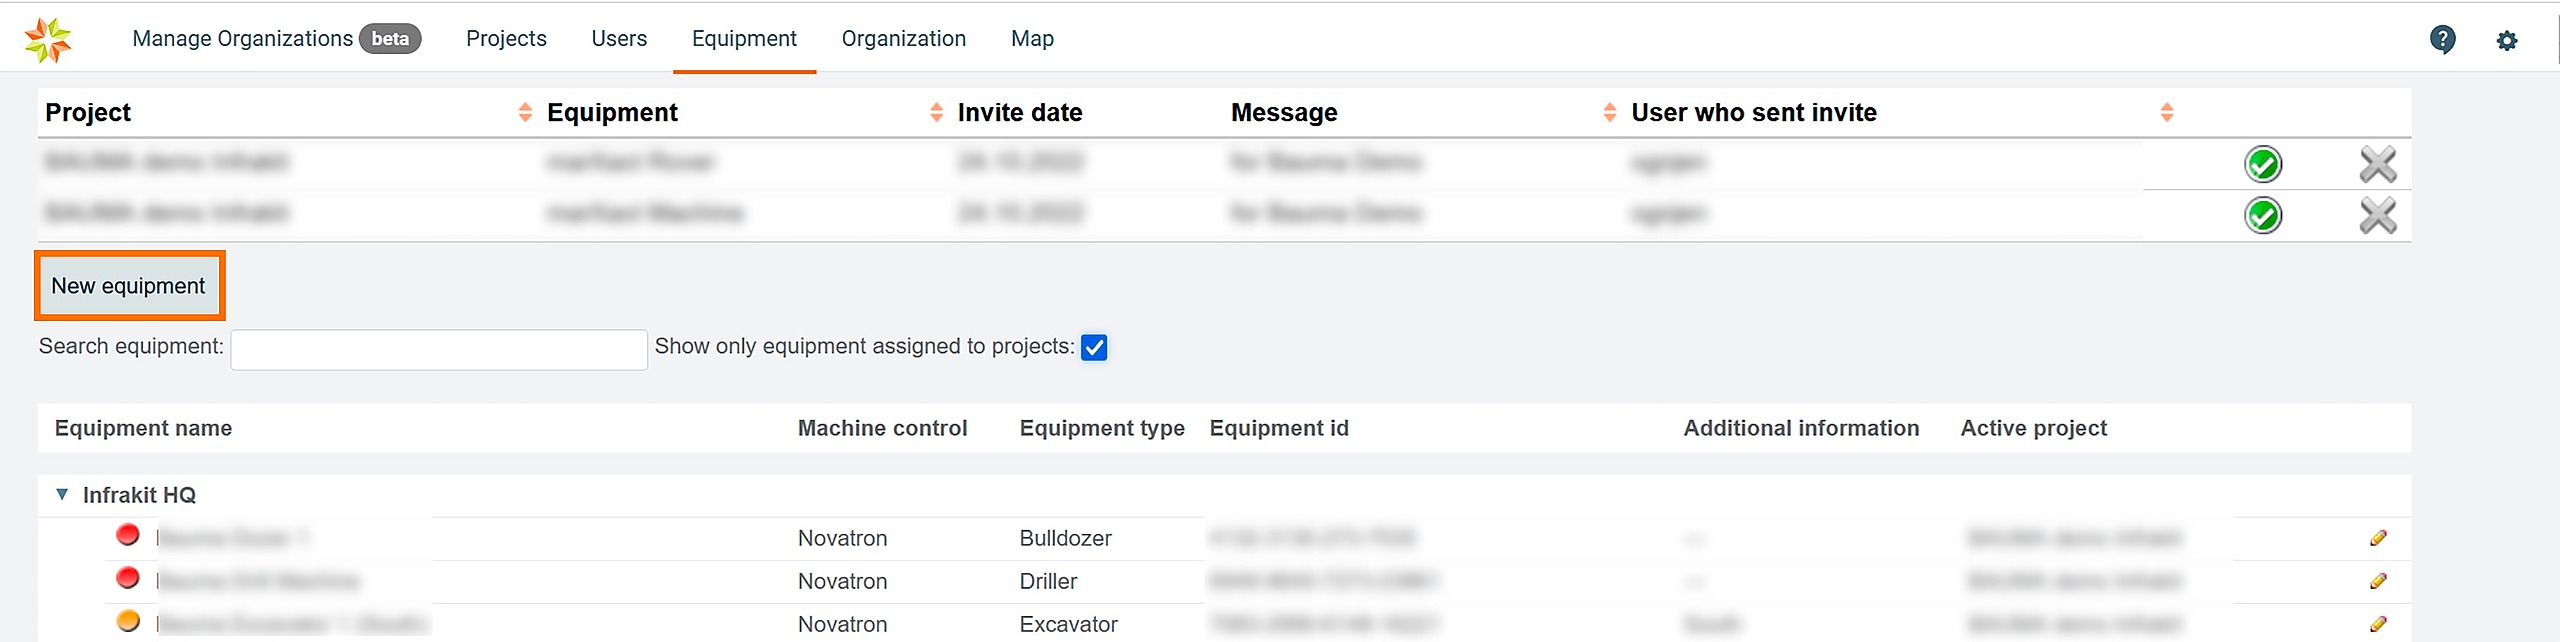
1. New equipment
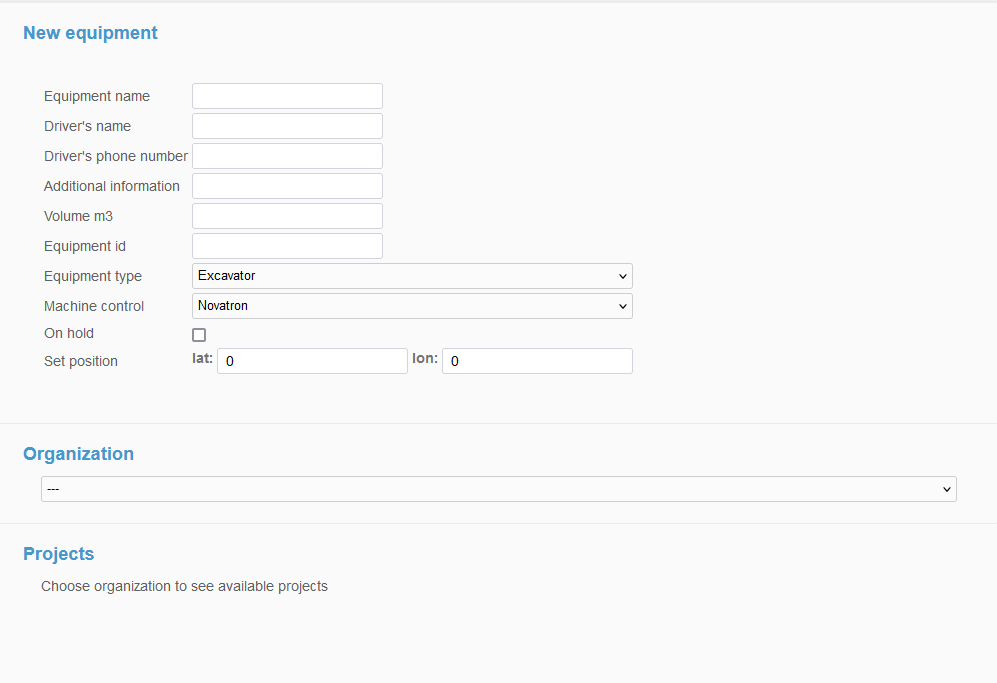
Creating a new equipment - Fill in the equipment attributes. "Equipment name", "Equipment id", "Equipment type" and, "Machine control" are the mandatory attributes. Other attributes are optional, but they may also be useful as additional information about the equipment. Select the organization where the equipment will be added. Checkmark the projects for the equipment and select the current active project. Click "Save" if you want to create the equipment or save changes that you have made. Click "Cancel" if you want to revoke the operation.
Projects
In this section, the user can select all the projects where the equipment will be included. All the available projects in the selected organization are listed at the bottom of the page.
From the drop-down bar, the user can select the current active project where the equipment will be included.
By clicking the "Save" button, the user can save the modifications.

By clicking the "Cancel" button, the user can leave the page without saving any modifications.