1. Create users

Set username, recommended actual name, some use register plate ID or both
Set first and last name with phone number
Infrakit supports one e-mail address to be used only with one user account
Create new users with unique e-mail addresses
address does not have to be valid if you manually set up the password
Select Generate password or preset it
Select Organization, language, time zone
Select Role
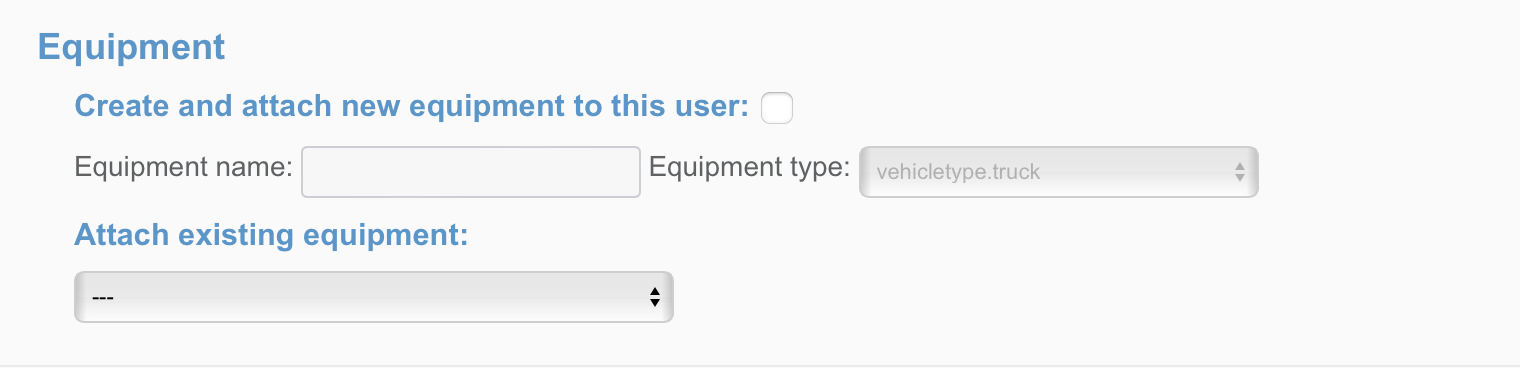
Create Equipment for the user (can be the same as the username)
Select Project from the checkbox
Don’t select “old masses” and “create vehicle automatically”
Press save
Tip! For Office people role “Foreman” allows seeing Vehicles page
2. Create Equipment (if you did not create them while creating the user)
Set name (same to “user name” recommended)
Set machine name:
Set machine type: Truck or Dumper
Set machine control: Infrakit
Set machine ID: press Generate
Set Organization
Set Project
Press Save
3. Connect users and machines
(if you did not create them while creating the user)
Go to “users”
Find user
Vehicle – Attach existing vehicle: Select the created vehicle
Press Save
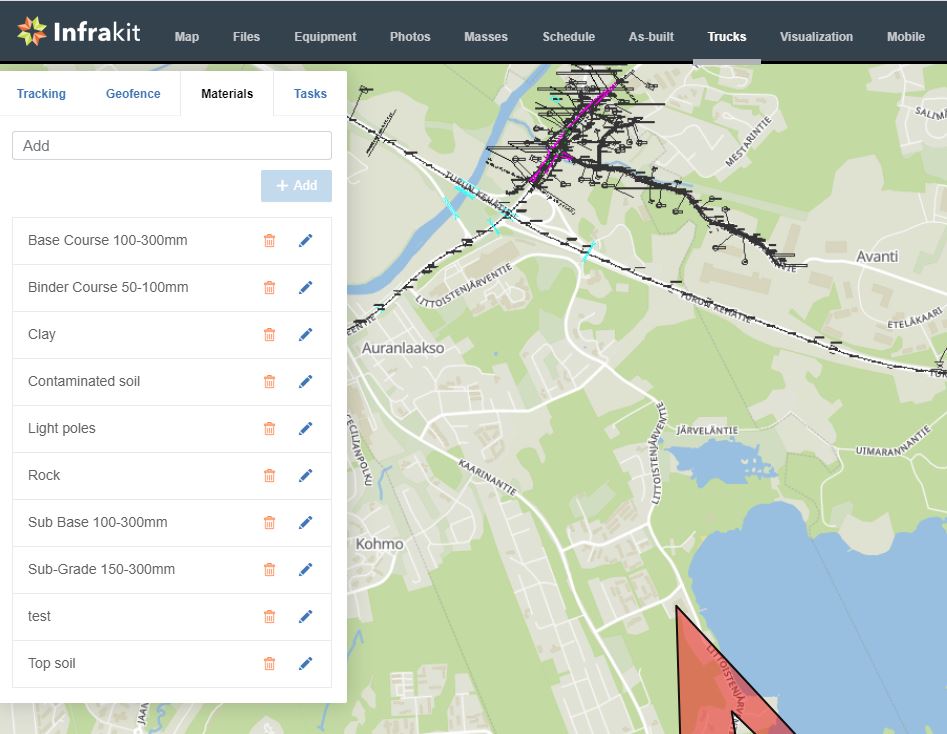
4. Define materials
For example, gravel or rock
5. Define areas
Define default material
Define unit
Select area type and draw area on map

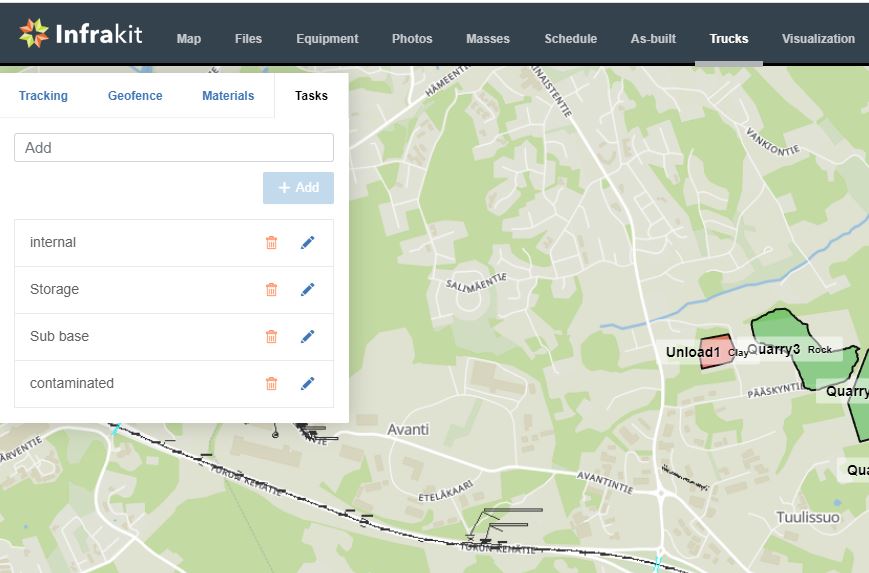
6. Define Tasks
Typically a machine loading trucks or dumpers
Enables identification of similar tasks later from freight report
7. Install and login to app
Android:
https://support.infrakit.com/help/infrakit-truck-app-quick-guide
Advanced location in device is very important!
Device settings:
New knowledge base articles come frequently
9. Fetch freight reports in OFFICE
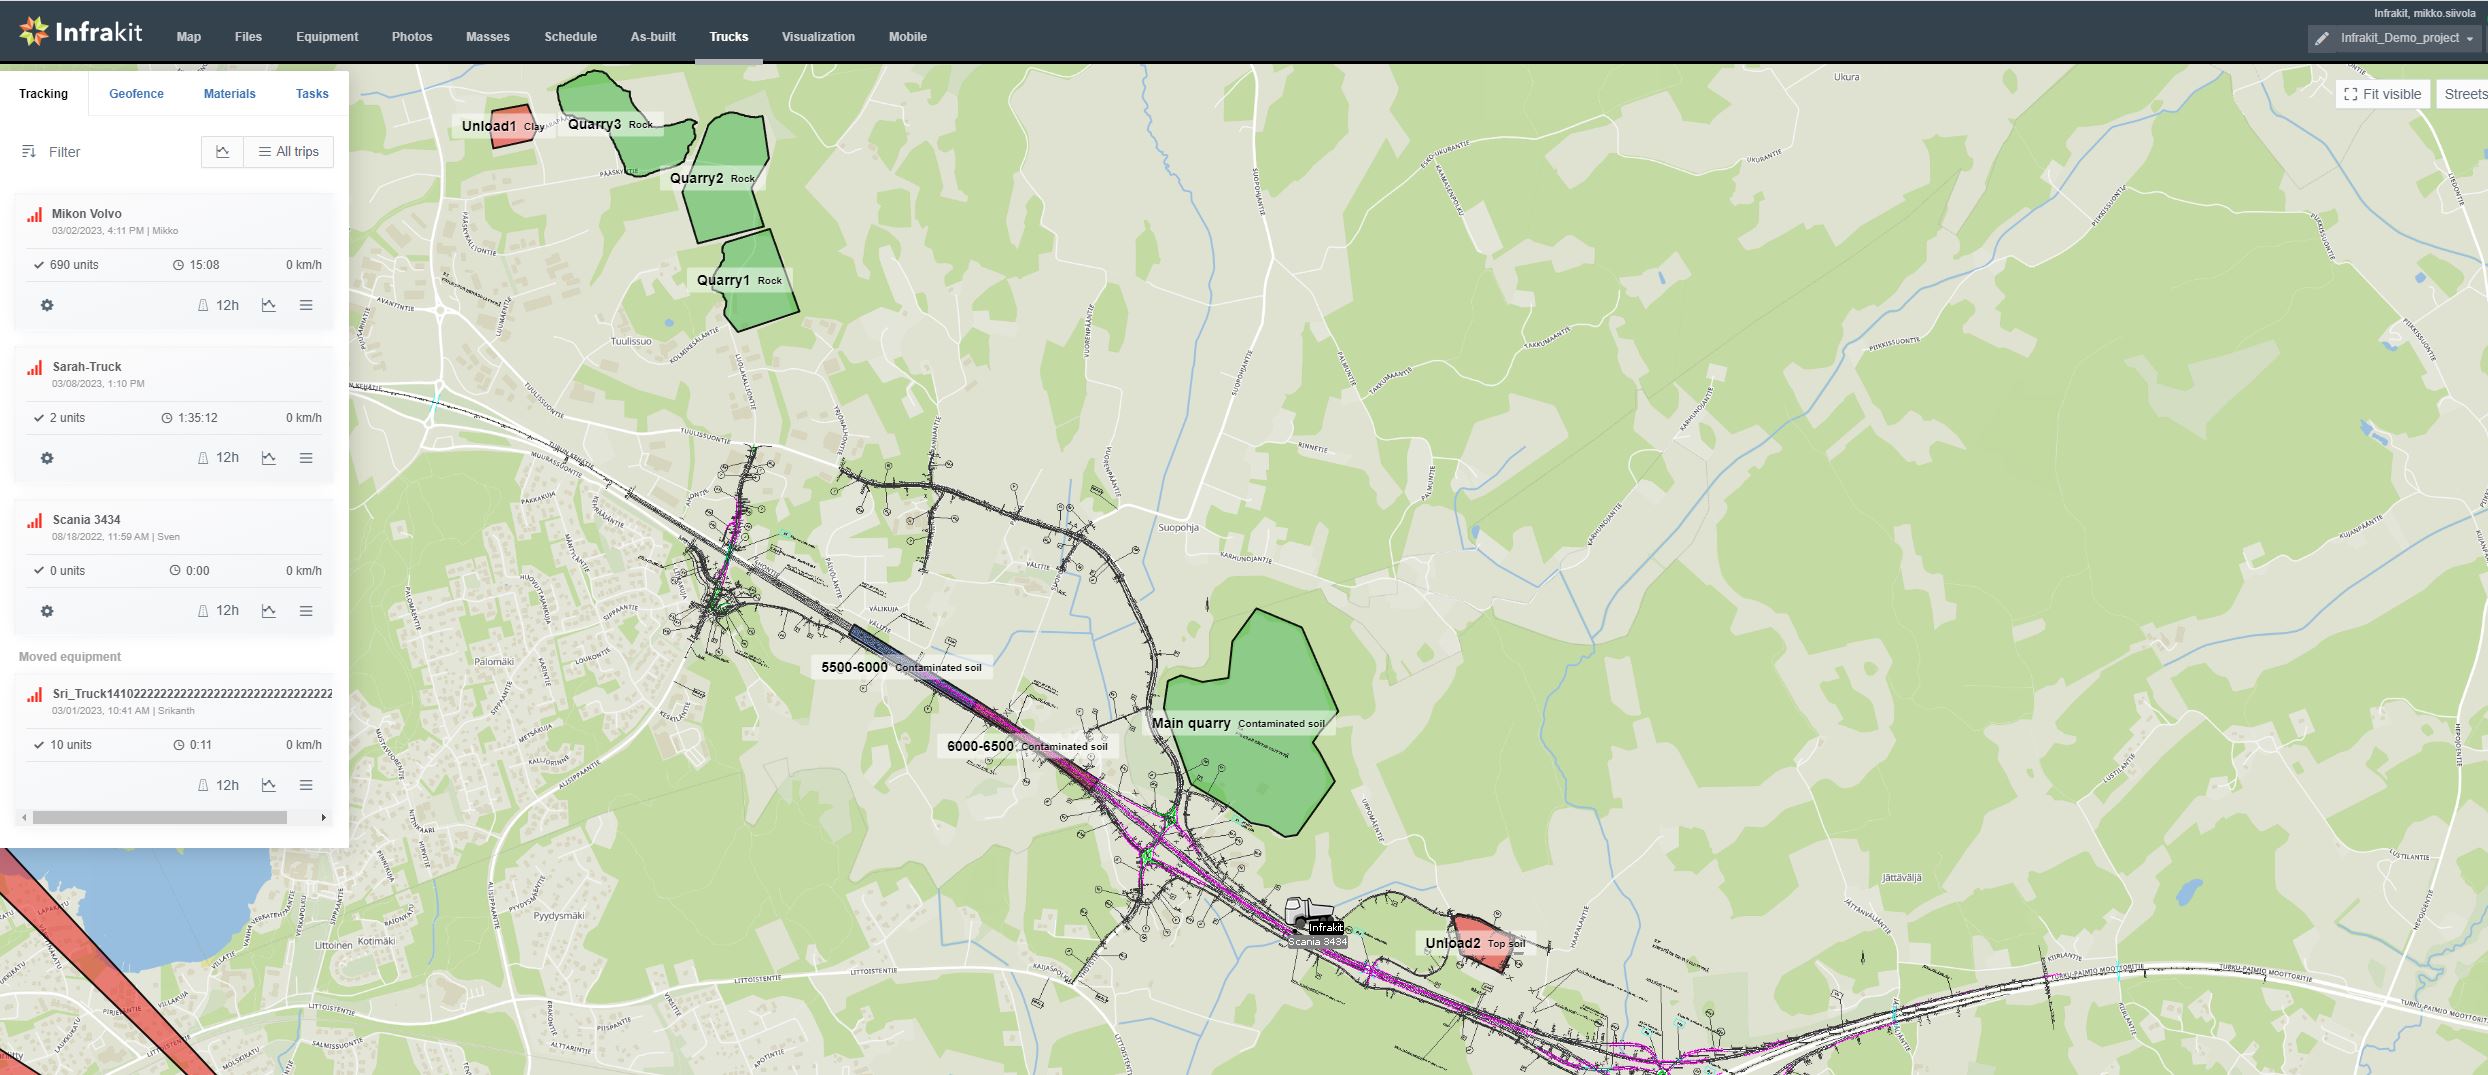
All trips
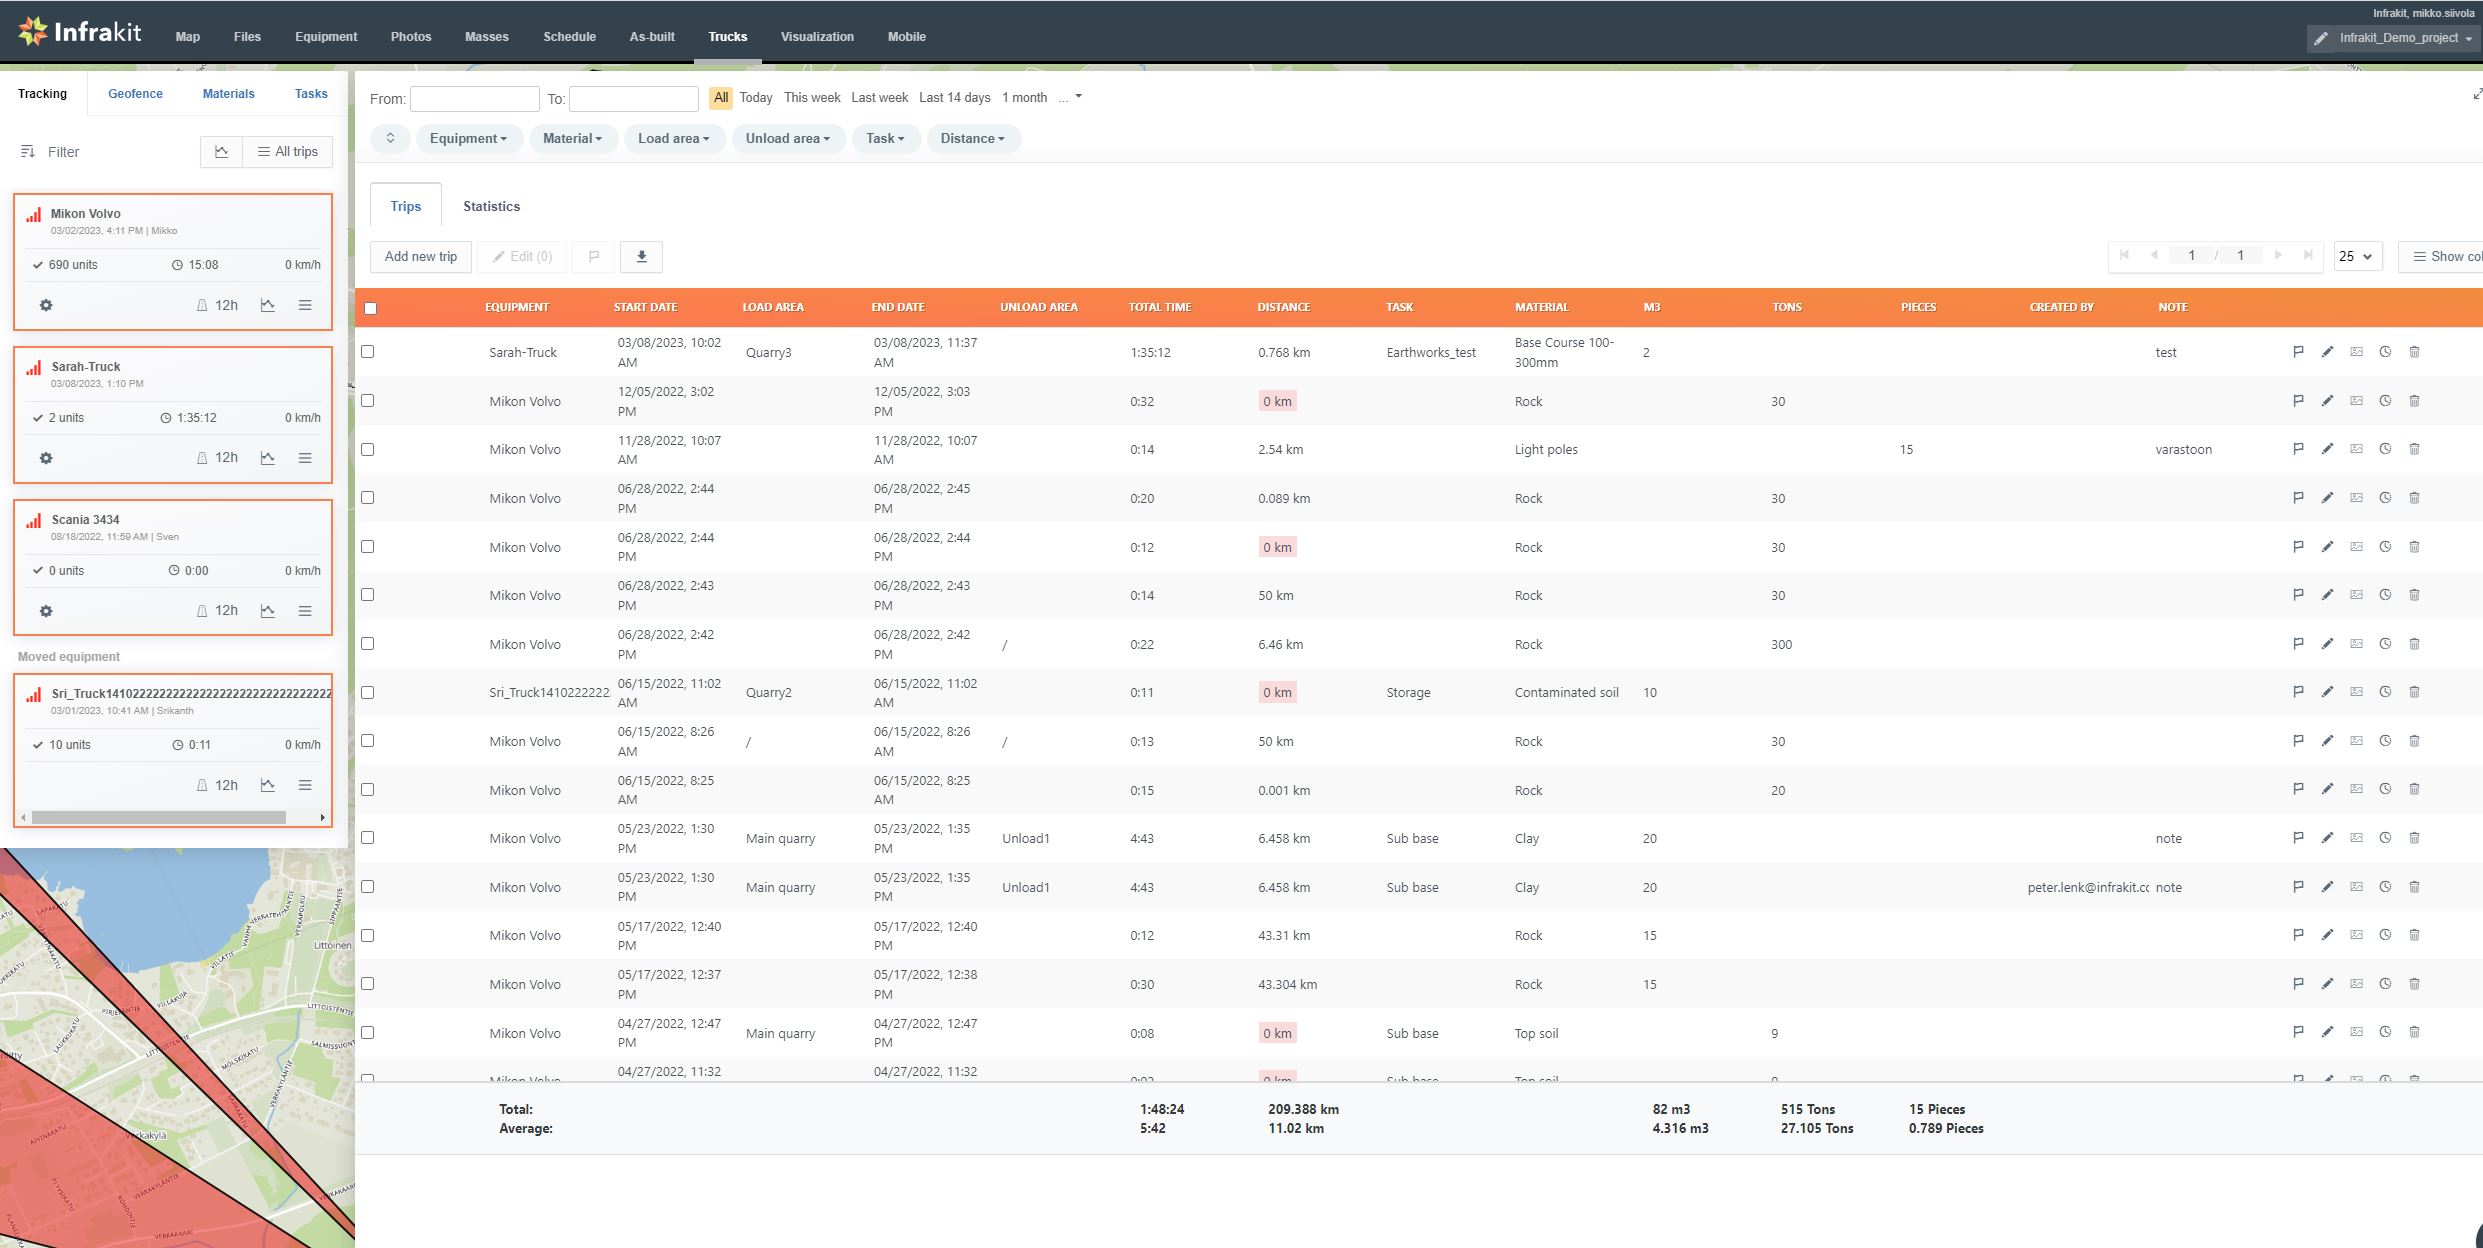
Statistics
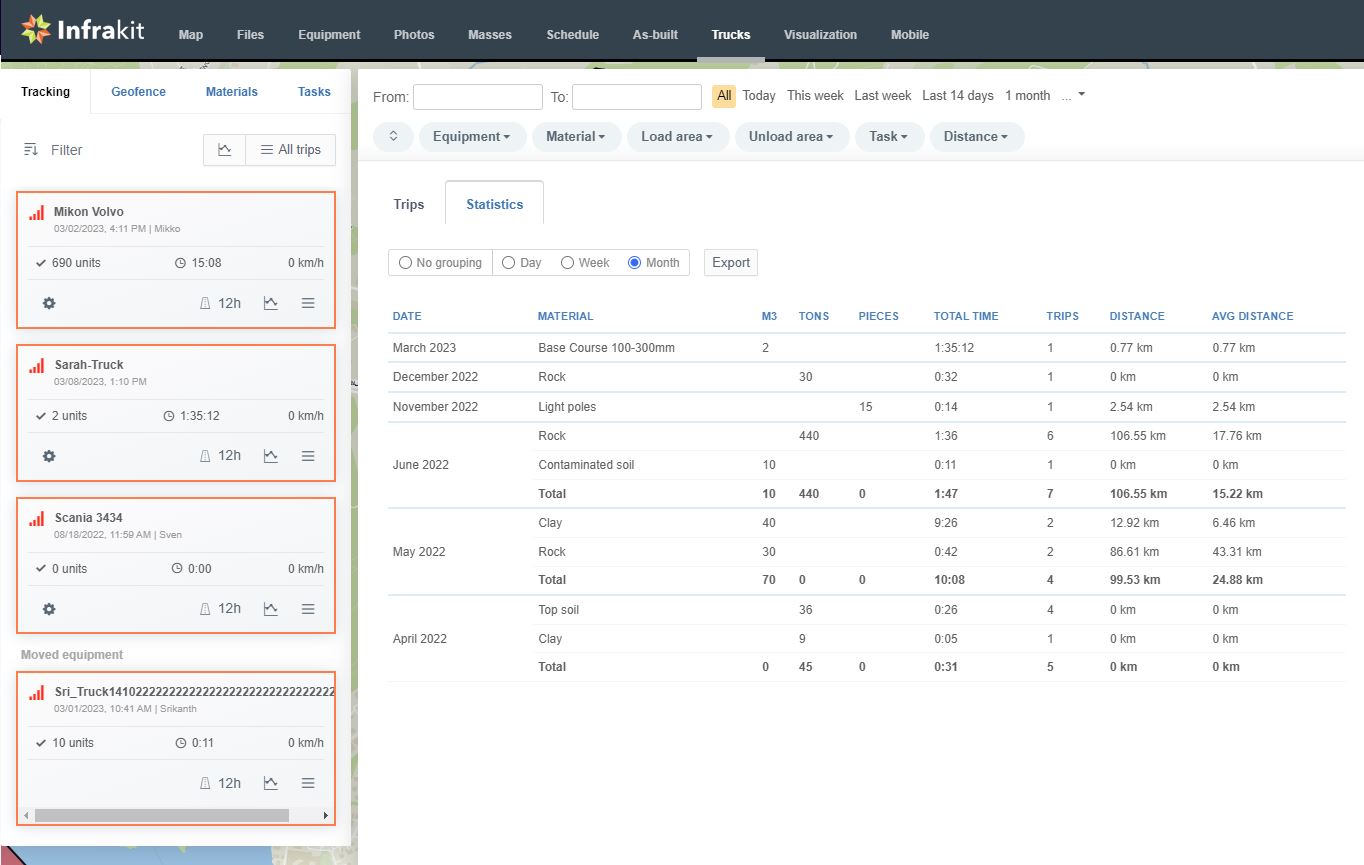
Tip: Use built-in filters to view the data you want to see