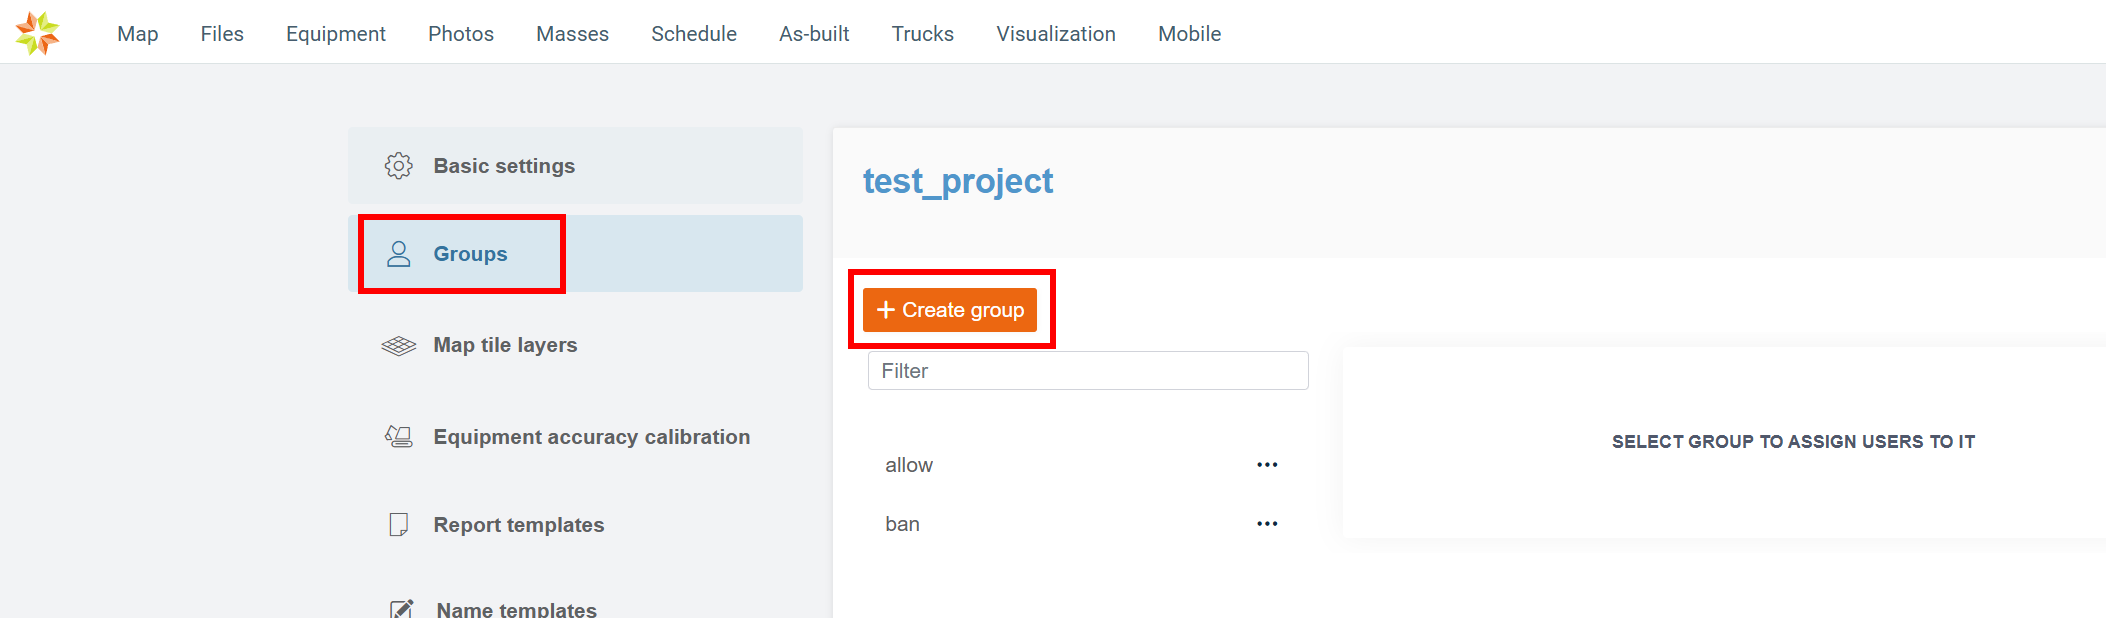
Create user groups: create needed amount of different user groups who participate for the approval. These can be anyone and any number of groups you need.
https://support.infrakit.com/help/using-folder-permissions
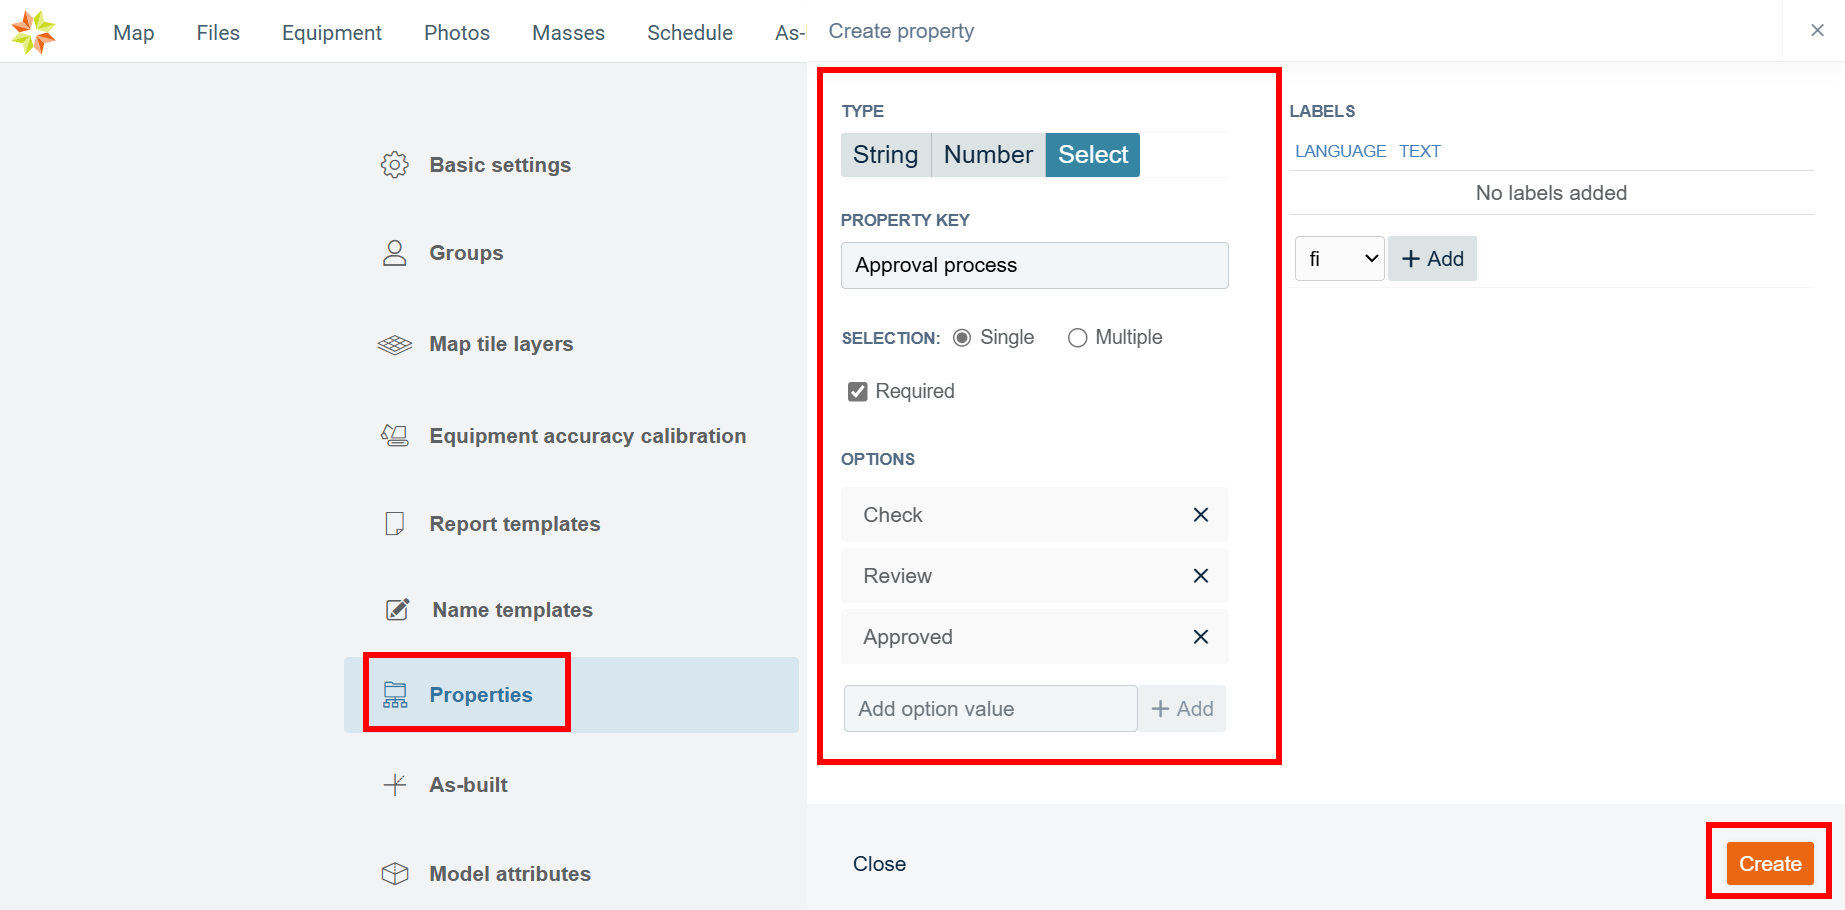
Create properties: next we create needed amount of properties for approval process. For example, “Select” property for “check/review/approved”.
Properties work inside Infrakit but are not saved into file for external use in third party software.
https://support.infrakit.com/help/assigning-properties-in-infrakit
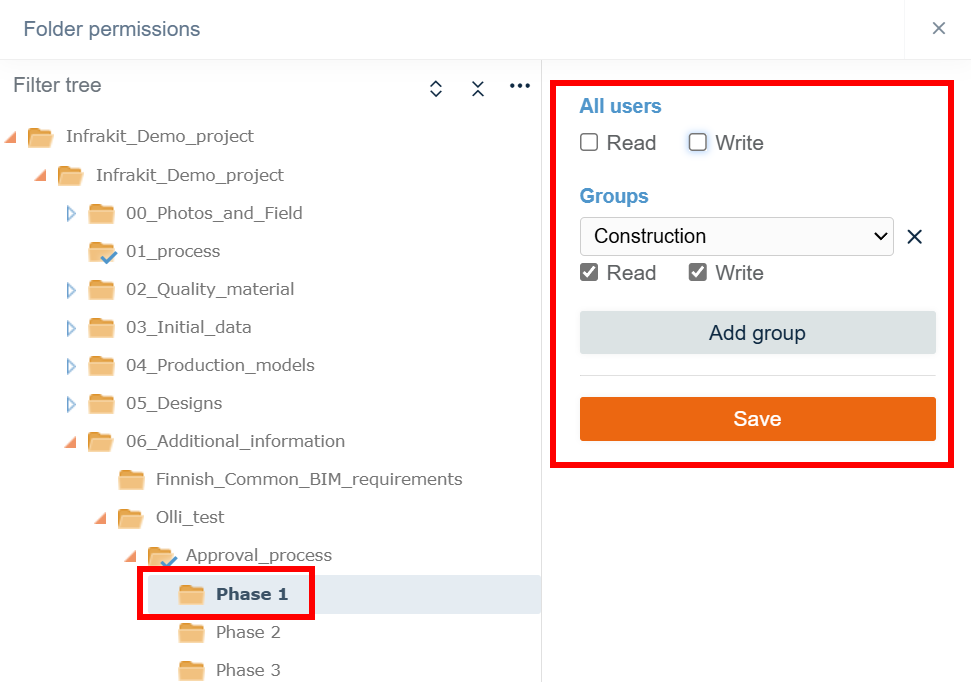
Set folder permissions: set read/write permissions for created folders for the user groups you created in step 1.
Note that Infrakit project admin will always have read/write rights to all folders no matter the folder permission settings.
https://support.infrakit.com/help/using-folder-permissions
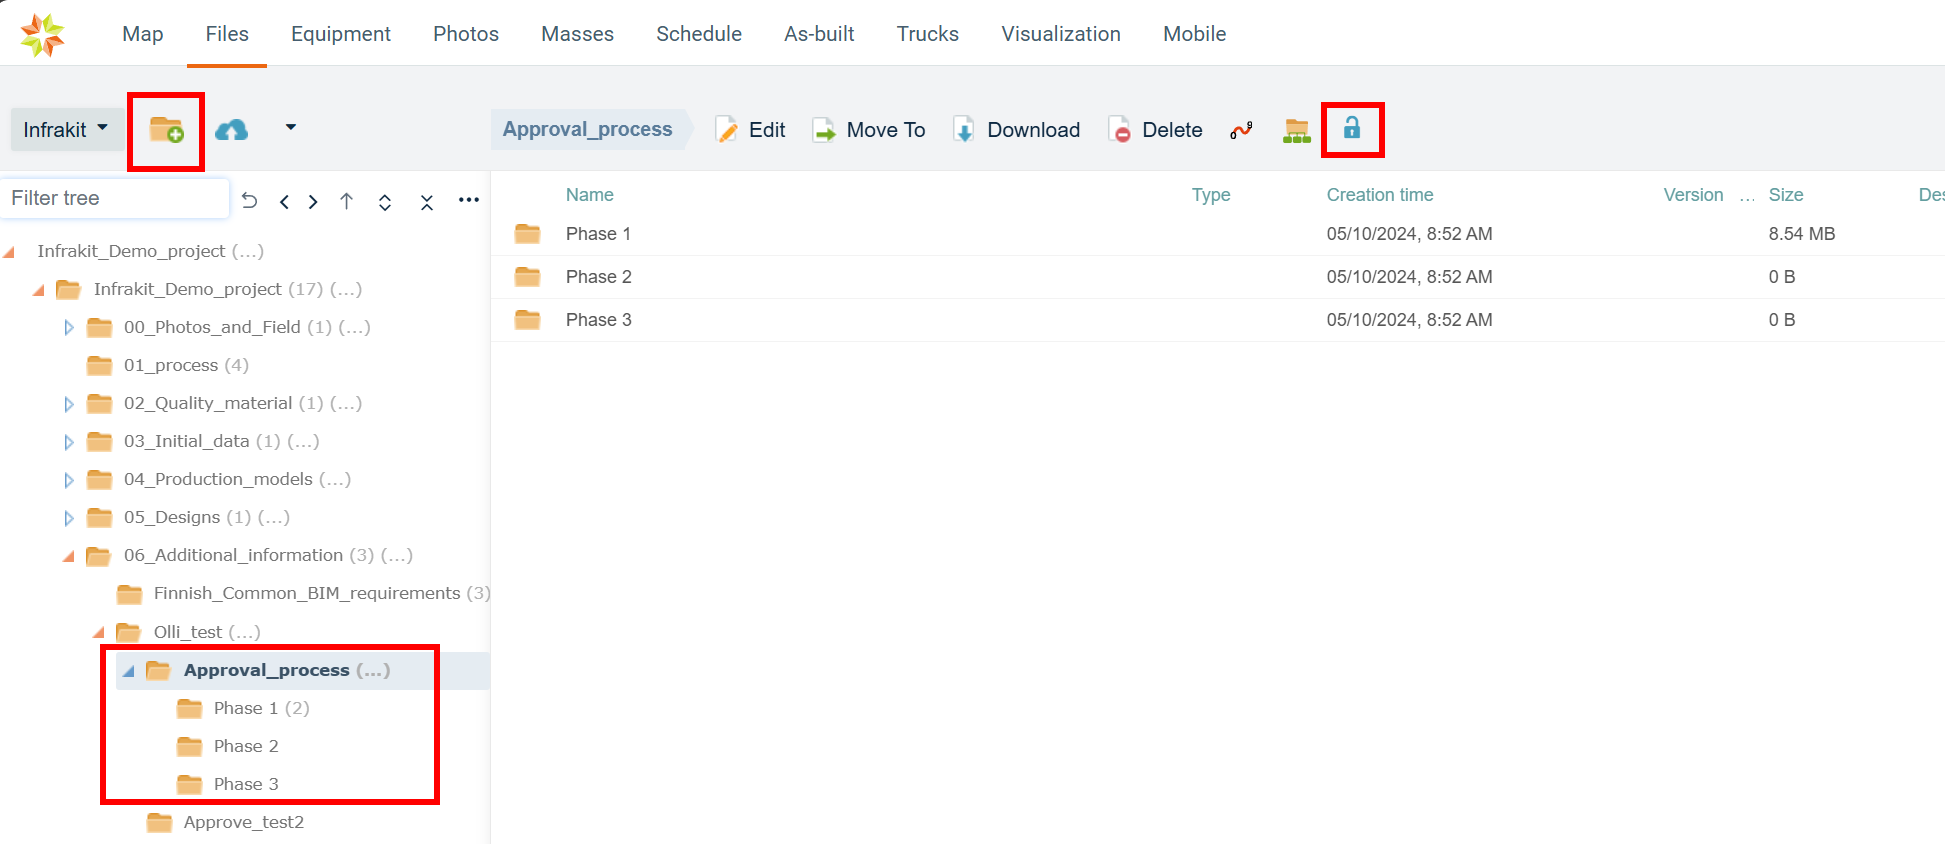
Set properties: set properties you created in step 2 for created folders you created in step 3.
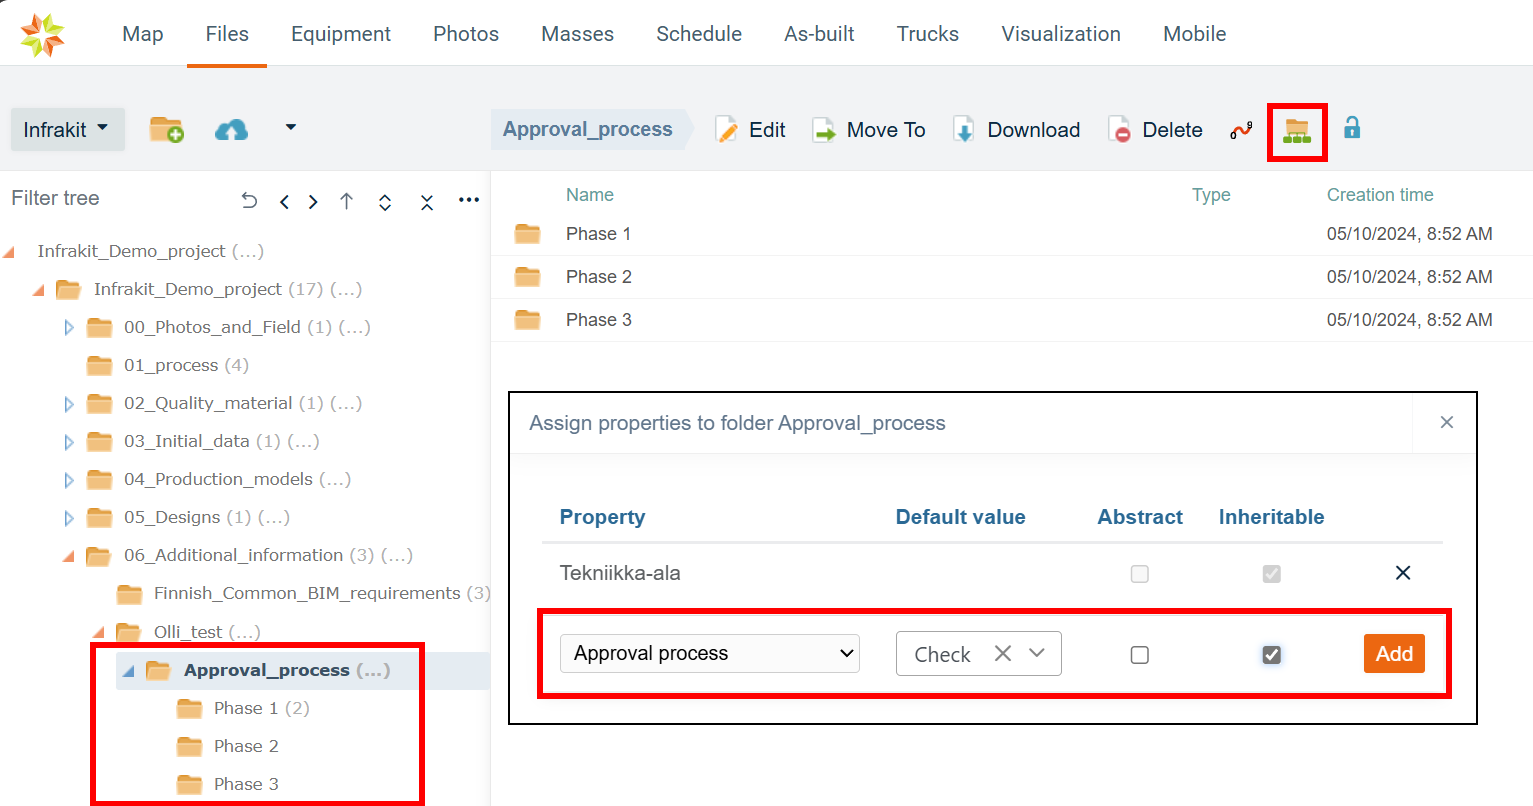
Select folder you want to have properties. Select “Assign properties”-tool. Select property and select default value if needed.
Abstract: chosen property is not active for the chosen folder but can be chosen for subfolders.
Inheritable: chosen property can be active for the chosen folder and that property is also can be chosen for subfolders.
Please note that if you wish the property information to follow the file when the file is moved to another folder you need to set the property to all folders that file is moved into.
https://support.infrakit.com/help/assigning-properties-in-infrakit
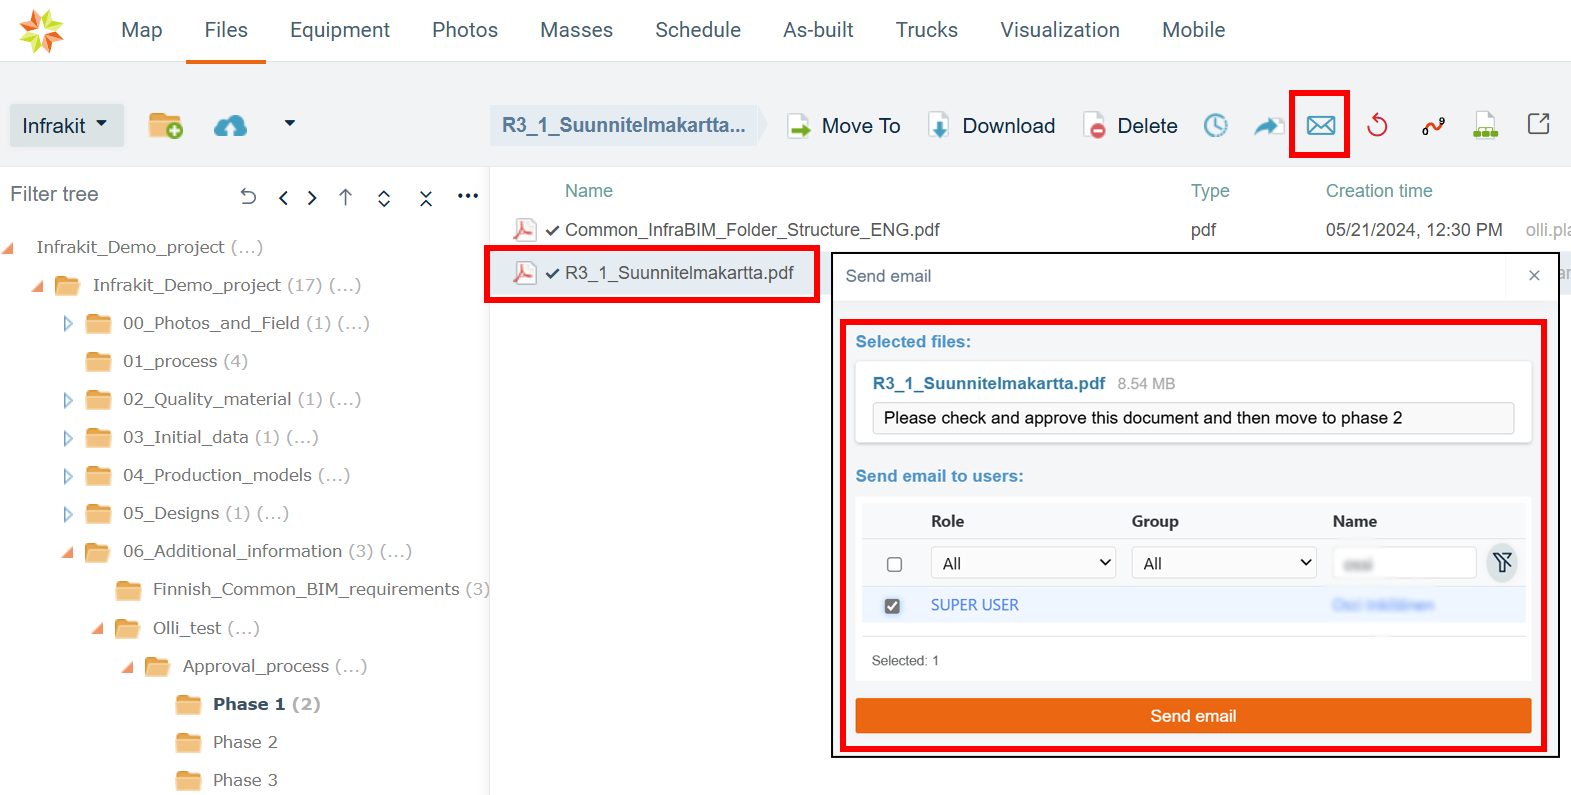
Start approval process: add files you want to include for the approval process. After uploading select files and change properties with “Edit properties”-tool if needed.
Select files again and klick “Send email”-tool to send approval request to user group/users.
Users receive an email notification and a link that leads directly to approval process folder.
Continue approval process: use “Add comment”-tool to comment and approve/decline files. After that select files and change property with “Edit properties”-tool to desired phase.
If you want to restrict read/write rights for different approval phases move files during the approval process to next folder. Remember to check read/write folder restrictions for each folder.
Use “Send email”-tool to send notification for next approval request if needed.
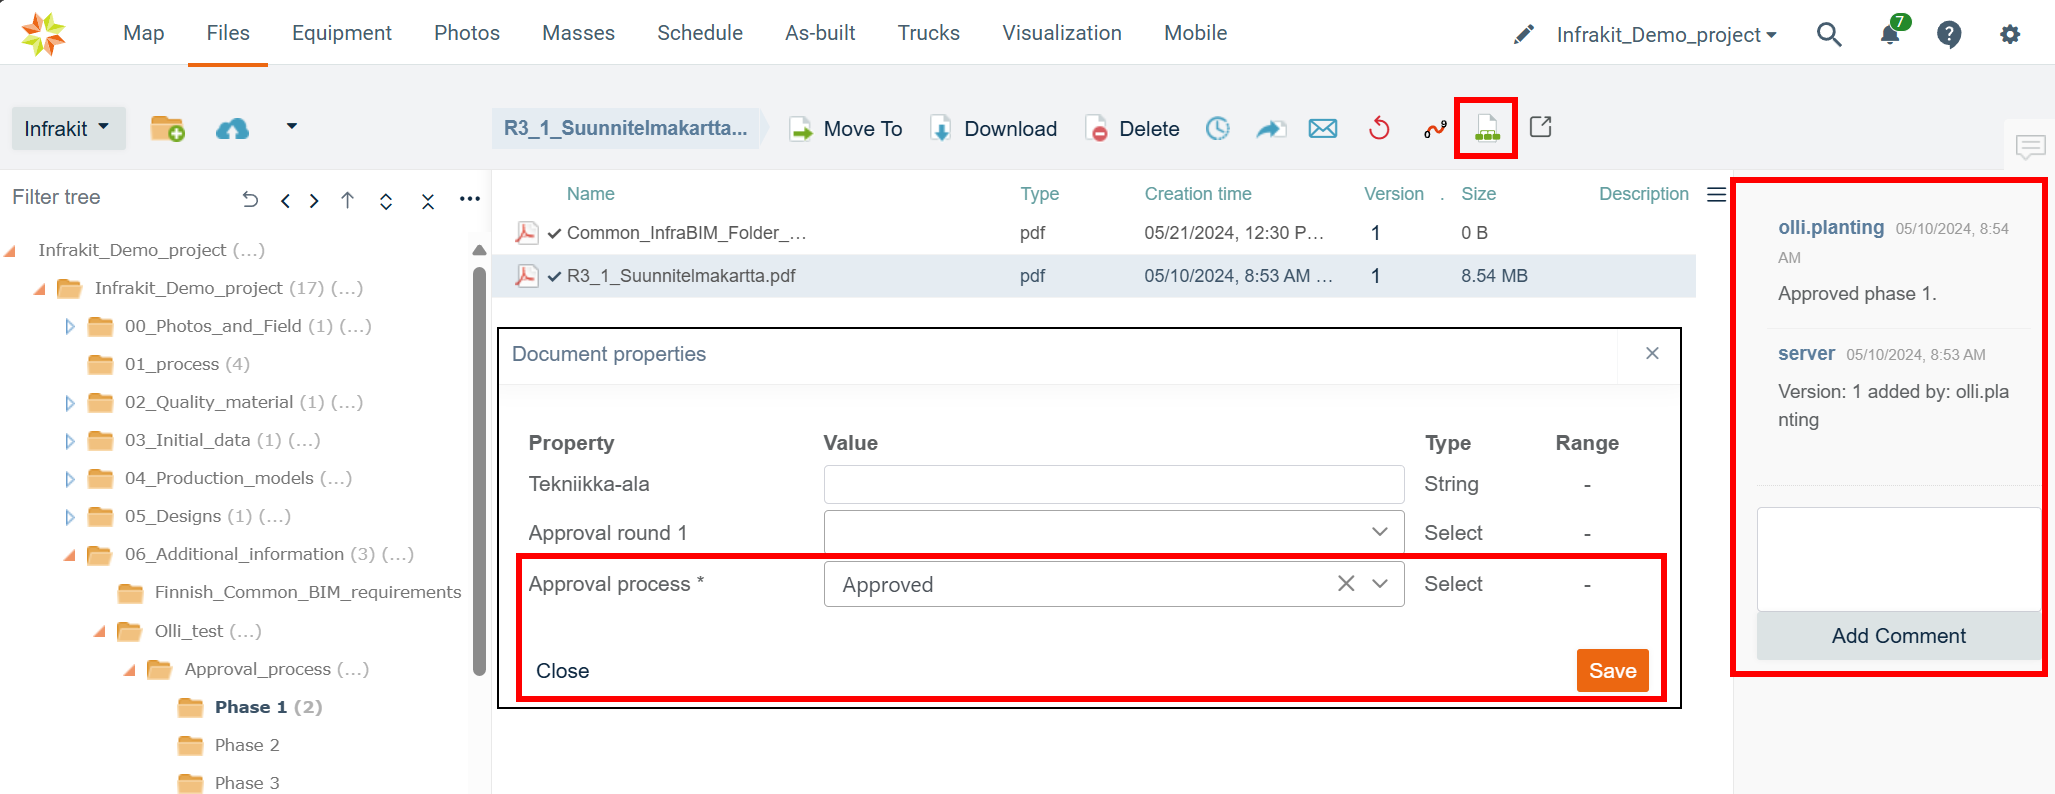
Complete approval process: For final approval use “Add comment”-tool to comment and approve/decline files. Select files and change property with “Edit properties”-tool and use “Approve”-tool to approve the file.
In “Approve”-tool Select “Send email to users” to inform user group/users about completed approval process.
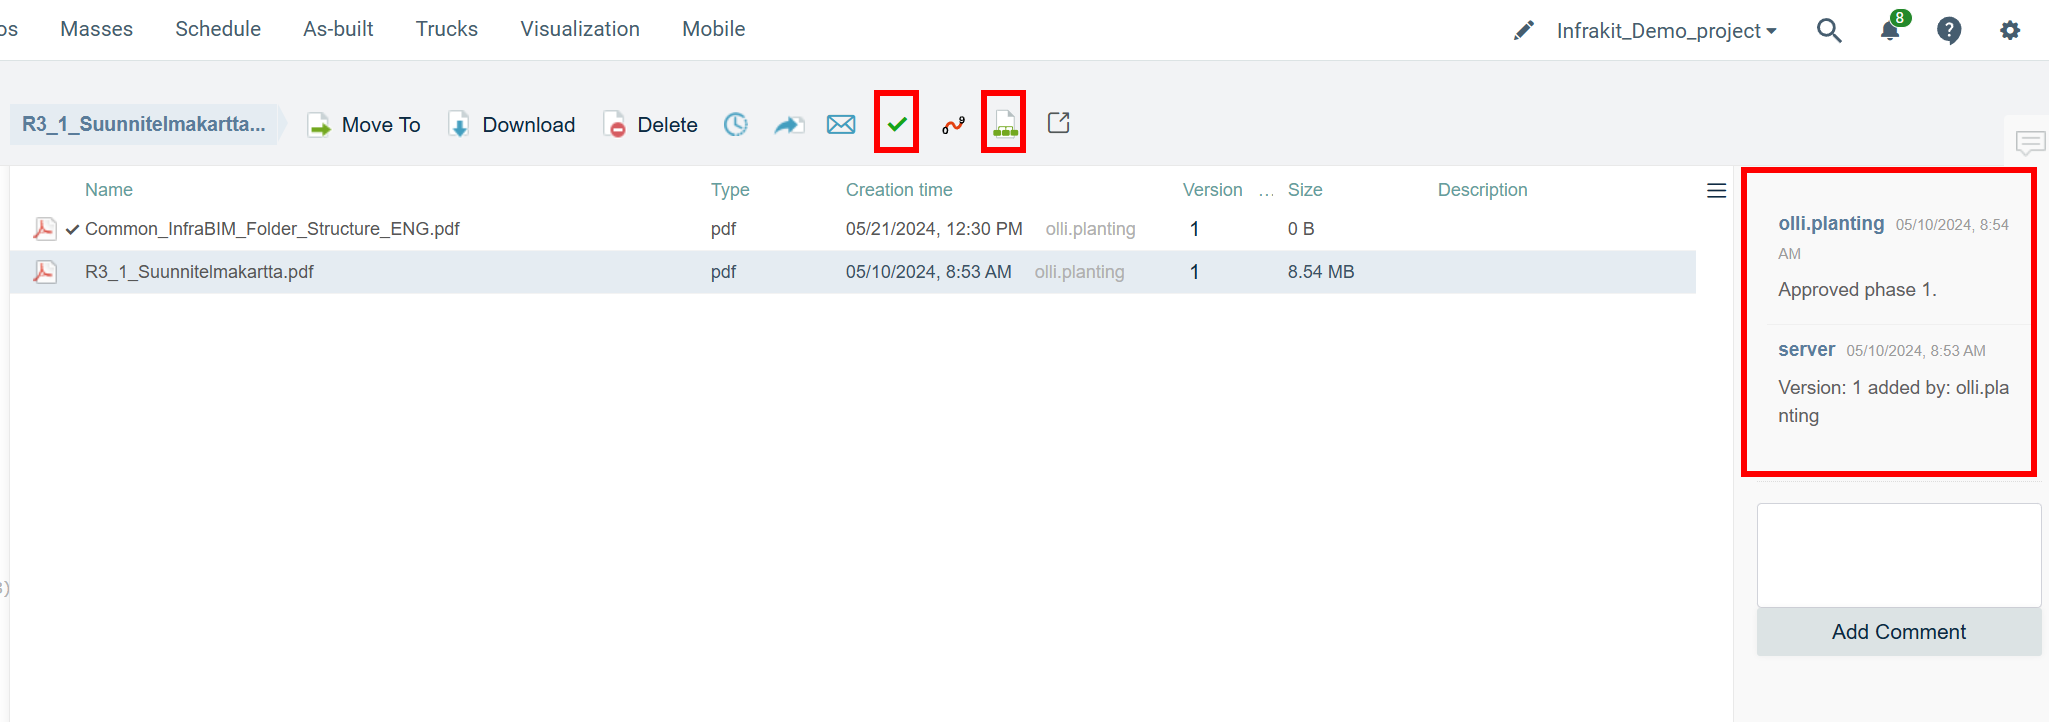
Completed approval process: File is now approved. Move the file to desired folder for future use.
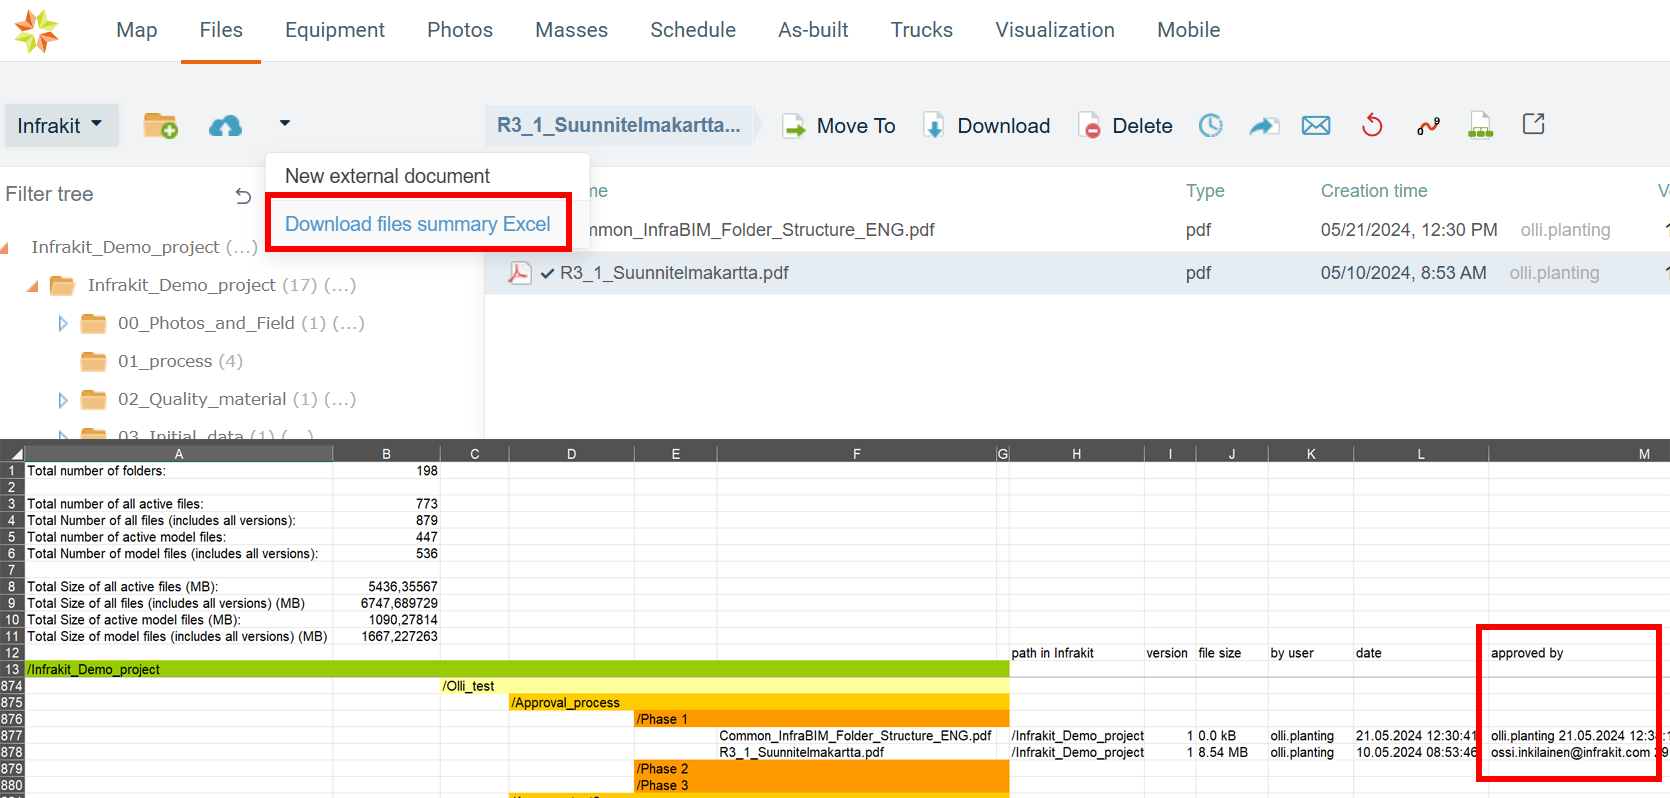
Approved files have checkmark ✓ next to the file name. When you move your mouse over the checkmark it gives detailed information of the approval.
Final approval is also saved to “Files summary excel”.