In user organizations ICT environment
Get integration parameters for Entra ID Enterprise application
This document describes how Infrakit customer can add ‘Infrakit Amazon Cognito user pool’ as an application in Azure AD, to establish a trust relationship between them.
You will need following Infrakit information during the application creation phase:
Identifier ID (Entity ID):
Please contact support@infrakit.com for the value, you will get contact person to deal with the integration.
Reply URL (Assertion Consumer Service URL):
https://eu1.auth.infrakit.com/saml2/idpresponse
Create Enterprise Application
Log in to the Azure Portal.
In the Azure Services section, choose Azure Active Directory.
In the left sidebar, choose Enterprise applications.
Choose New application.
On the Browse Azure AD Gallery page, choose Create your own application.
Under What’s the name of your app?, enter a name for your application (e.g. Infrakit) and select Integrate any other application you don’t find in the gallery (Non-gallery), as shown in Figure below
Choose Create.

It will take few seconds for the application to be created in Azure AD, then you should be redirected to the Overview page for the newly added application.
Set up Single Sign-on using SAML
On the Getting started page, in the Set up single sign on tile, choose Get started
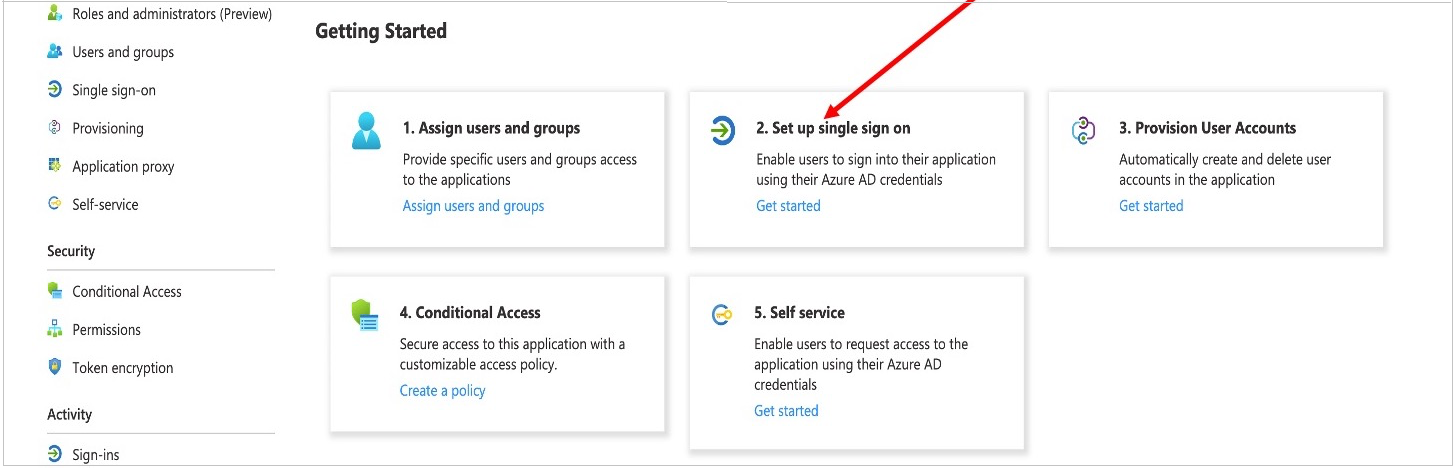
2. On the next screen, select SAML.
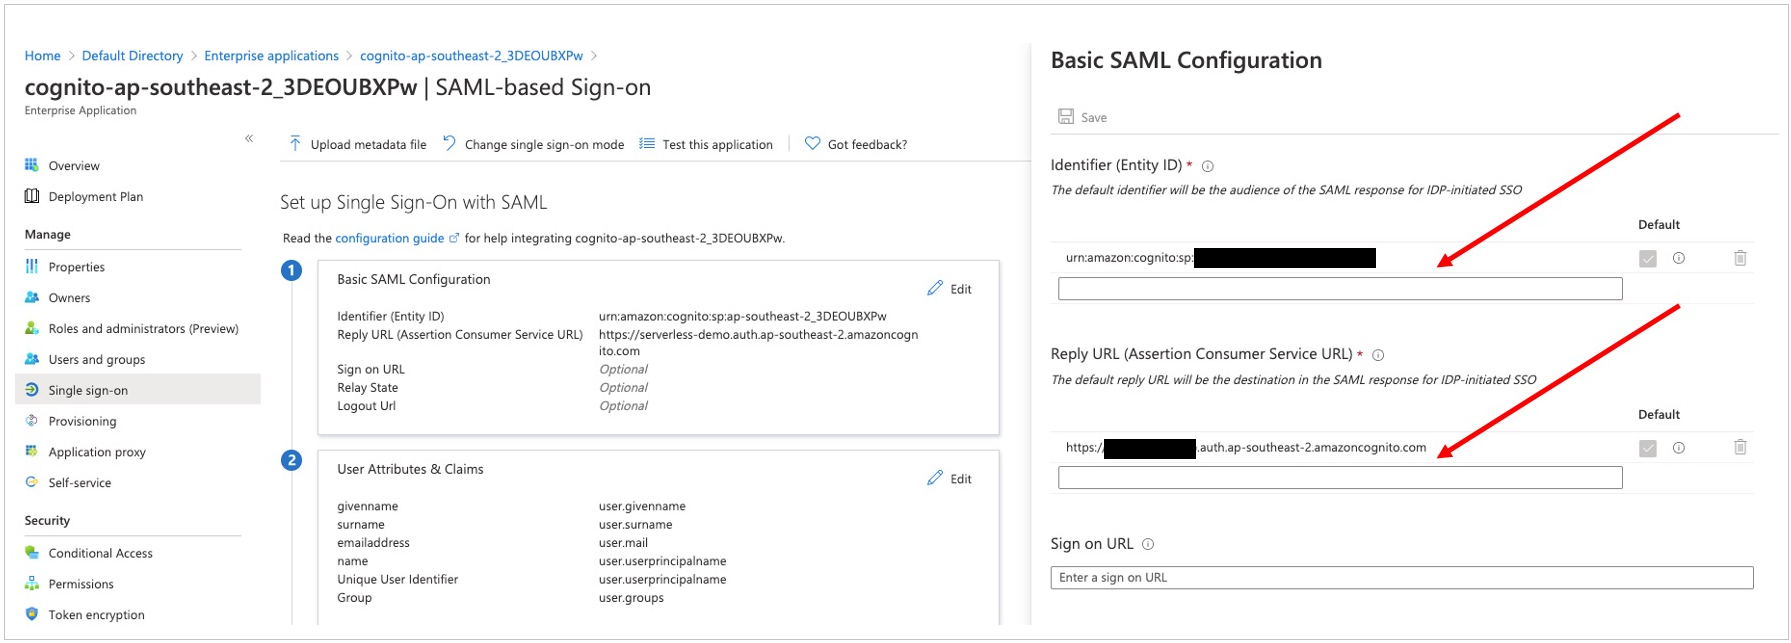
3. In the middle pane under Set up Single Sign-On with SAML, in the Basic SAML Configuration section, choose the edit icon.
4. In the right pane under Basic SAML Configuration, replace the default Identifier ID (Entity ID) with one provided in introduction section. In the Reply URL (Assertion Consumer Service URL) field, enter value provided in introduction section. Choose Save.
5. In the middle pane under Set up Single Sign-On with SAML, in the User Attributes & Claims section, choose Edit.
6. Choose Add a group claim.
7. On the User Attributes & Claims page, in the right pane under Group Claims, select Groups assigned to the application, leave Source attribute as Group ID, as shown in Figure 5. Choose Save.
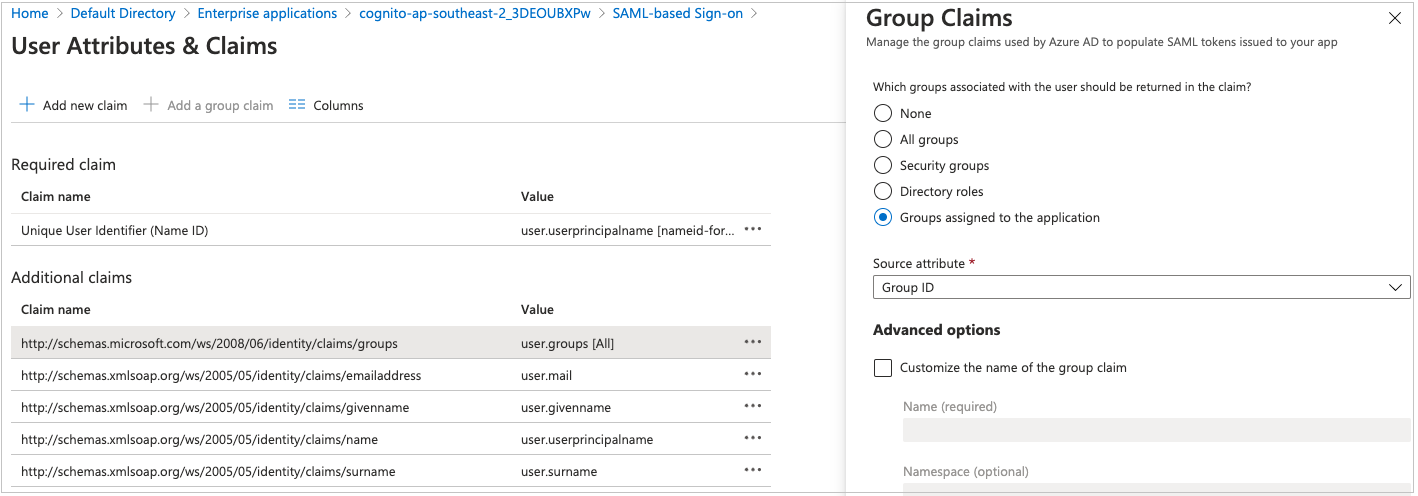
8. This adds the group claim so that Amazon Cognito can receive the group membership detail of the authenticated user as part of the SAML assertion.
9. In a any text editor (e.g. Notepad), note down the Claim names under Additional claims.
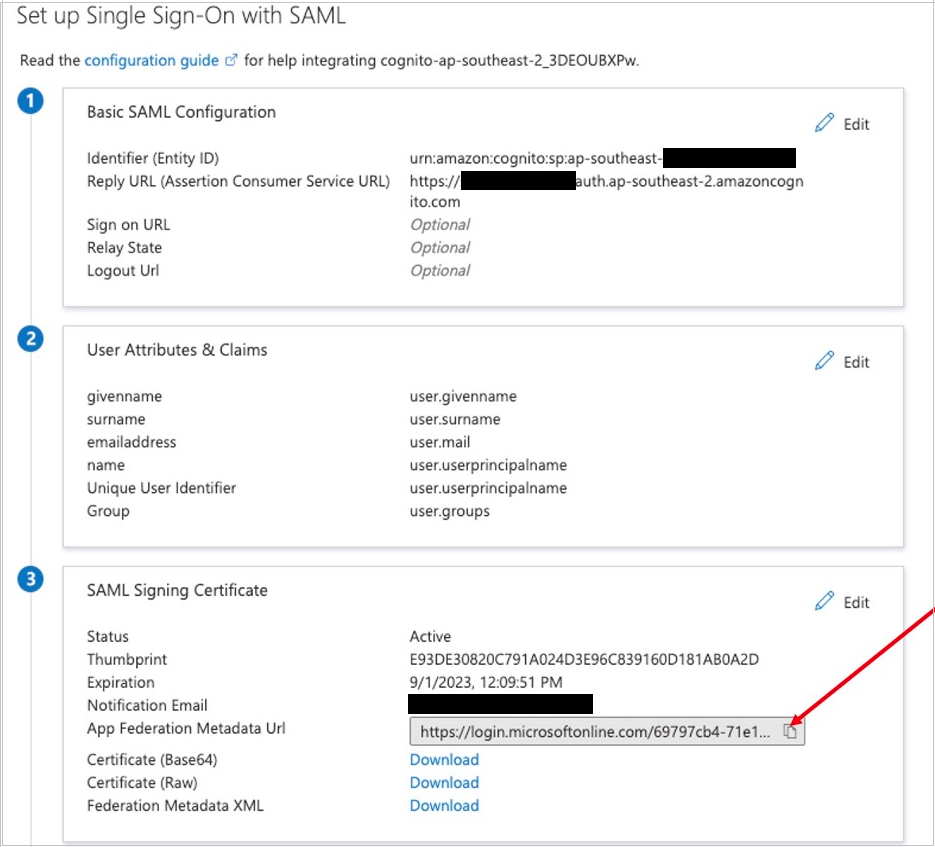
10. Close the User Attributes & Claims screen by choosing the X in the top right corner. You’ll be redirected to the Set up Single Sign-on with SAML page.
11. Scroll down to the SAML Signing Certificate section, and copy the App Federation Metadata Url by choosing the copy into clipboard icon. Keep this URL in a text editor.
Send following details to your contact person in Infrakit
Claim names copied at step 8 above
App Federation Metadata Url copied at step 10 above
Below is a sample
Claim Name
http://schemas.microsoft.com/ws/2008/06/identity/claims/groups
http://schemas.xmlsoap.org/ws/2005/05/identity/claims/emailaddress
http://schemas.xmlsoap.org/ws/2005/05/identity/claims/givenname
http://schemas.xmlsoap.org/ws/2005/05/identity/claims/name
http://schemas.xmlsoap.org/ws/2005/05/identity/claims/preferred_username/preferred_username
http://schemas.xmlsoap.org/ws/2005/05/identity/claims/surname
App Federation Metadata URL
https://login.microsoftonline.com/xxxx/federationmetadata/2007-06/federationmetadata.xml?appid=xxxx
User management in Infrakit
Users are created and roles are managed in Infrakit by organization Admin. Authorization only provides seamless centralized access to Infrakit resources.
End user login in web
User can access the federated login by entering to following address:
https://web.infrakit.com/entry/index.html
Input your organizations username and email. When once done, until the browser remembers the login, user is able to access Infrakit directly. Note that when accessing from not trusted network or device, organization may have multi-factor authentication (MFA) in use.
End user login in mobile Apps
This feature is not released. Note that this option may need multi-factor authentication (MFA) if user's mobile device is not on trusted devices list of federated organization.