Welcome to Infrakit Knowledge Base
Search our knowledge base for answers or contact support@infrakit.com / +358 9 4257 9297
Infrakit OFFICE
Using the DEM Tool for Volume Calculation
The DEM Tool (Digital Elevation Model Tool) enables users to perform volume calculations using DEM models in supported formats like TIF or TIFF. This guide walks you through each step to use this tool effectively.
Updated 3 weeks ago
1. Uploading DEM Models
Go to the "Files" page and upload the DEM models (TIF or TIFF format) into your project folder.
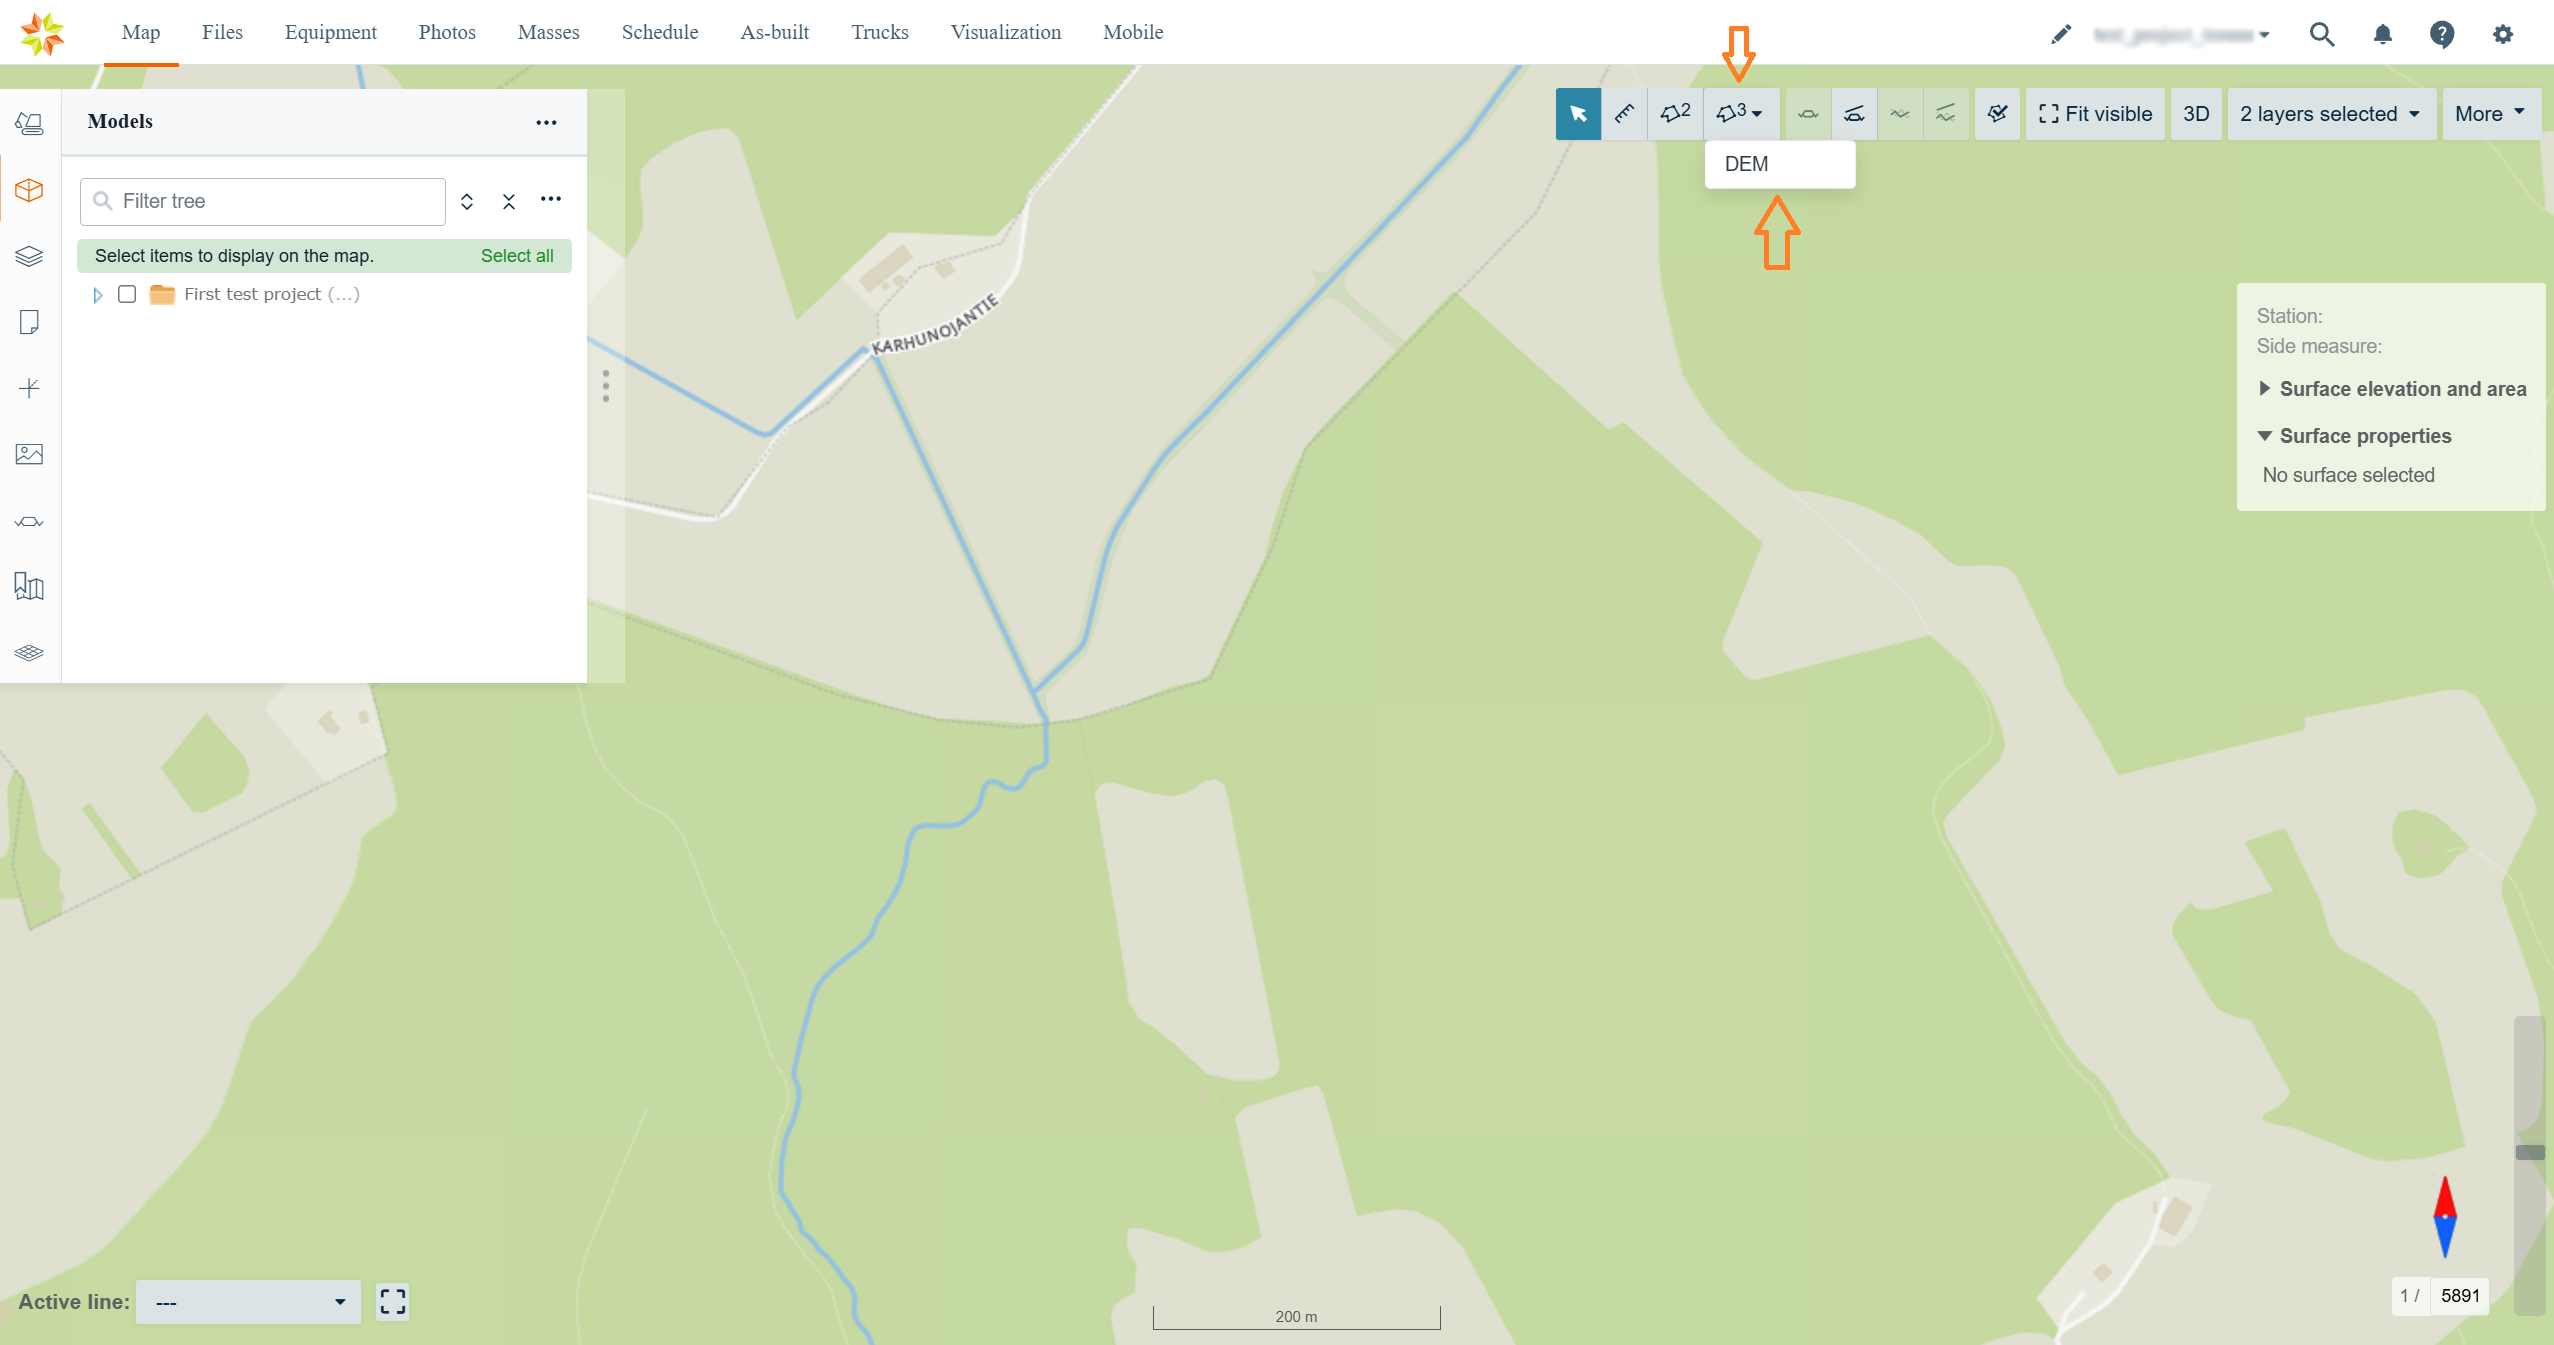
2. Accessing the DEM Tool
Click on the DEM tool icon to open the tool and select Stockpile.
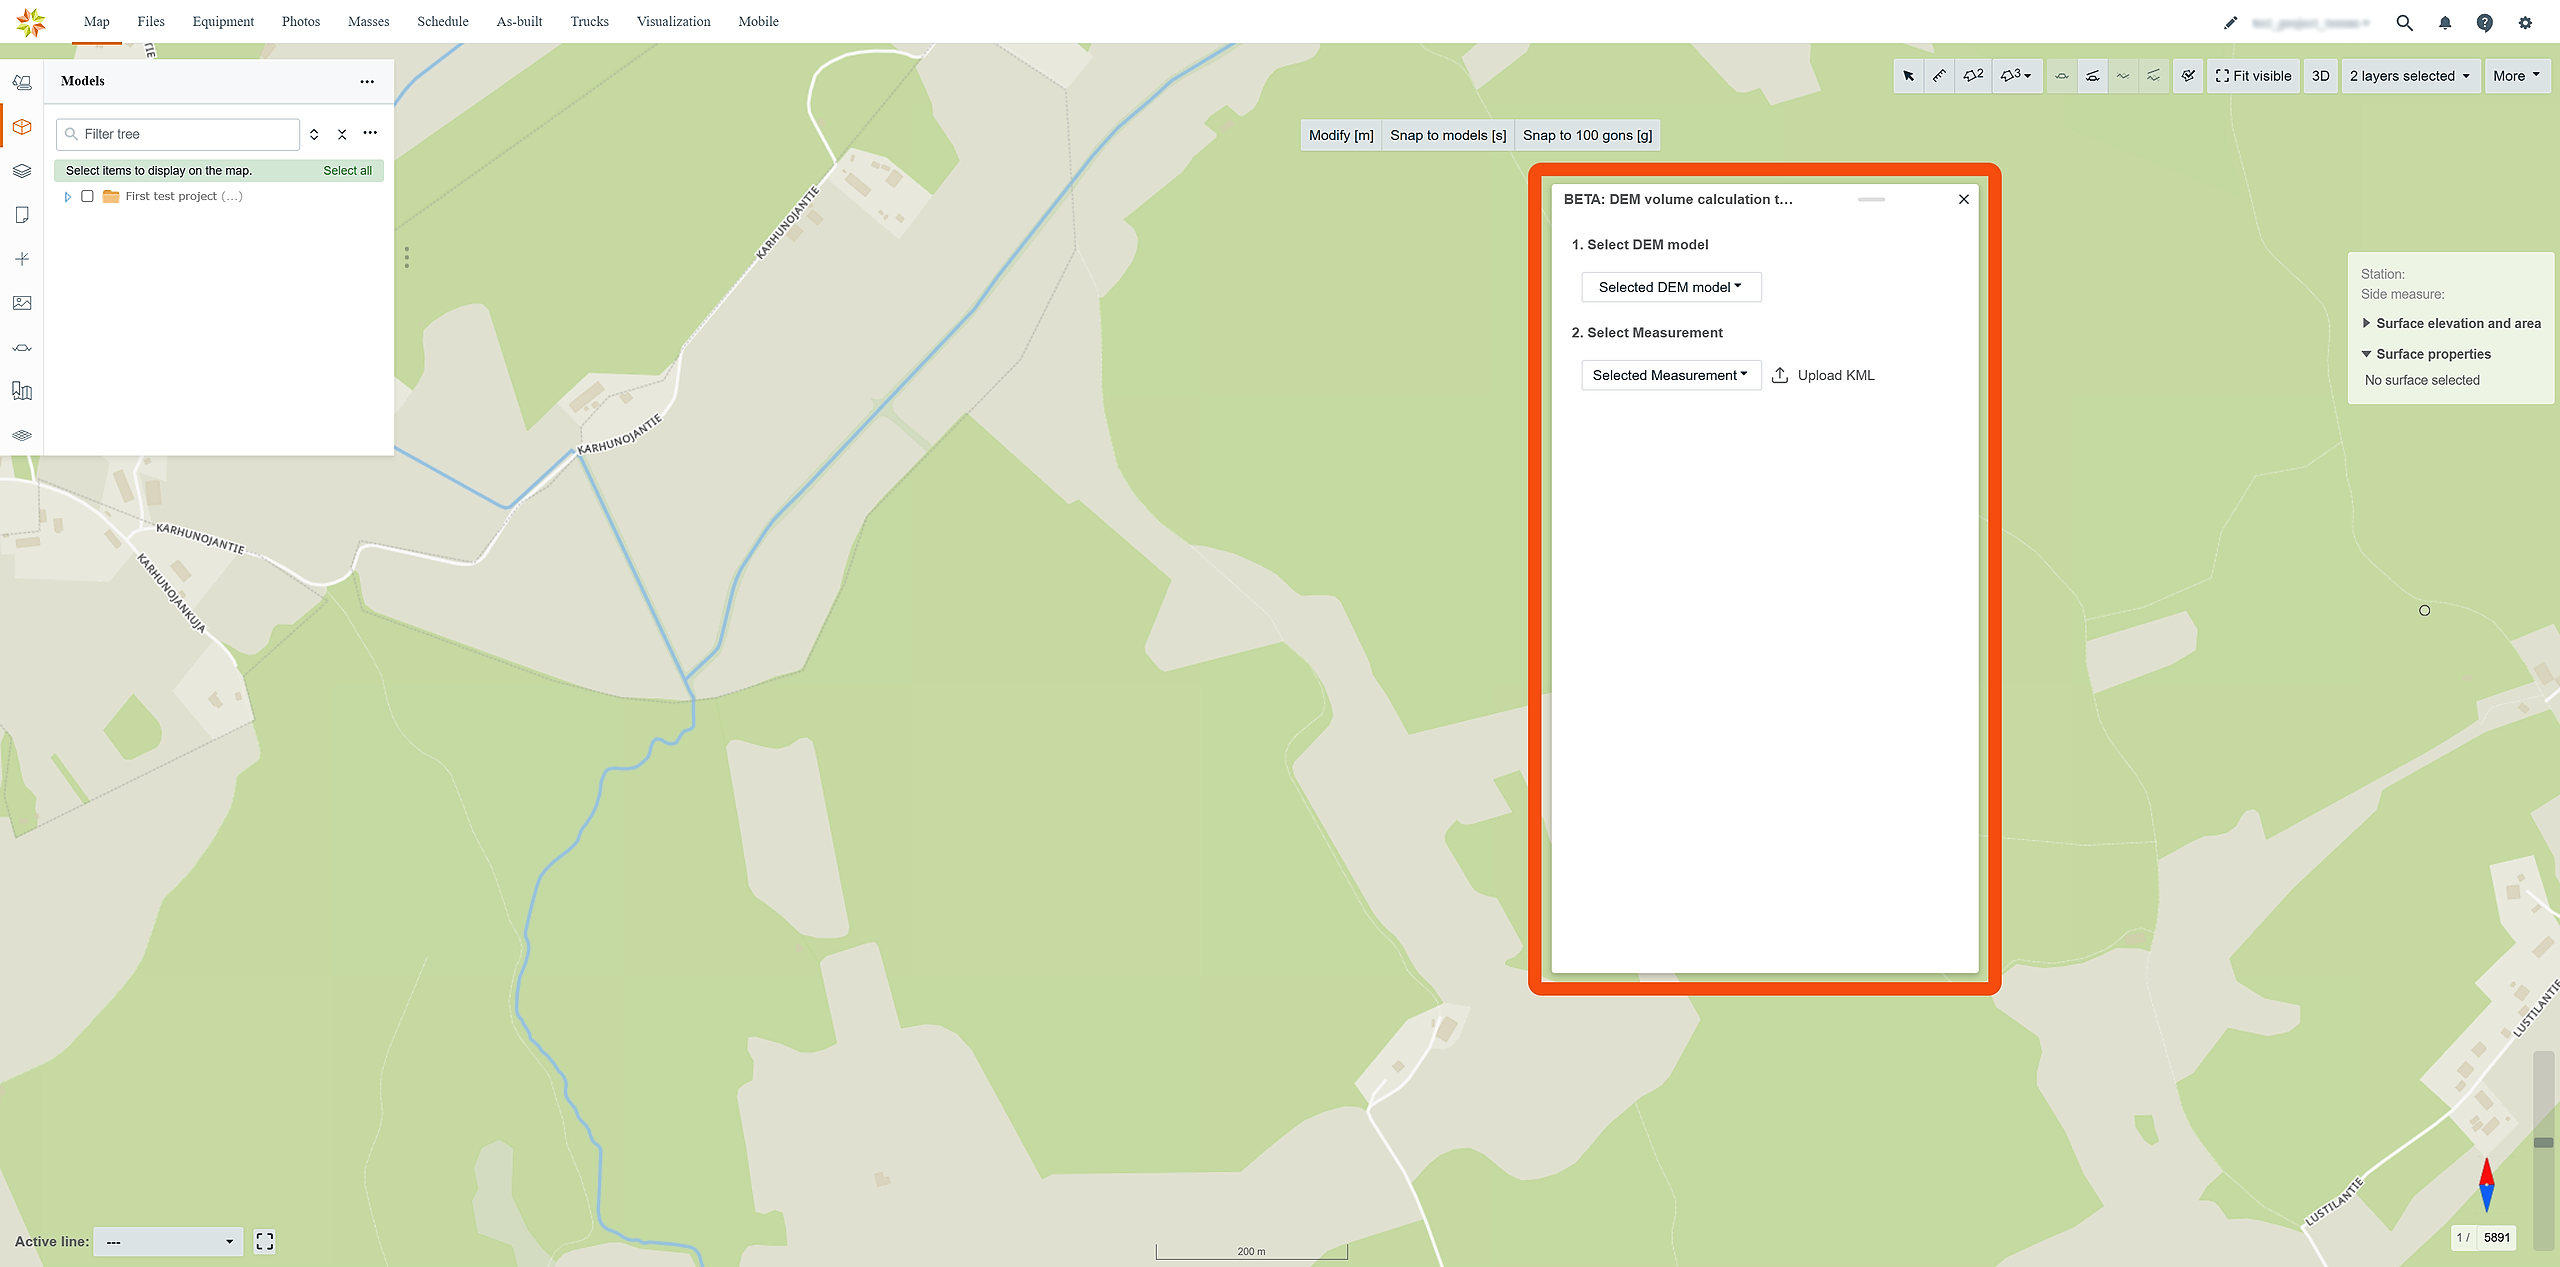
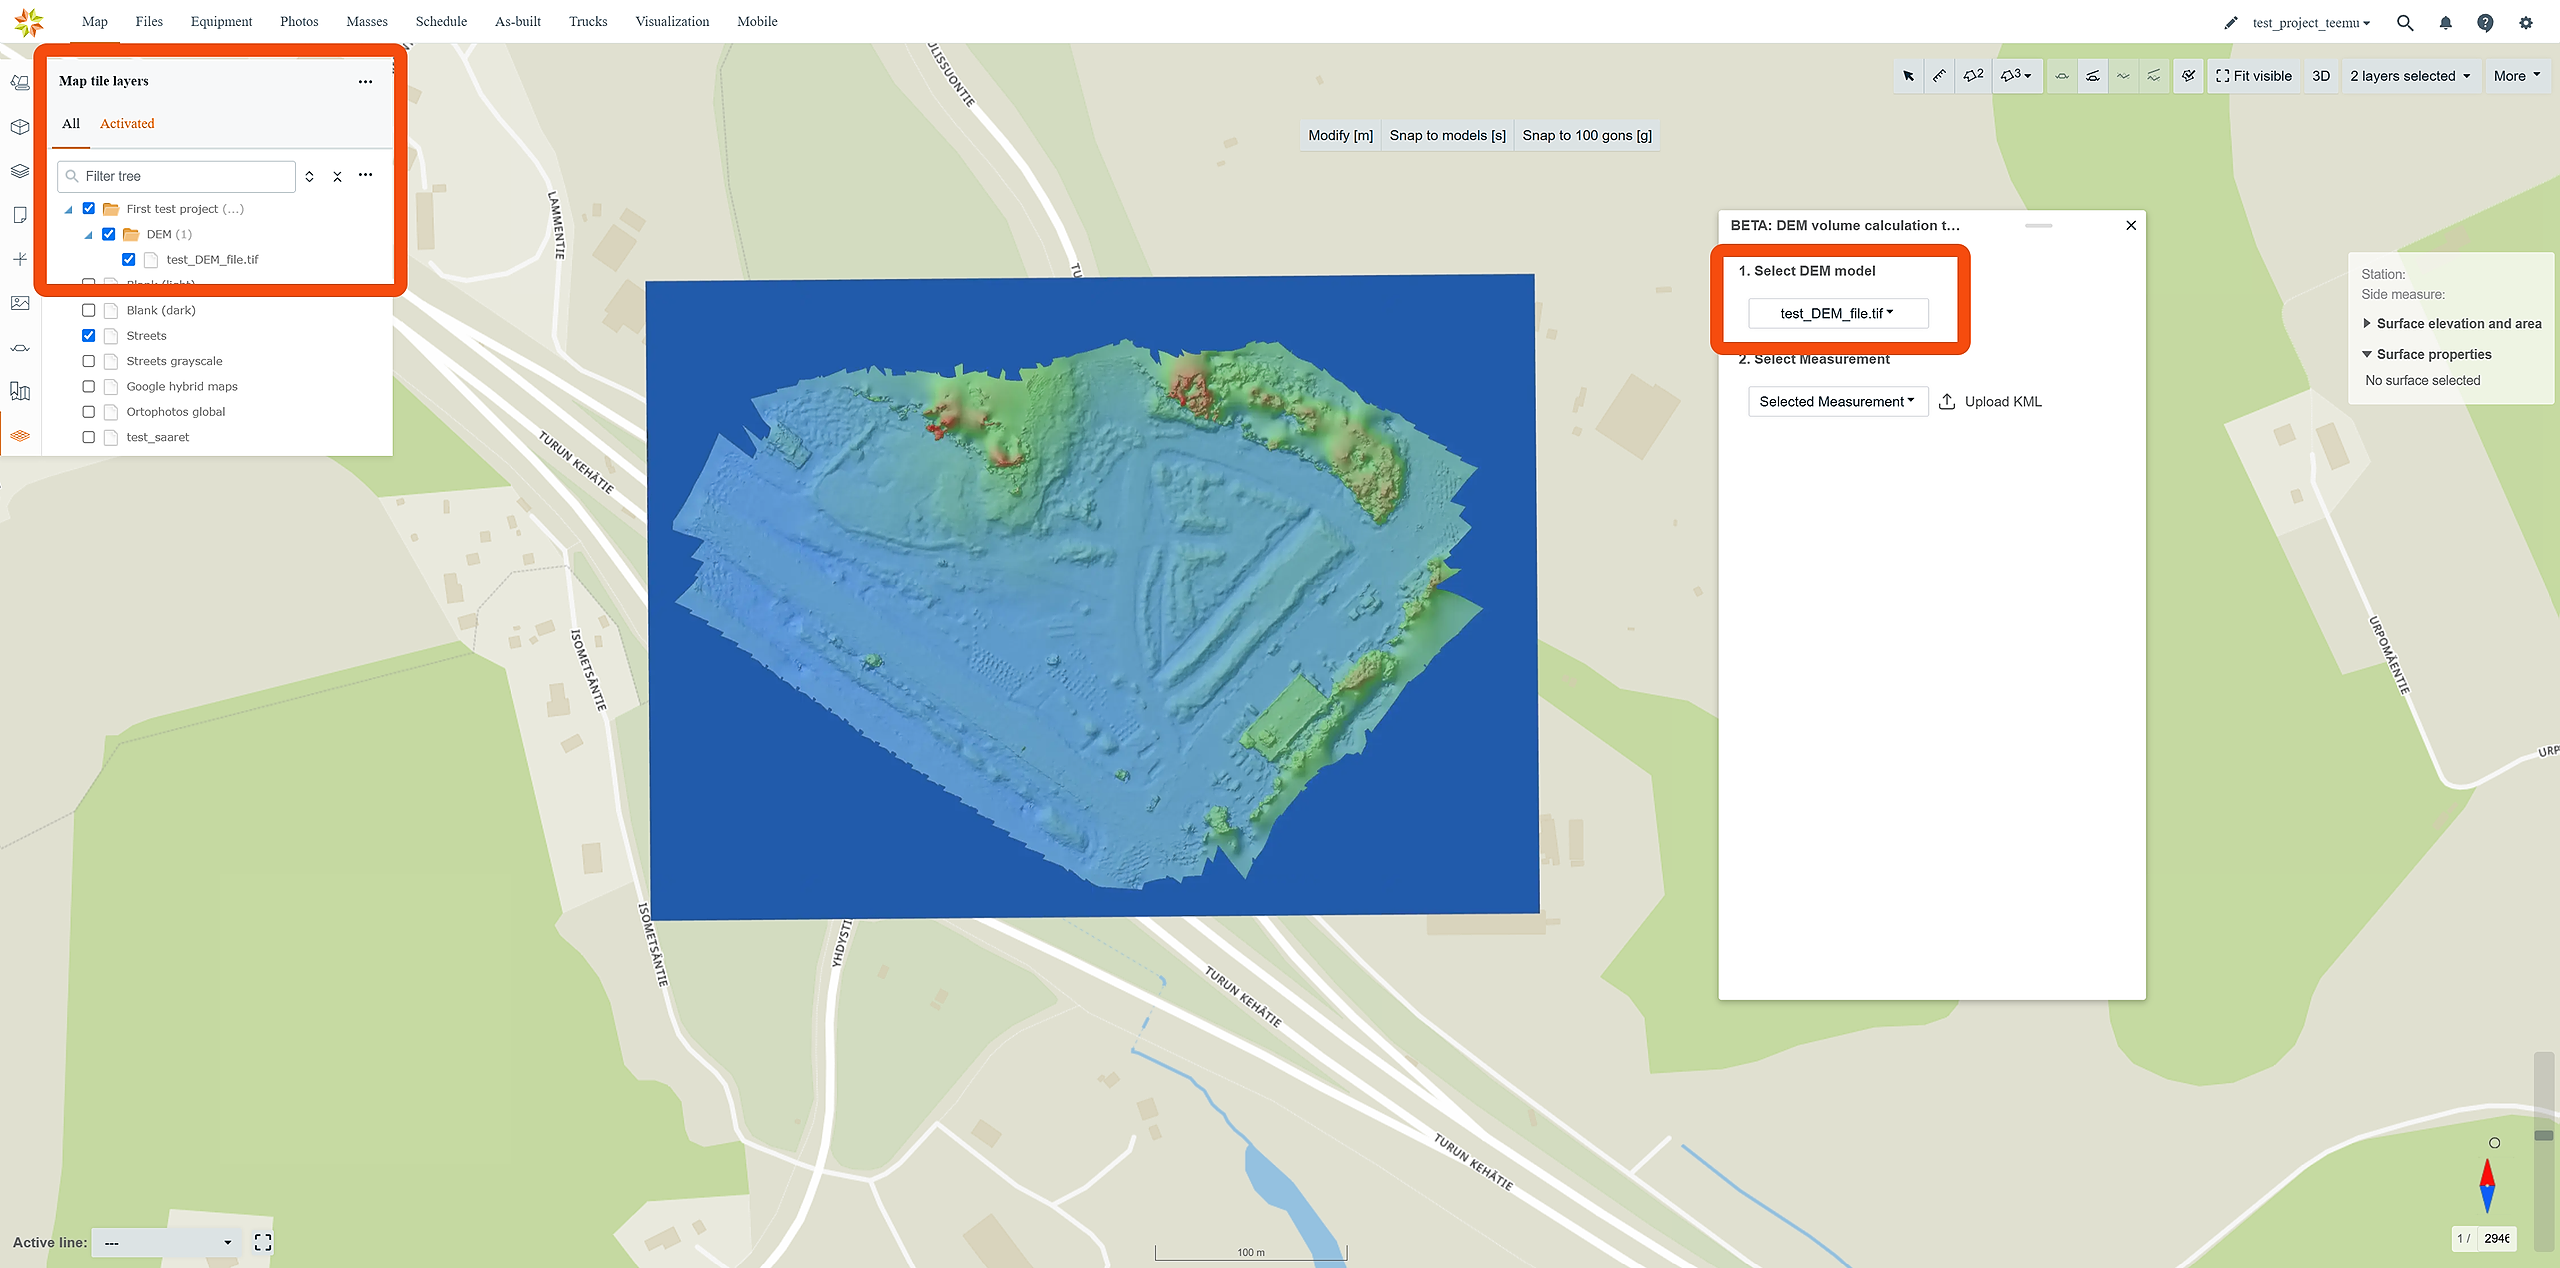
From the "Select DEM model" dropdown, choose the DEM model for the calculation.
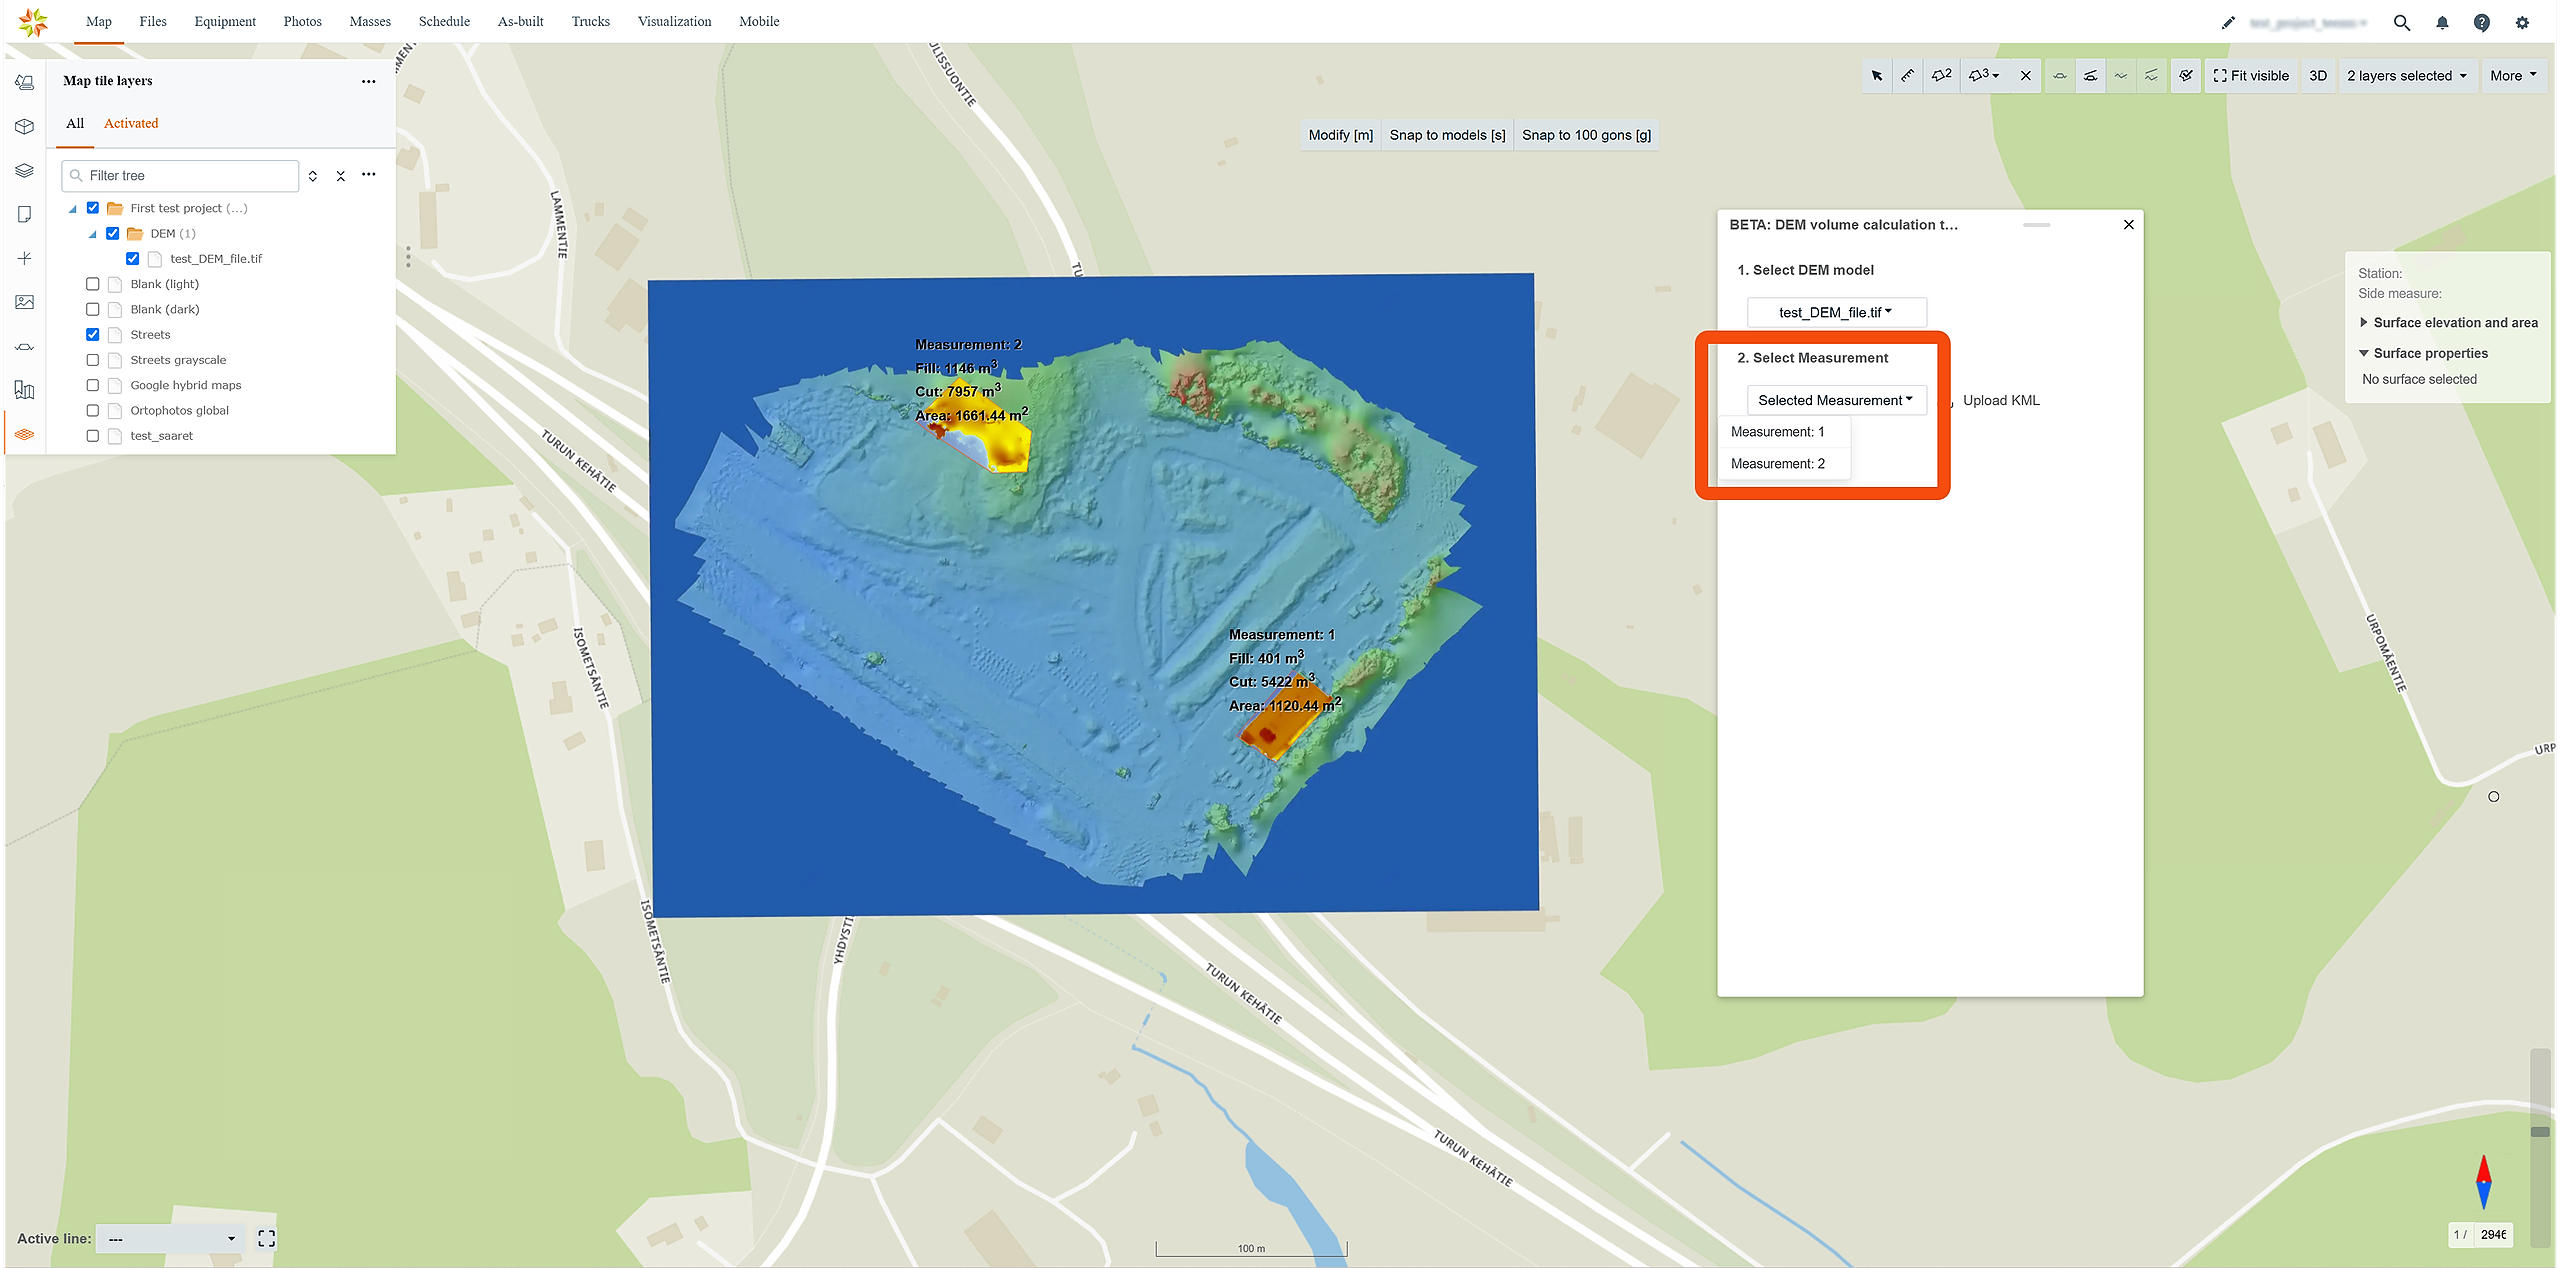
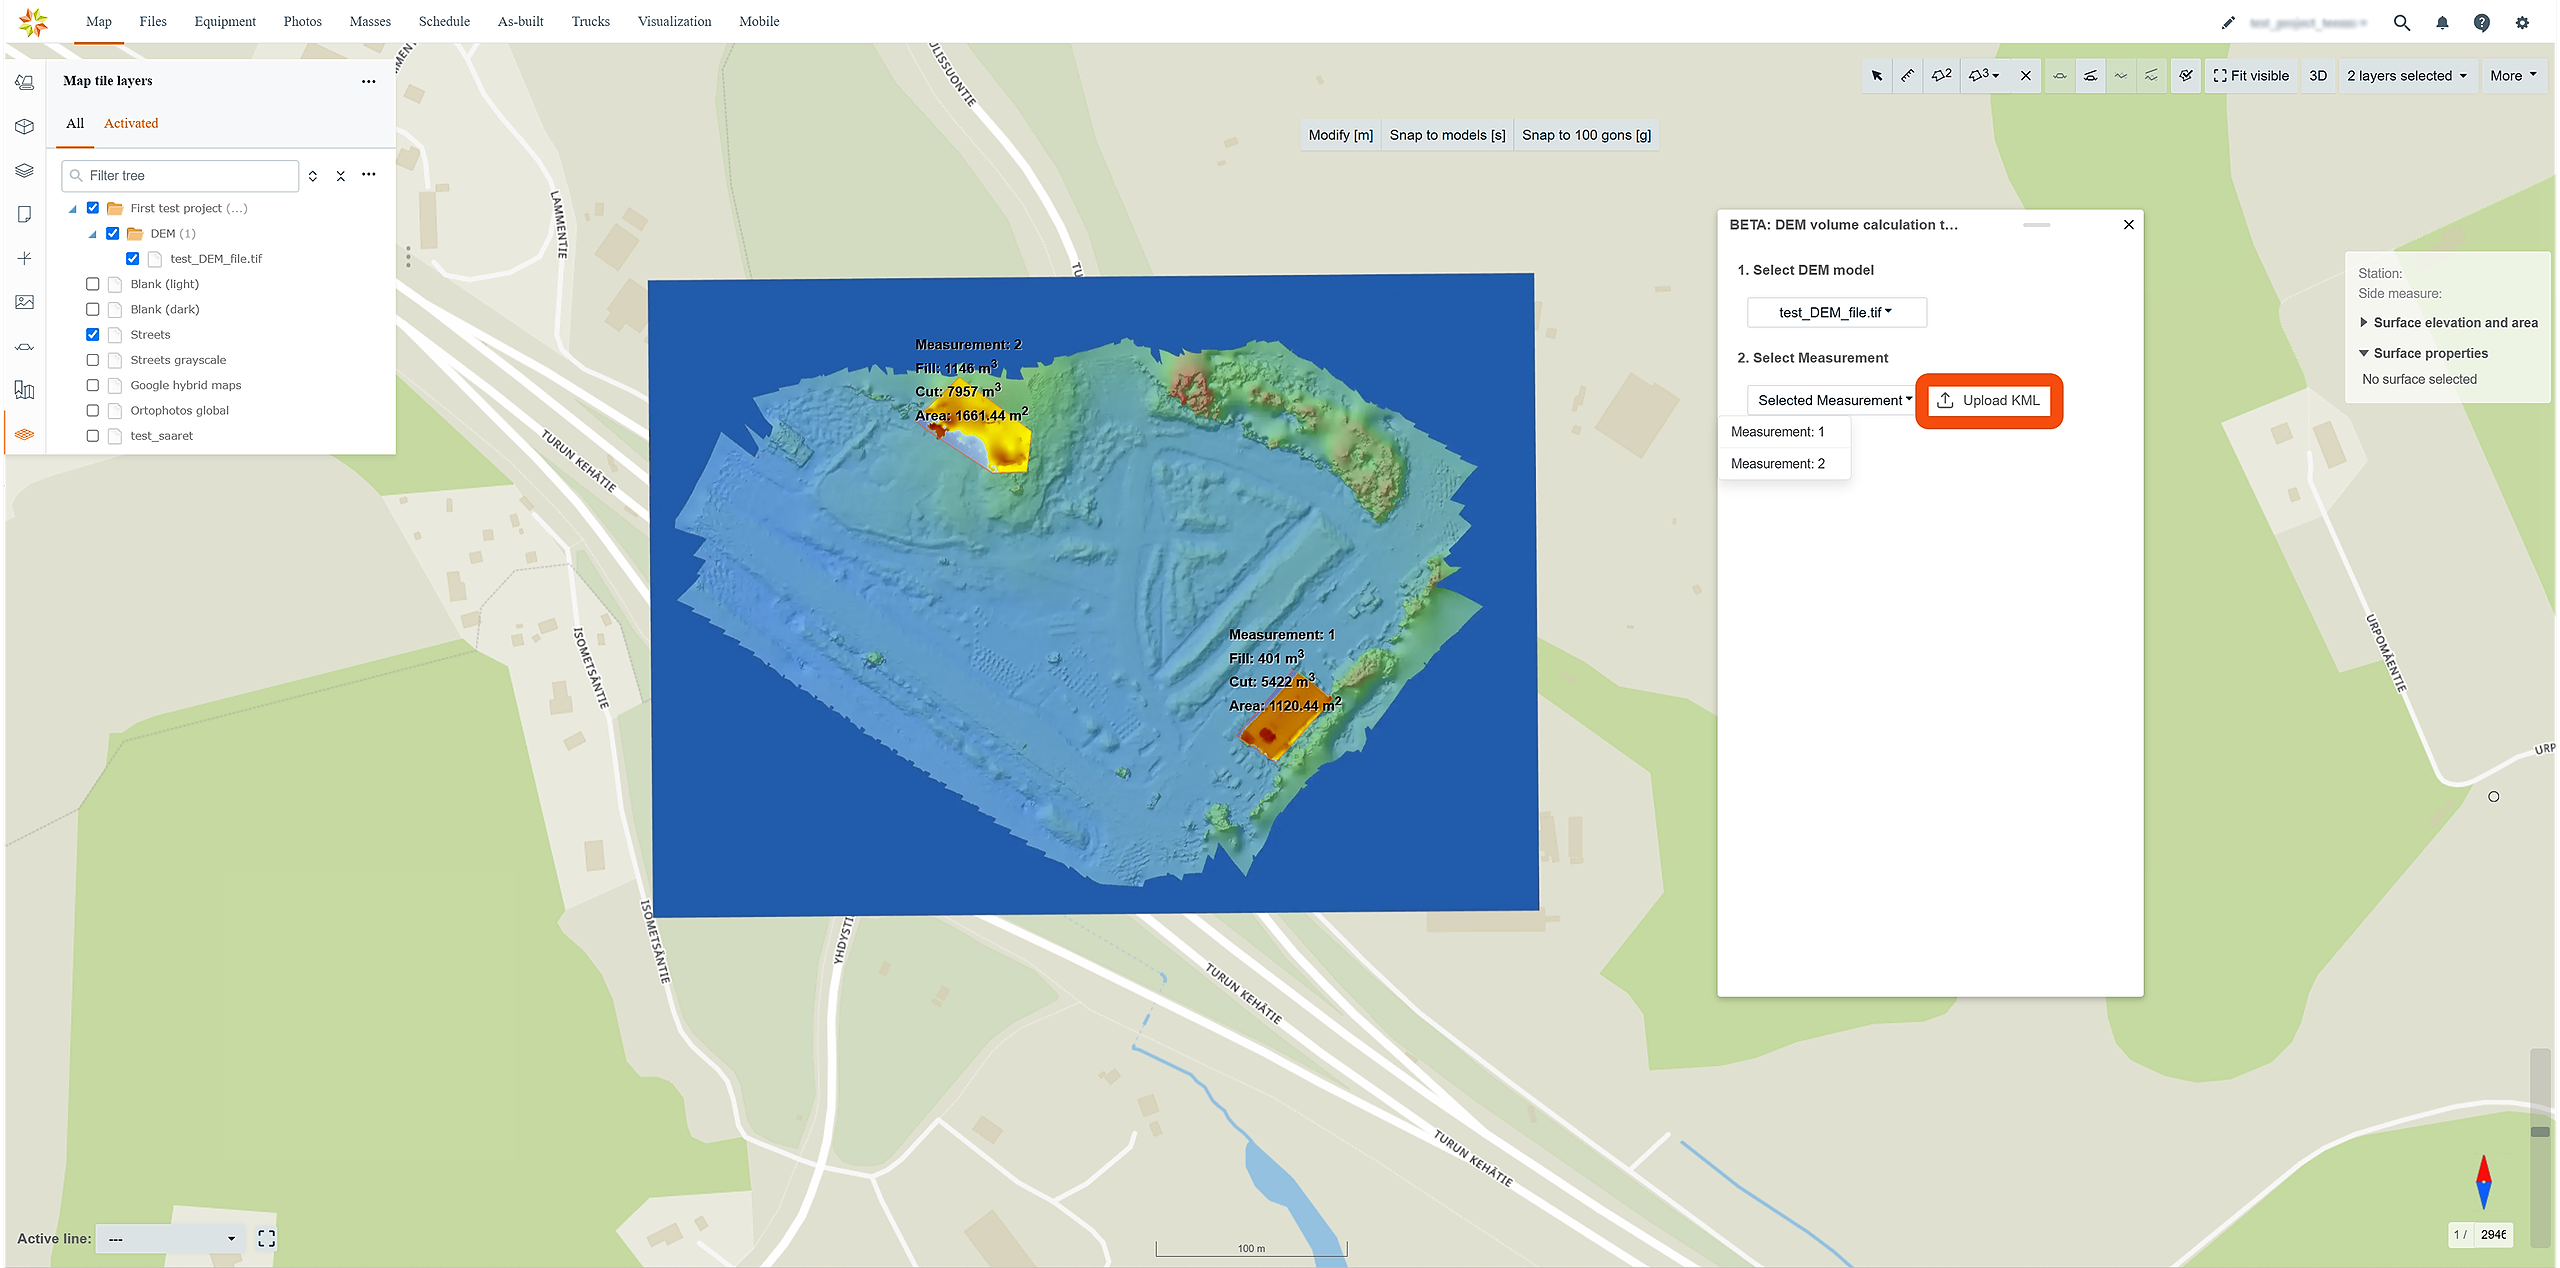
In the "Select Measurement" dropdown, select an measurement area or click "Upload KML" to upload a KML file as a measurement area.
3. Selecting DEM Model
Activate the DEM model from the "Map tile layers" tab and select the model from the "Select DEM model" drop-down box.
4. Drawing Areas
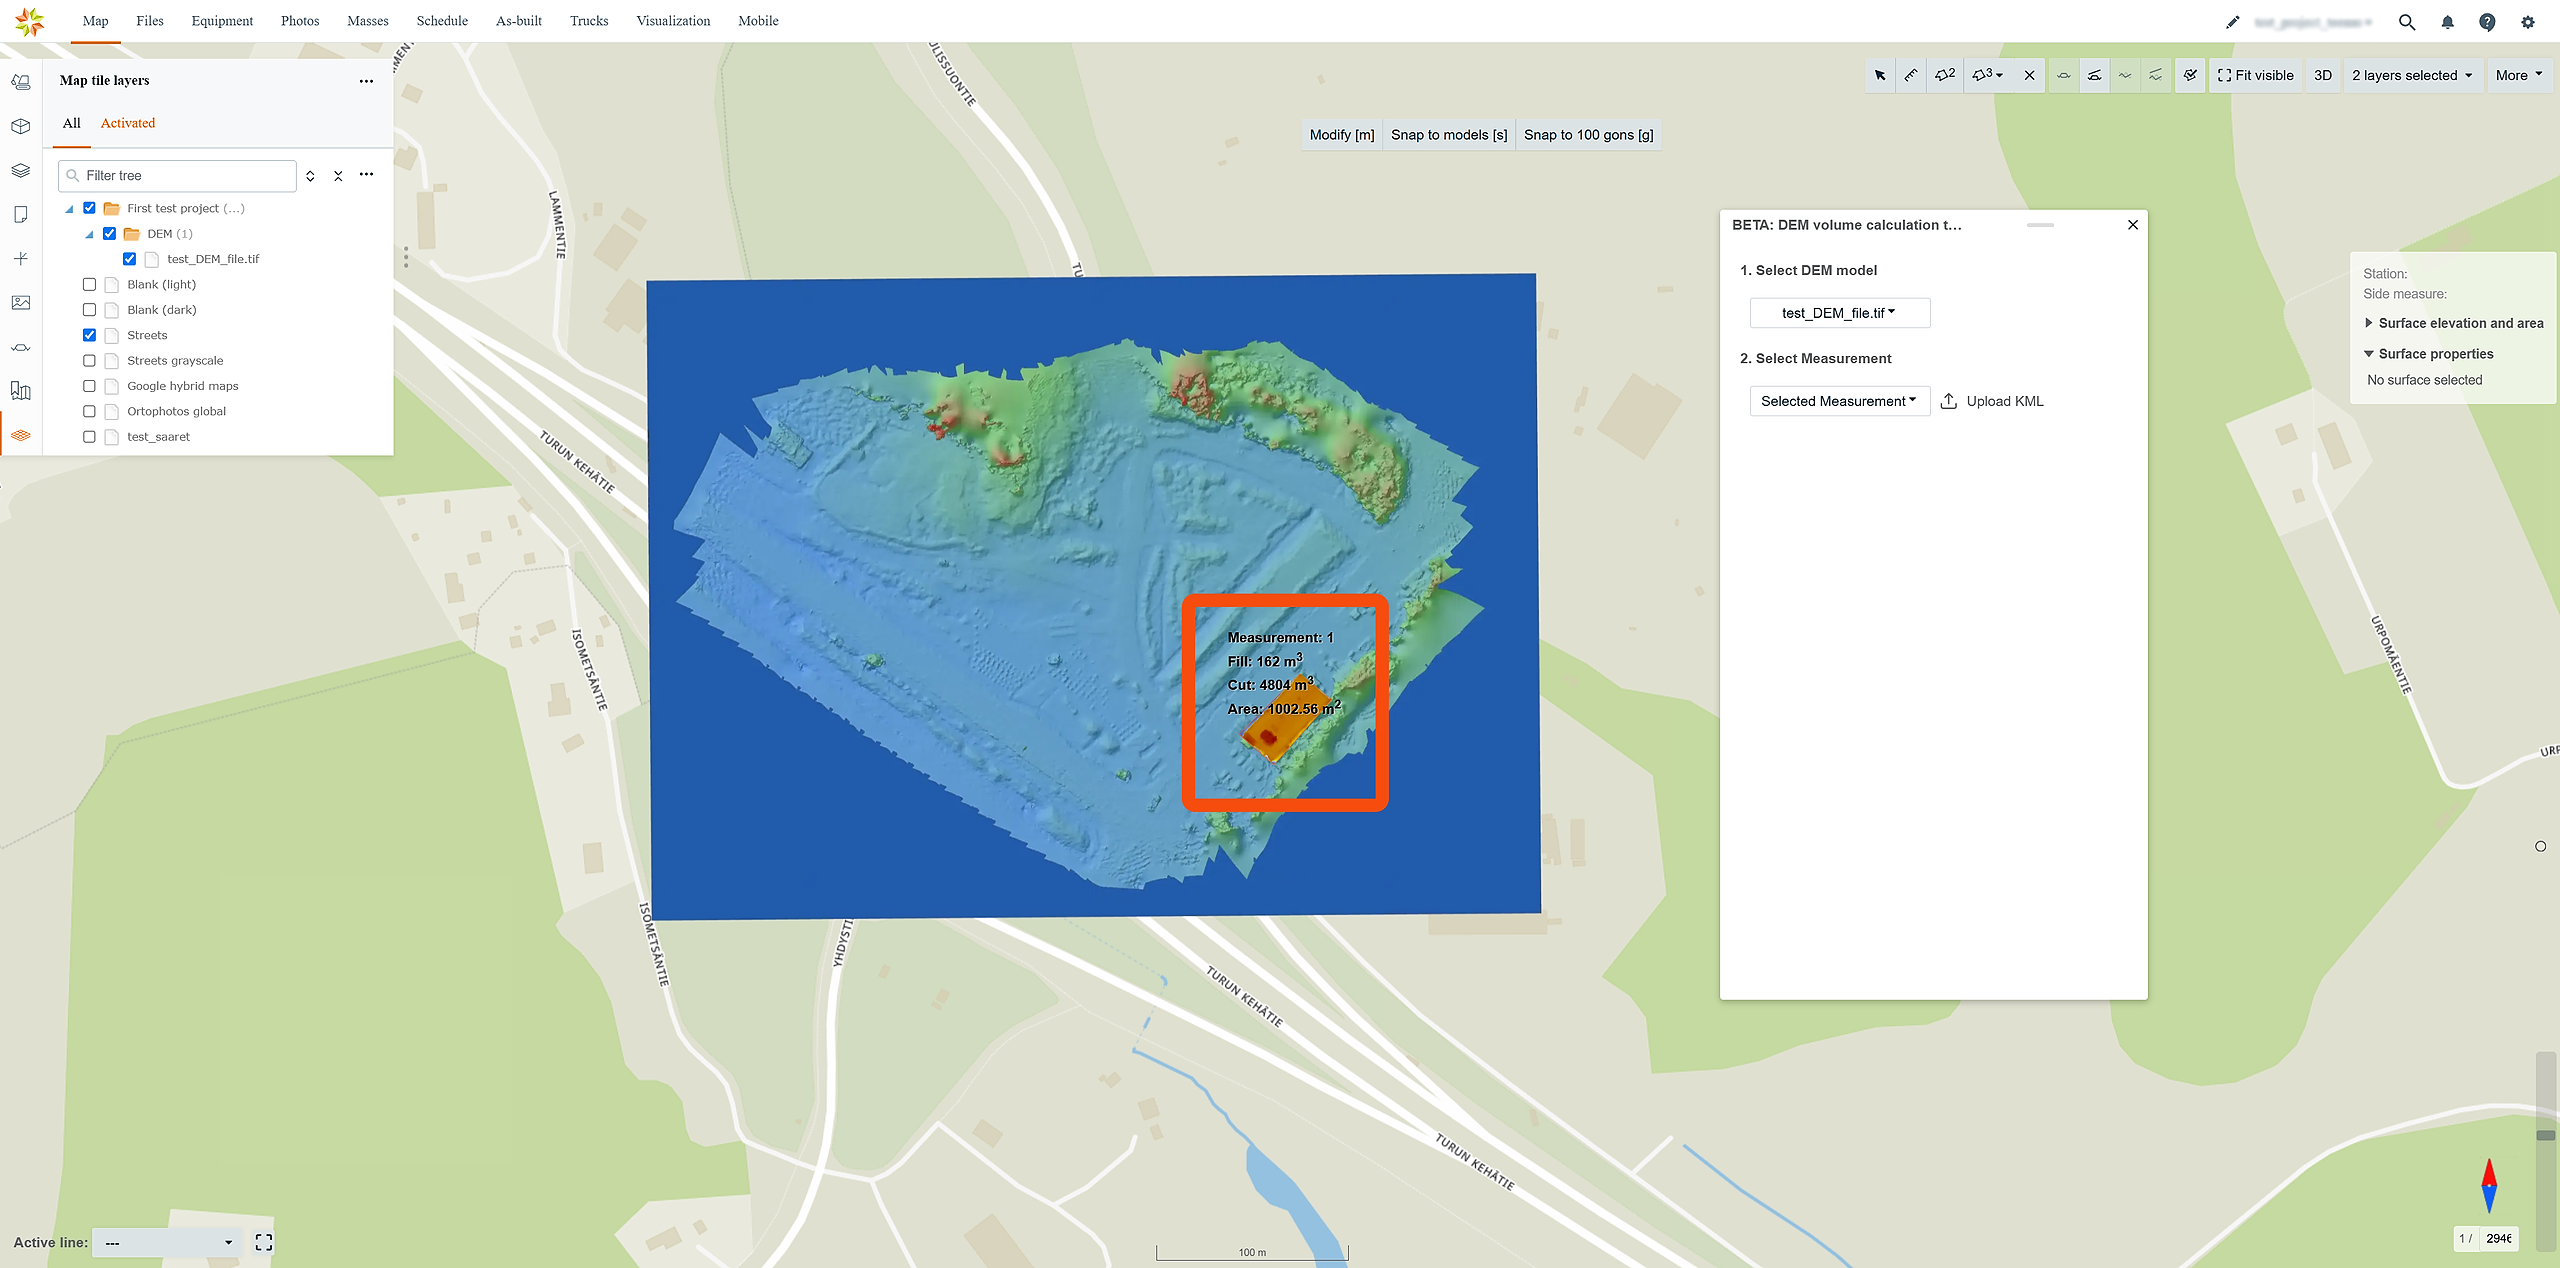
Draw an Area: After selecting the DEM model, draw an area on the map by clicking points. Double-click to close the area.
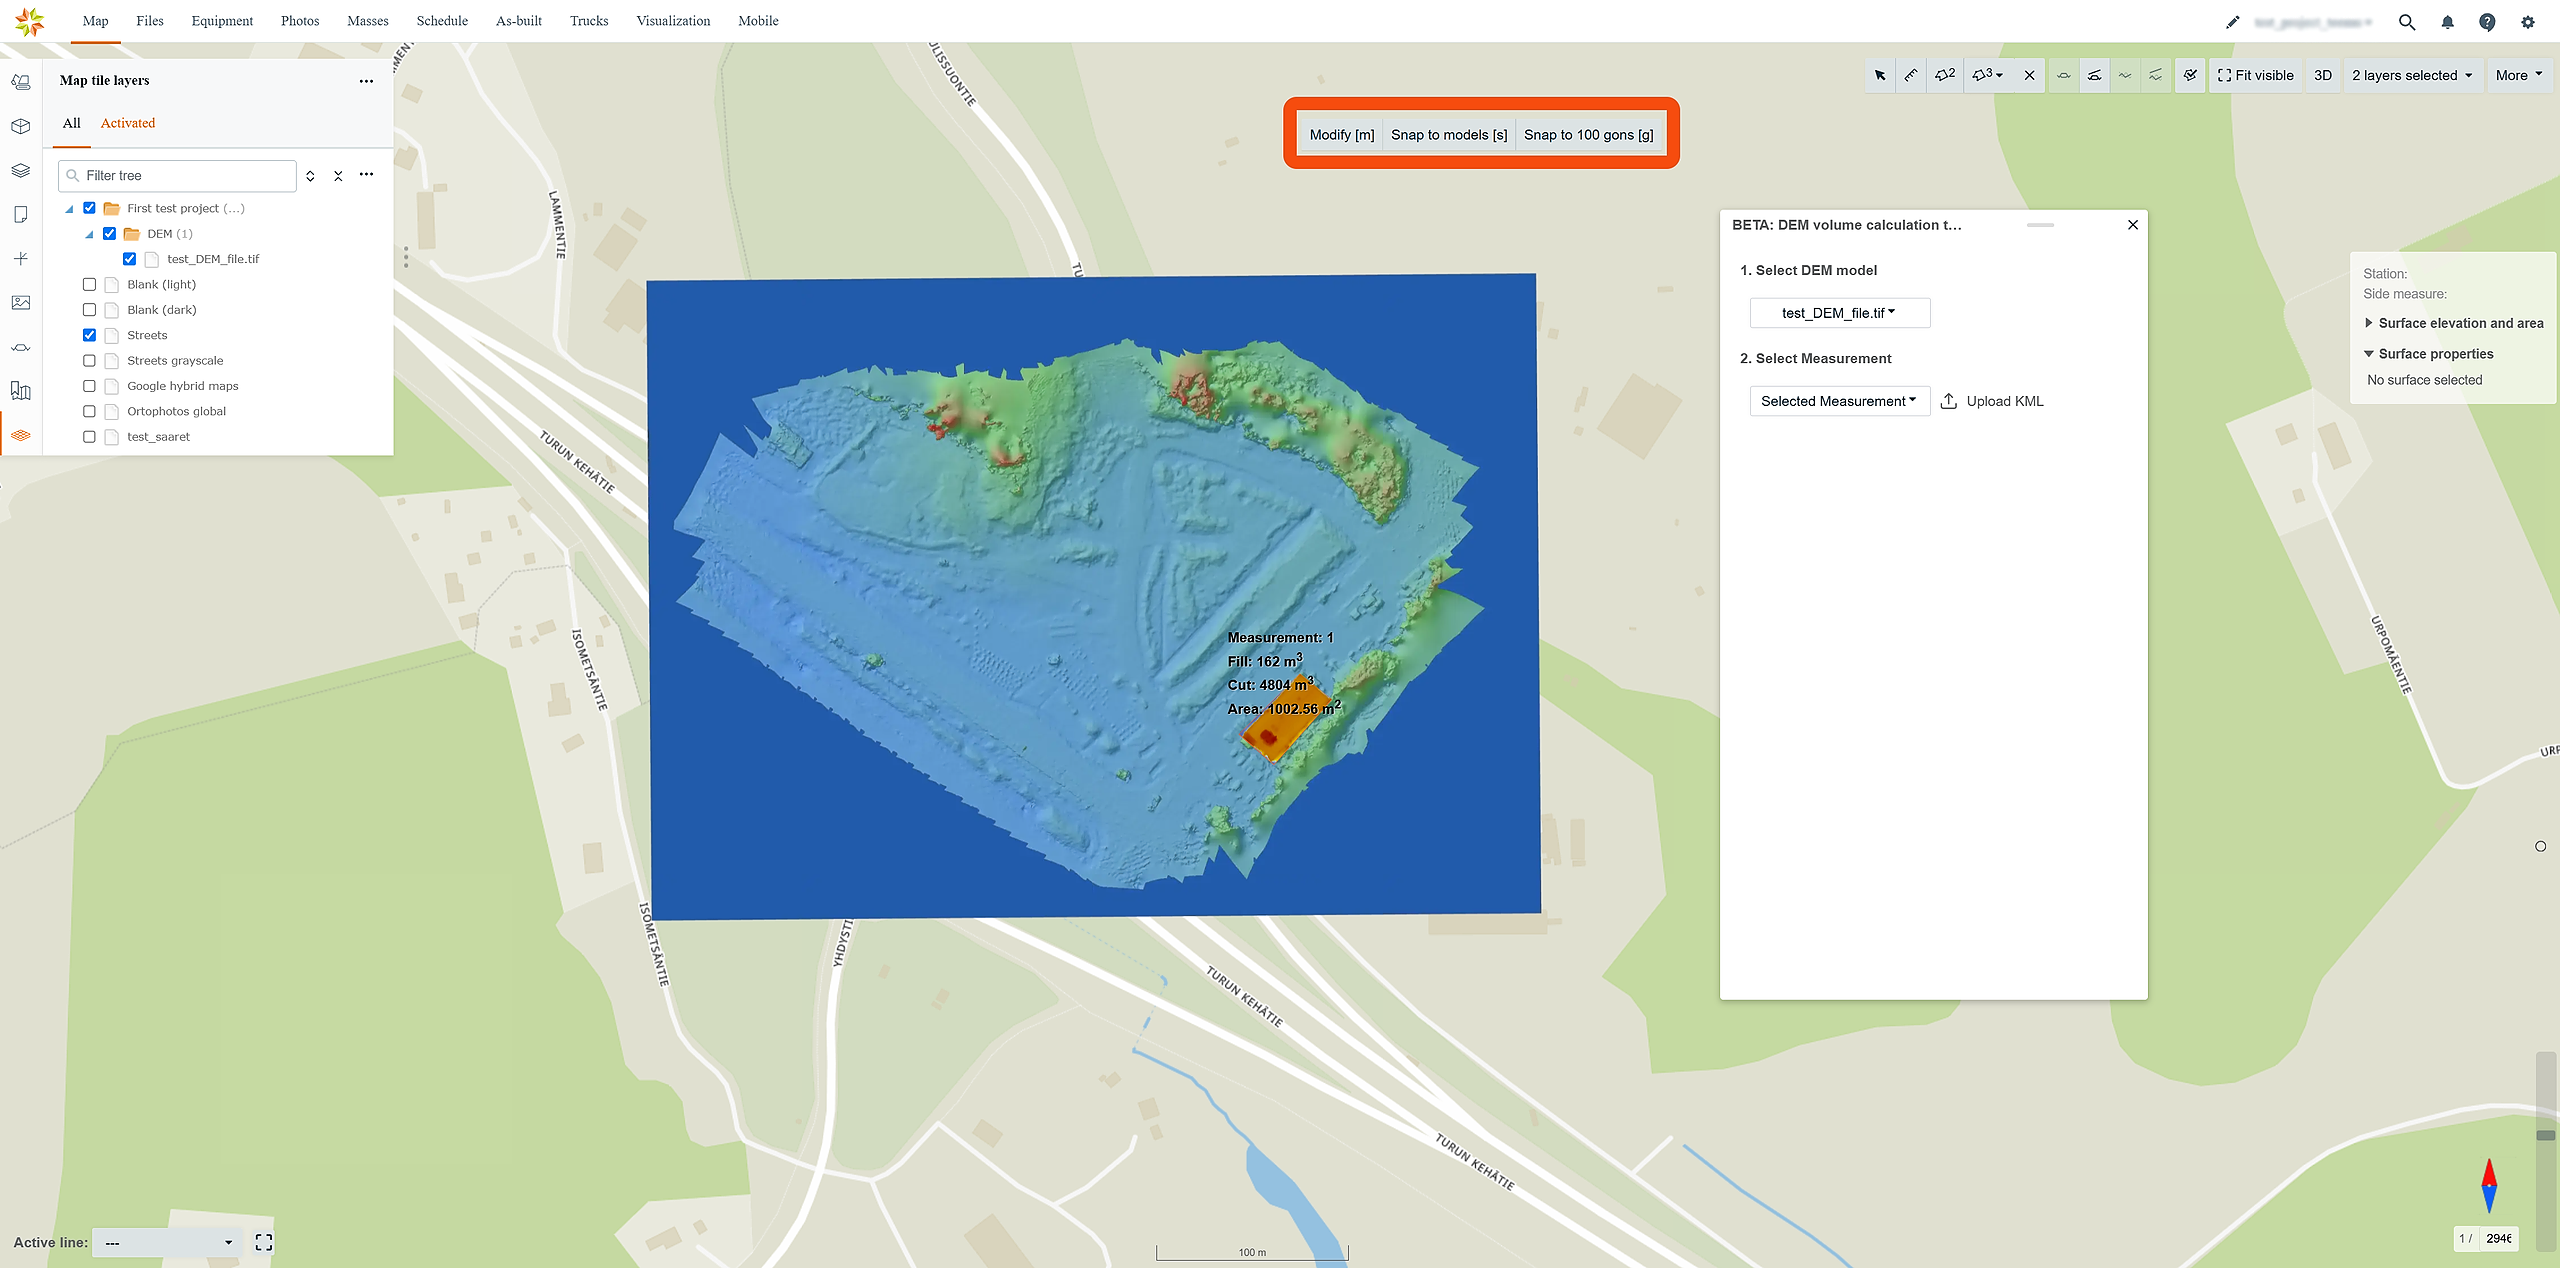
Drawing Tools:
Modify Tool: Click "Modify" to adjust already-drawn areas.
Snap Options:
Snap to Models: Click "Snap to Models" to snap to existing models while drawing areas.
Snap to 100 Gons: Click "Snap to 100 gons" to snap to 100 gons (90 degrees).
Each tool can also be activated from the keyboard, and the activation key is provided in the square brackets [ ].
You can draw multiple areas, which will be numbered sequentially. Each area can be used independently in calculations.
You can also upload an existing KML file and use that as an area.
After a measurement area has been selected, the calculation information will be shown.
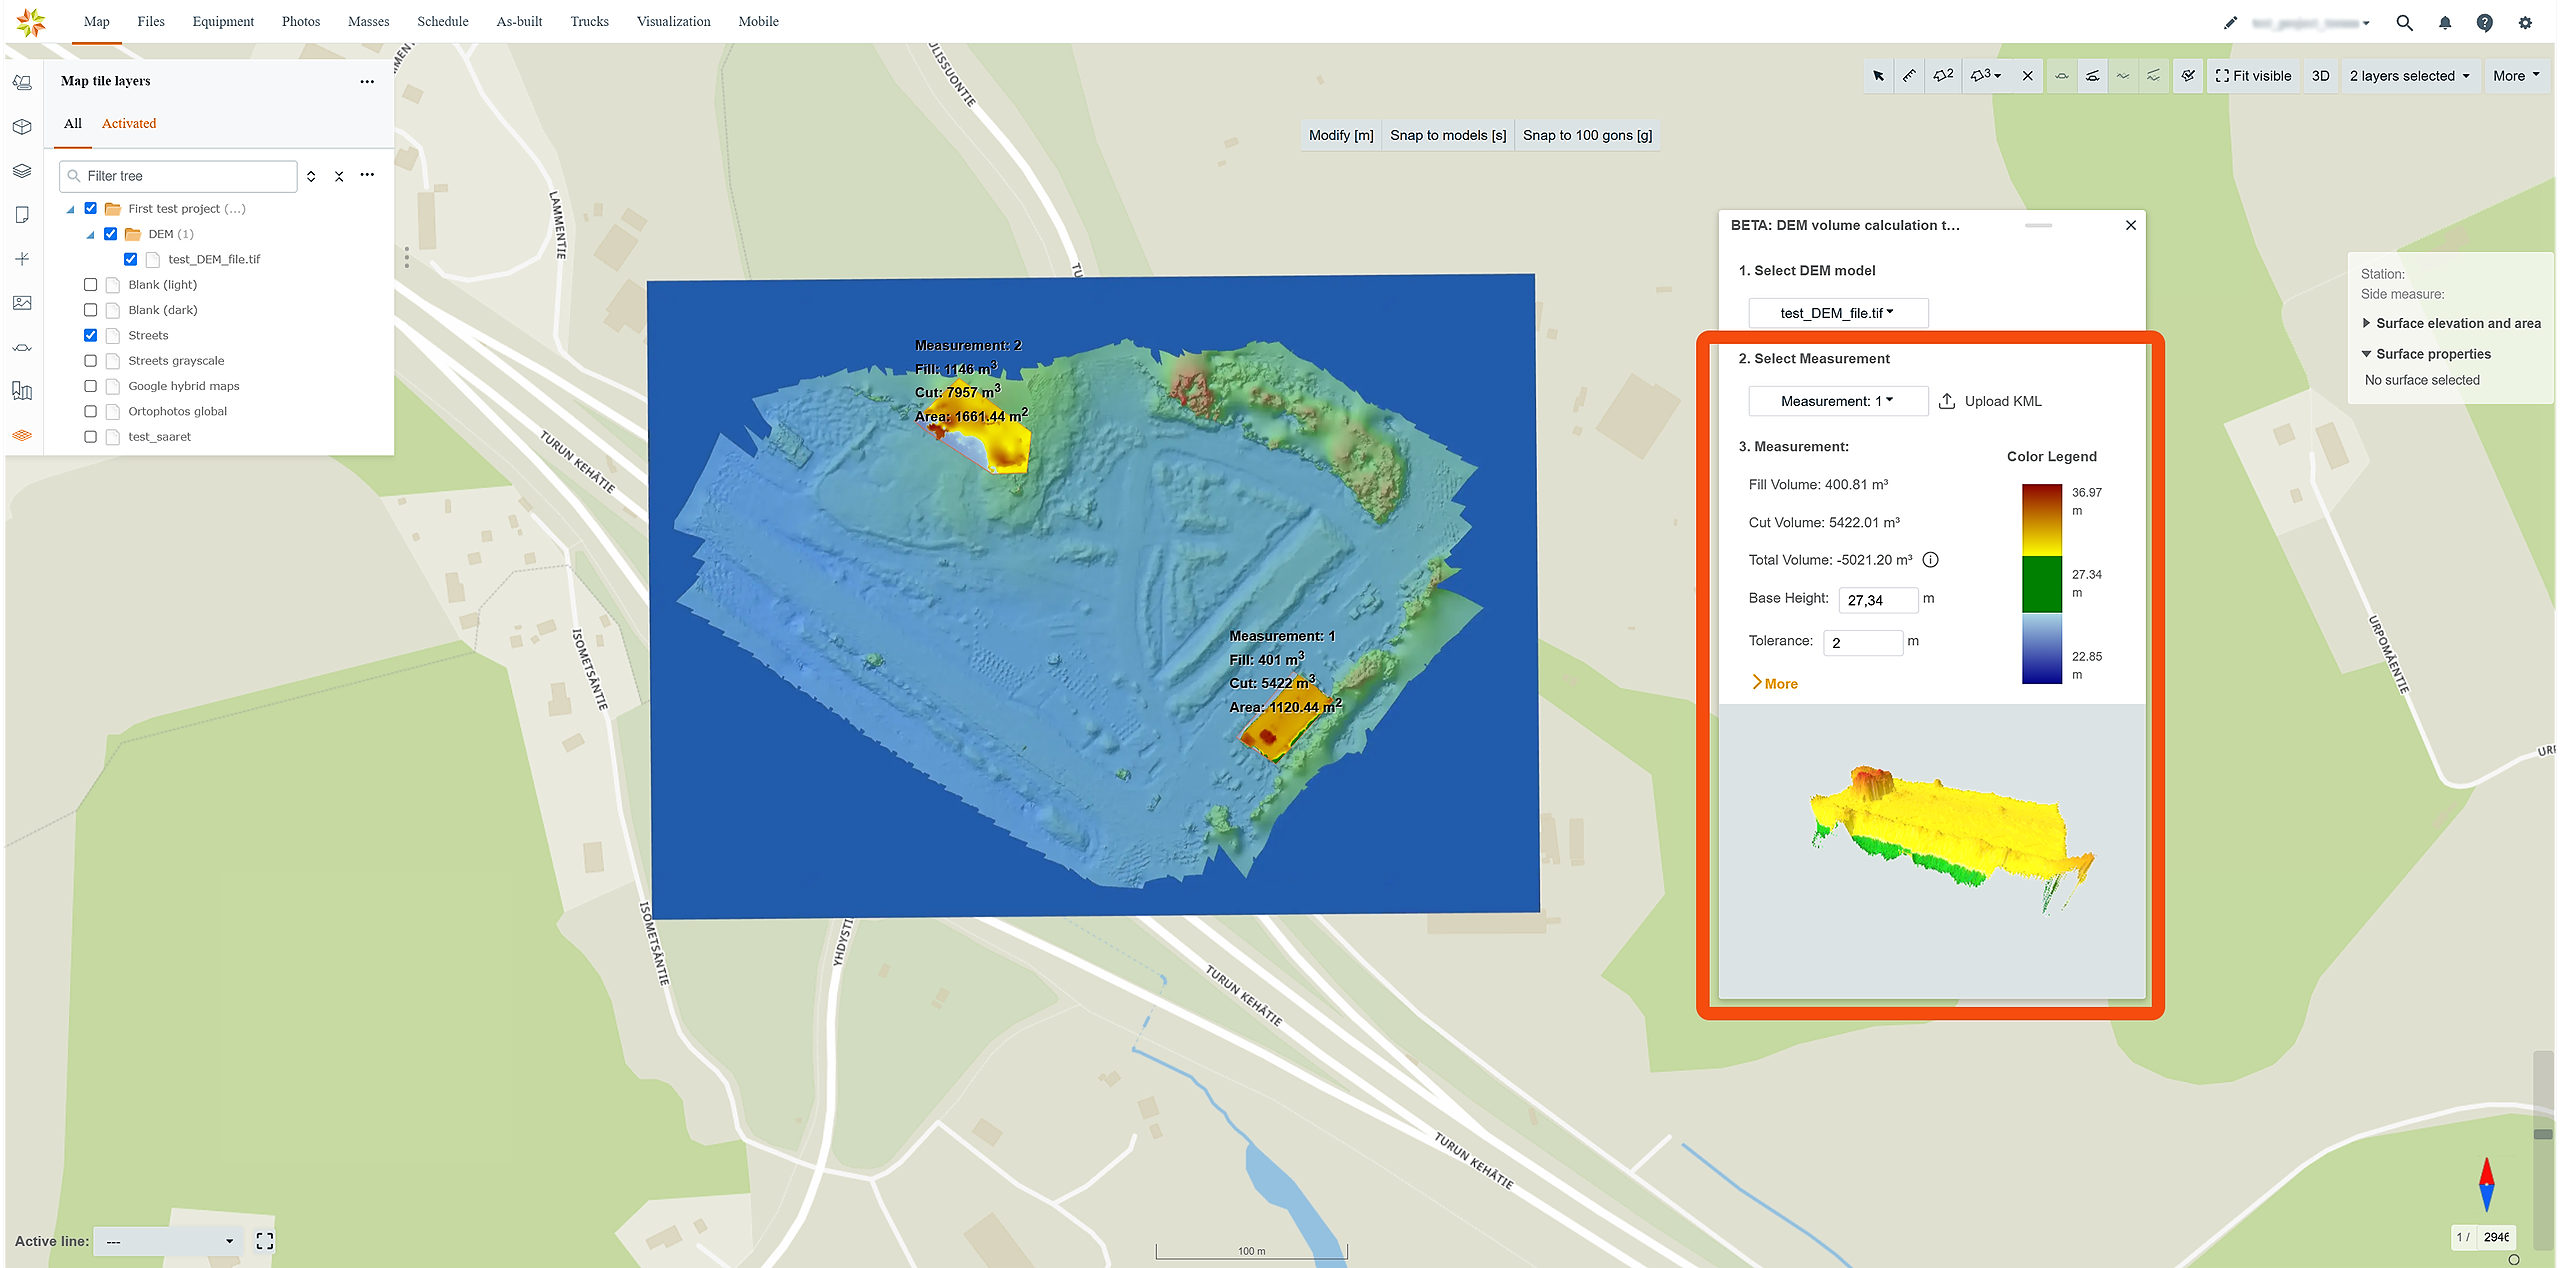
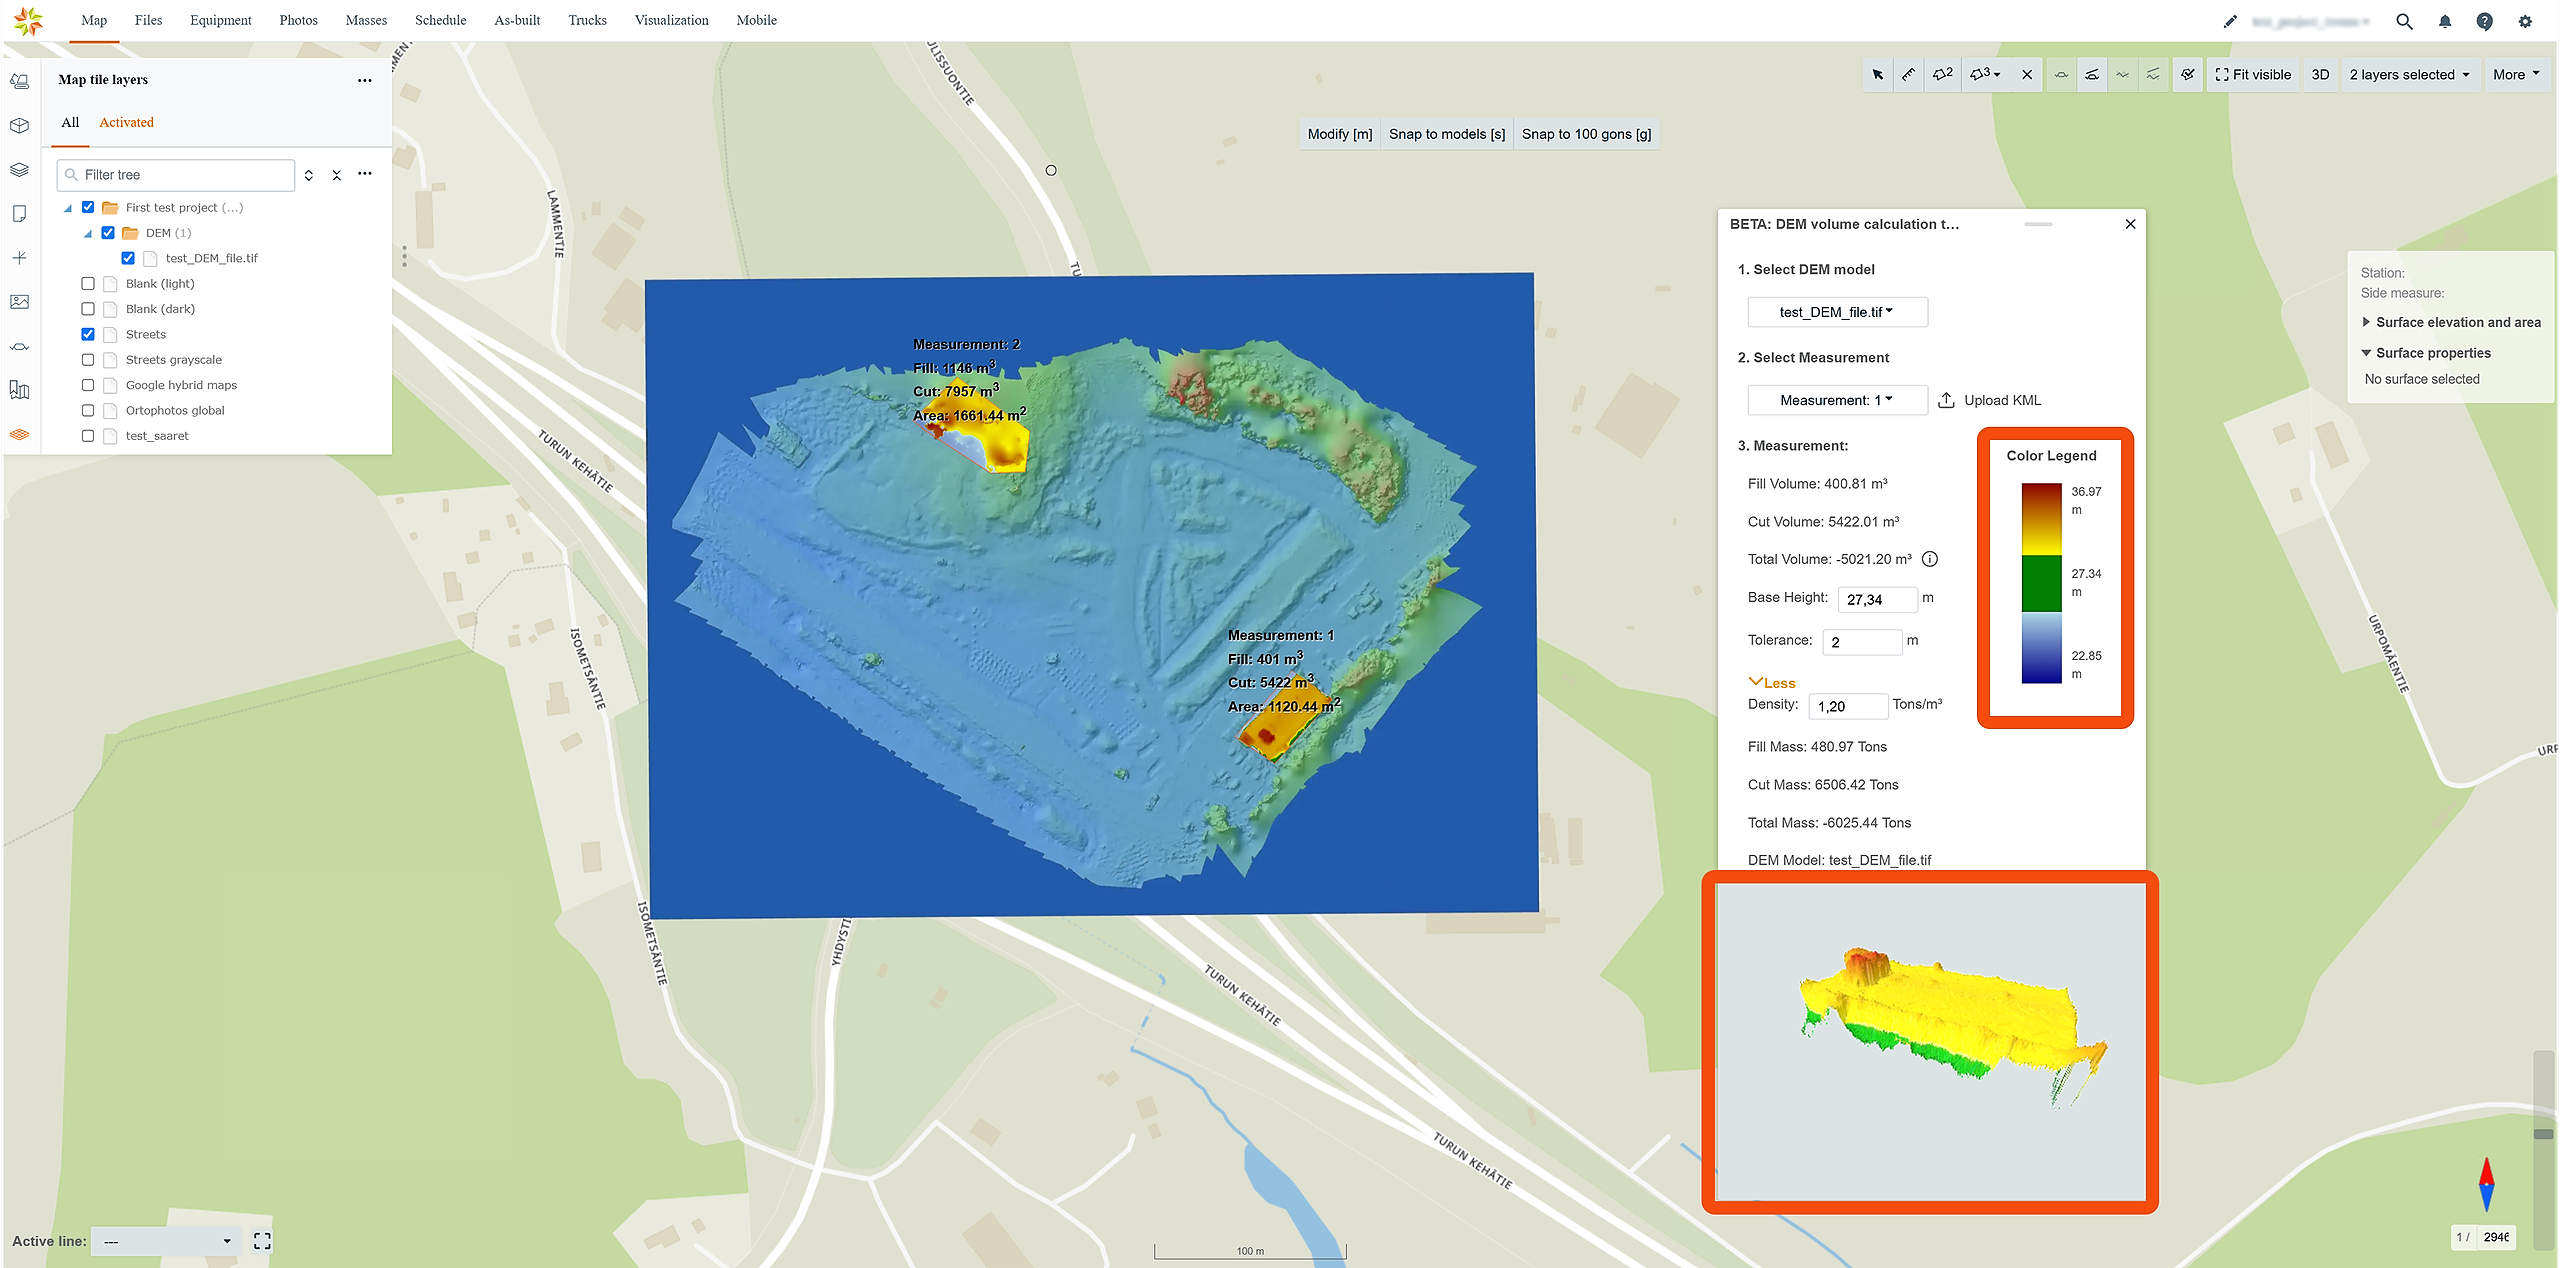
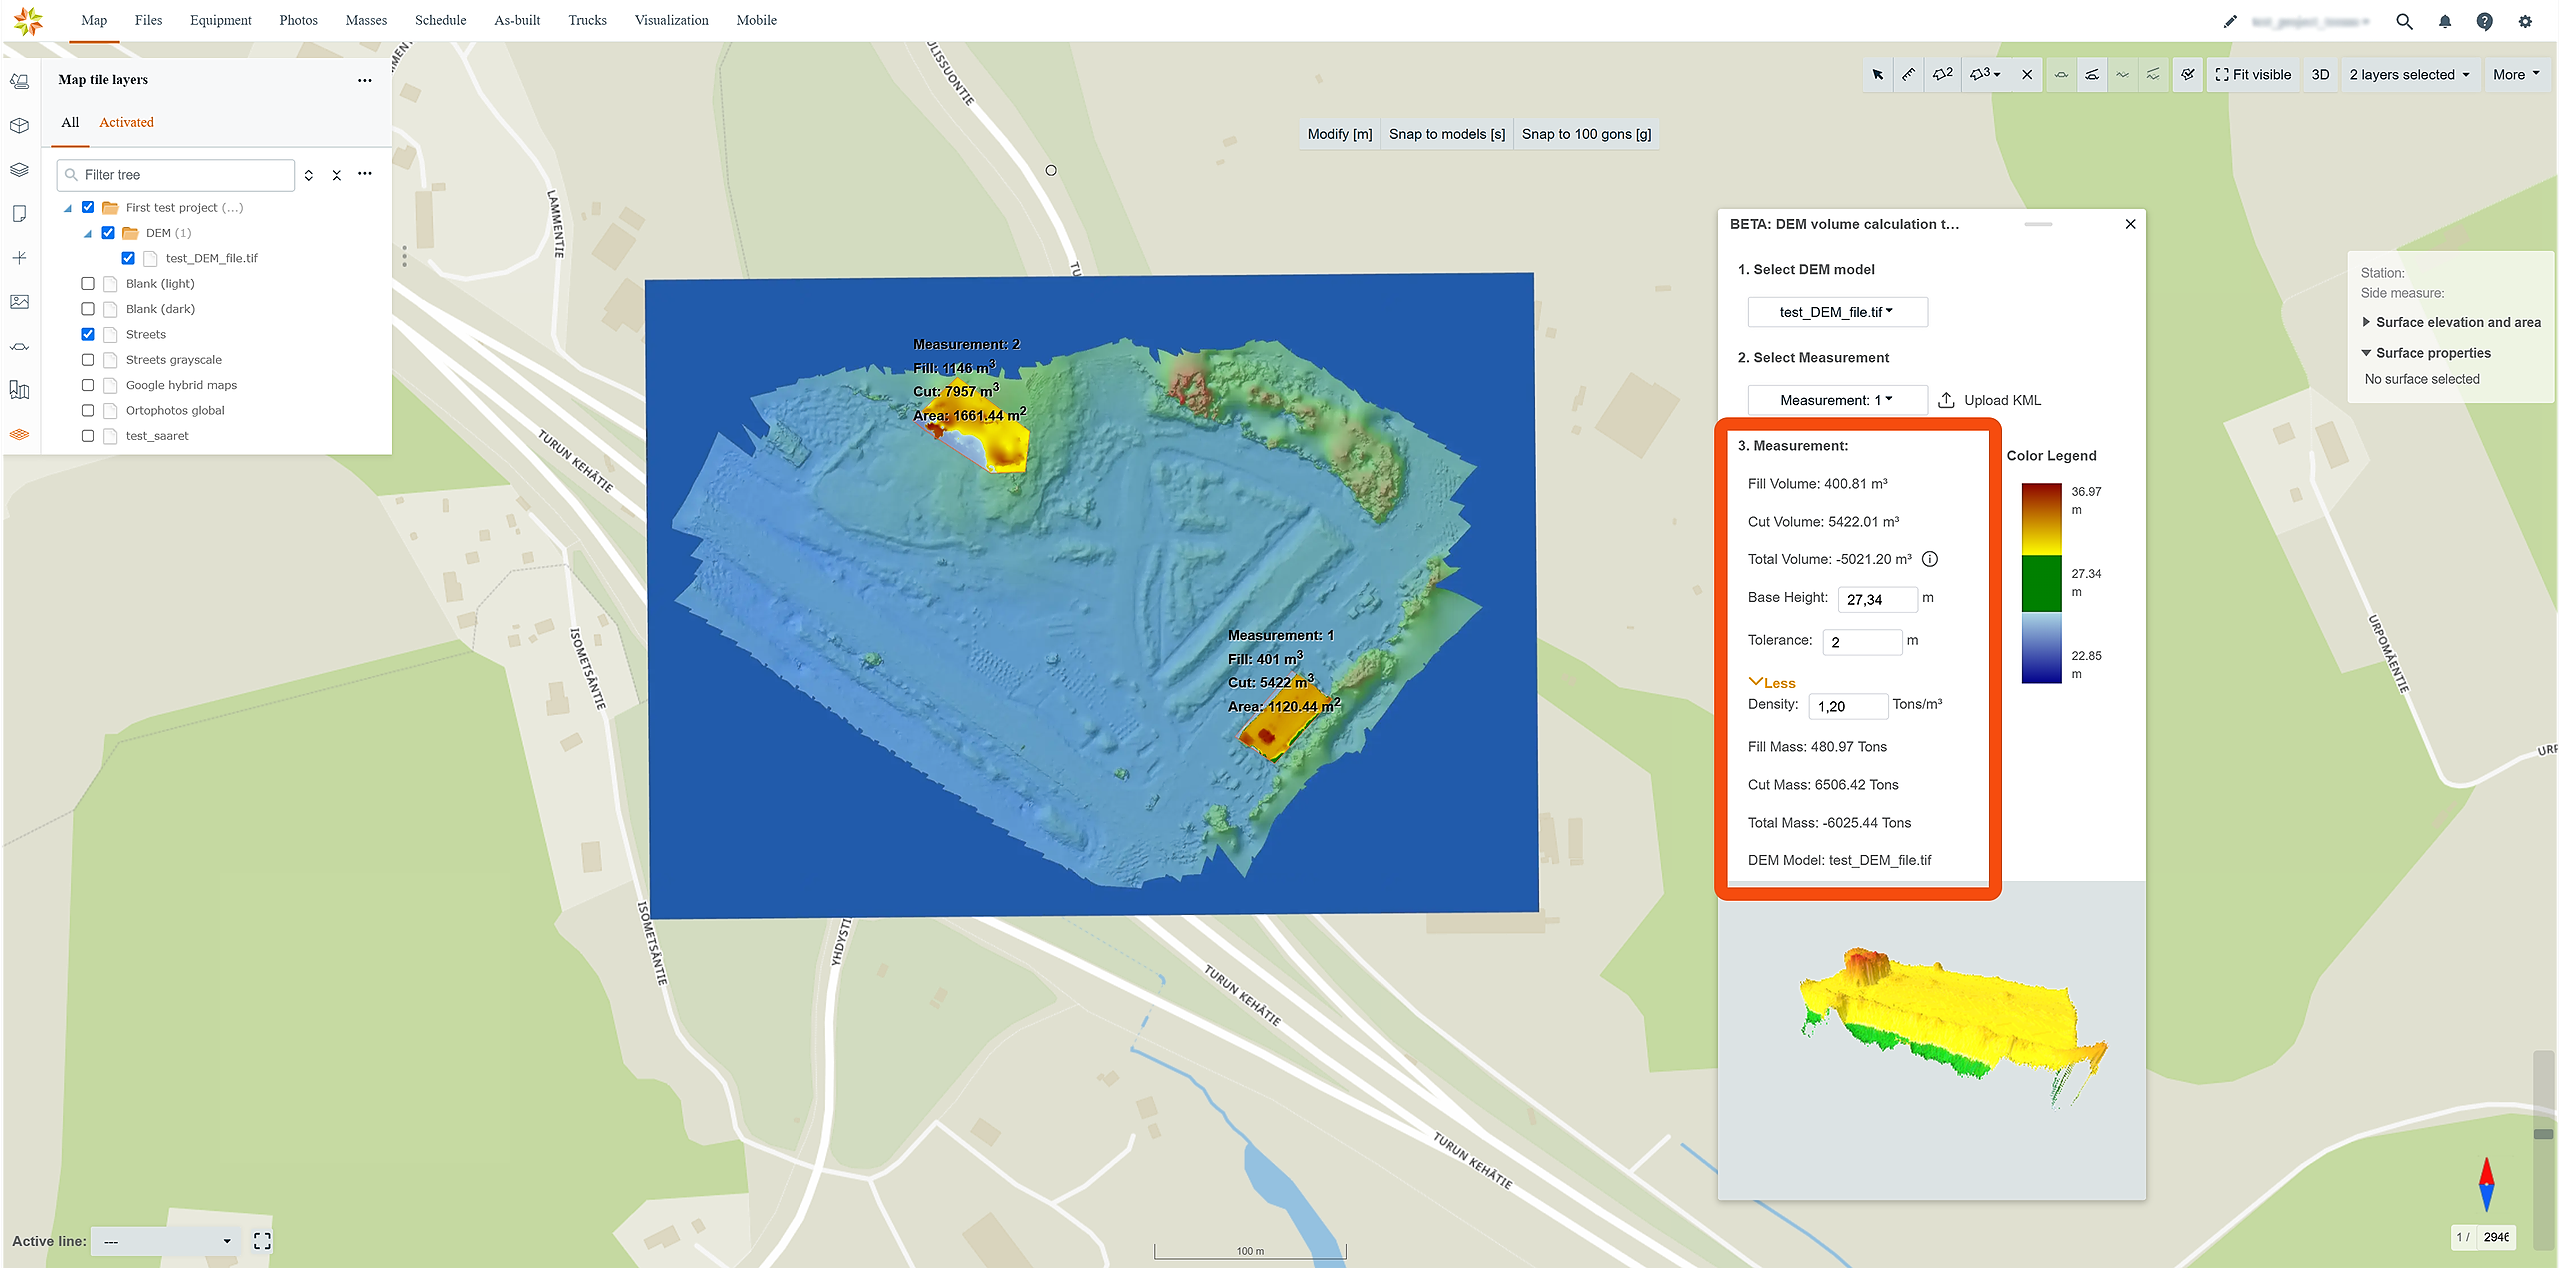
5. Configuring Calculation Settings
Base Height: Adjust the base height for the calculation in the "Base Height" bar.
Tolerance: Set the tolerance to exclude mass within a specified range from cut/fill calculations.
Density (Optional): Expand the box by clicking "> More" and set density for the mass in the calculation.

6. Color Legend
A color-coded legend shows the required cut and fill. The green color indicates the mass is within tolerance and won't be regarded in cut and fill calculations.
At the bottom of the box, these colors are also visualized with the DEM model.
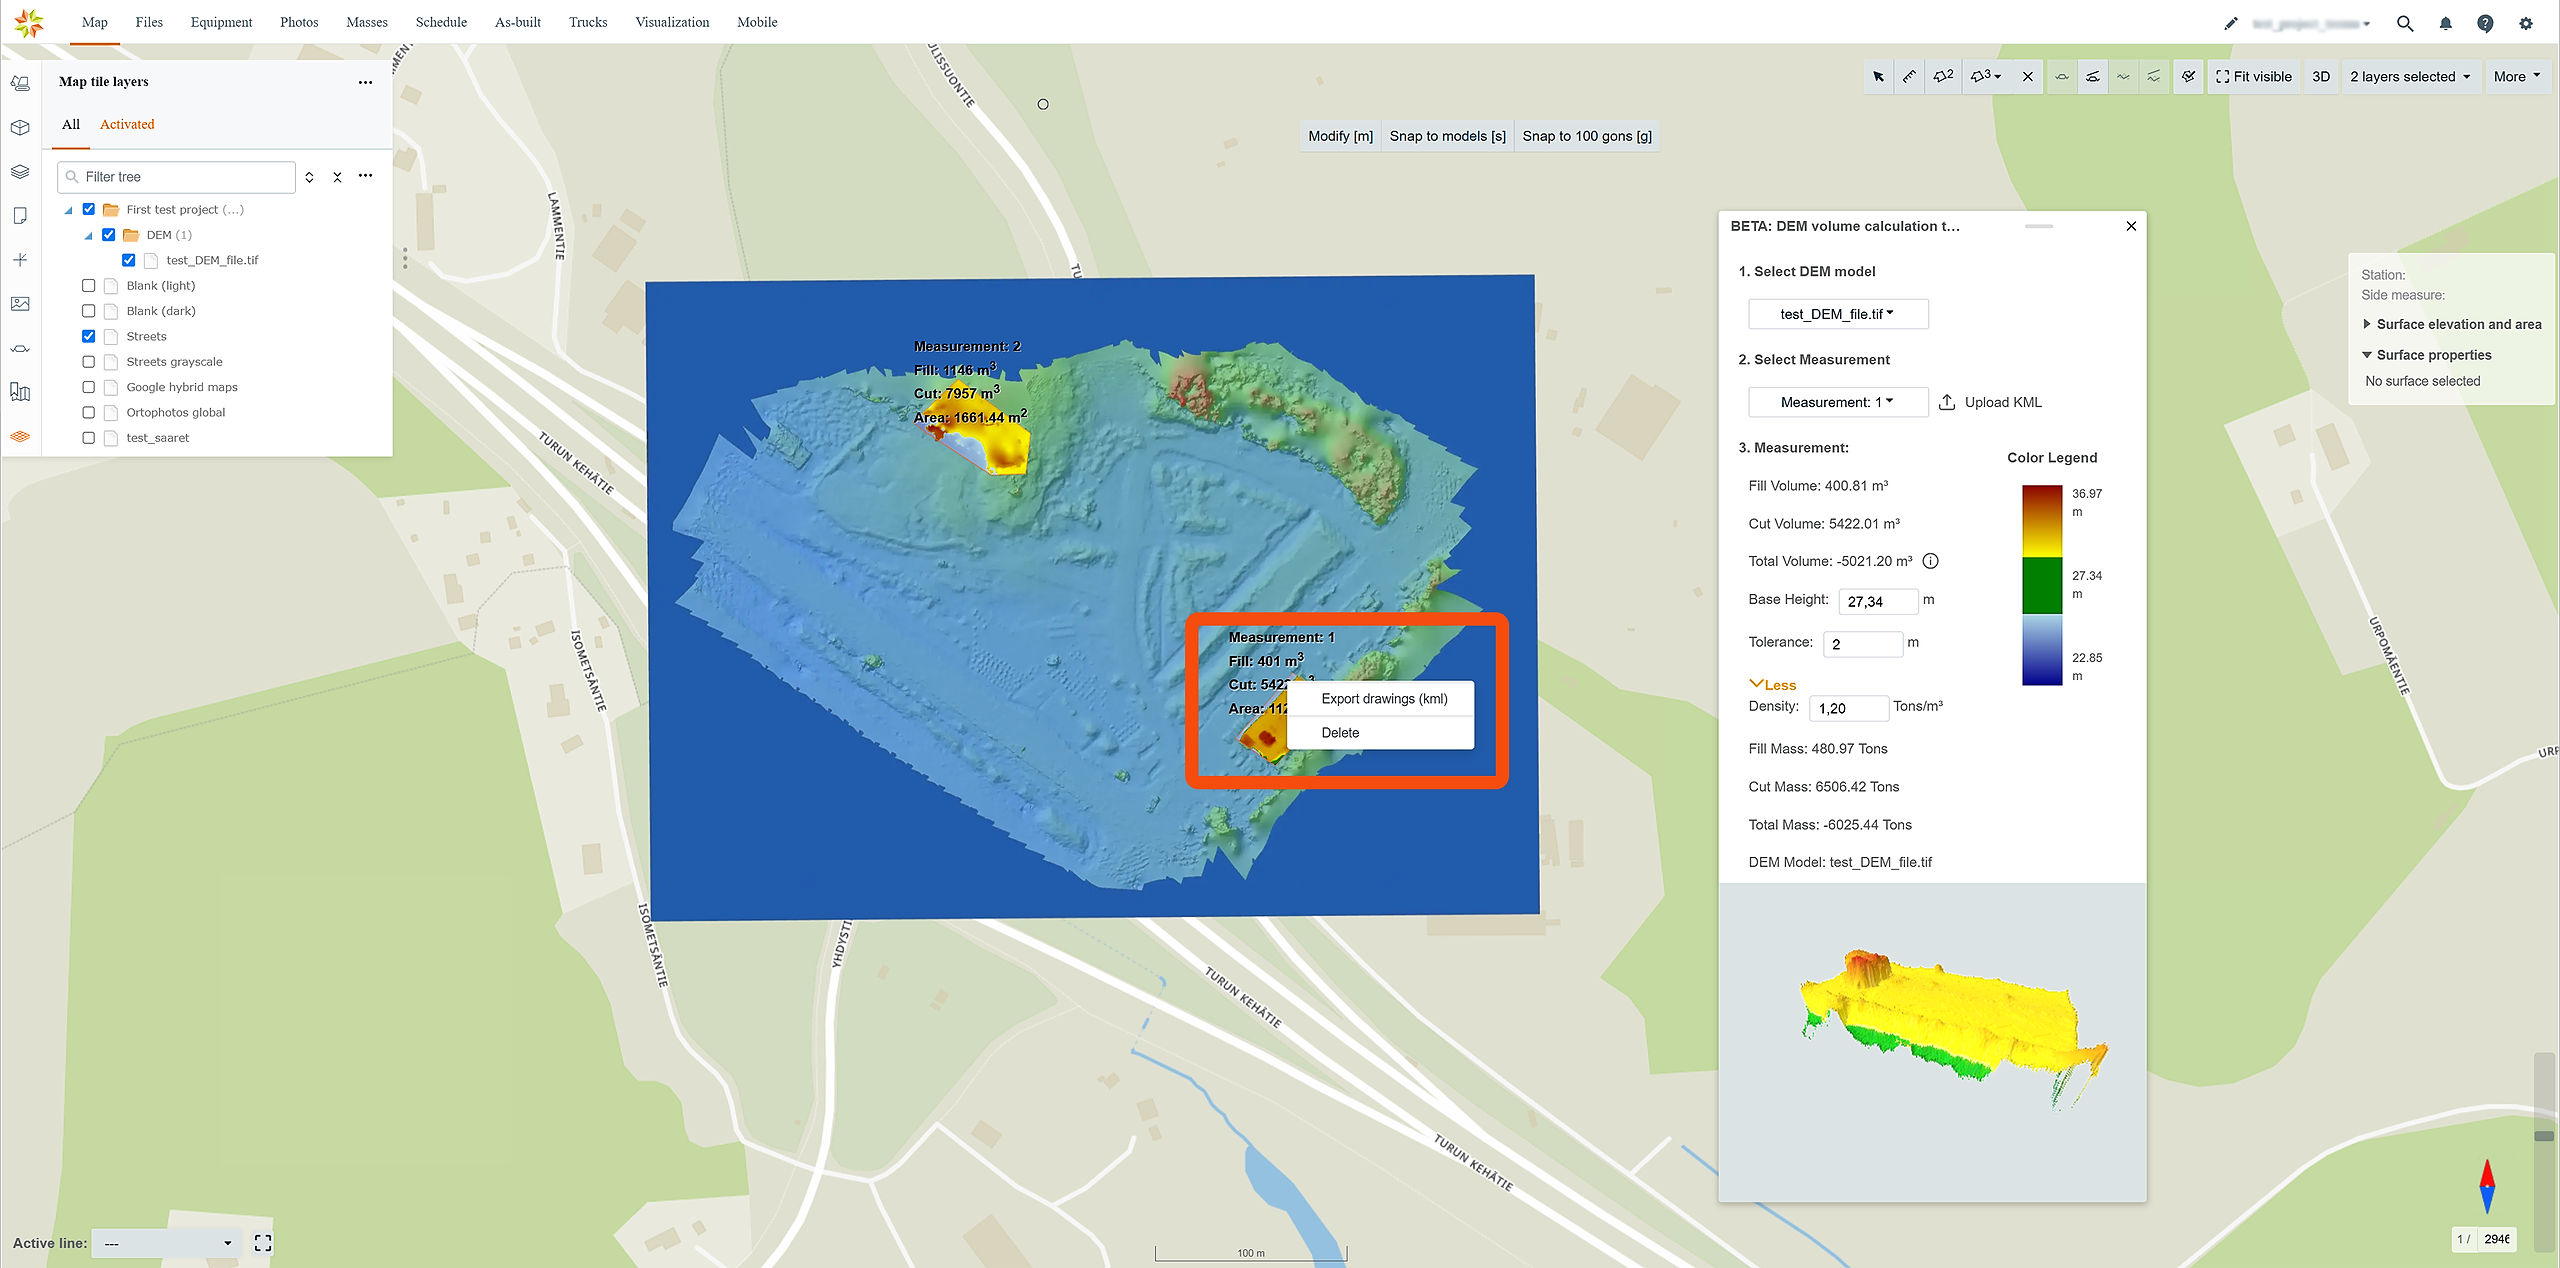
7. Mouse Actions
Right-click Options:
Export Drawings (KML): Download the drawn area as a KML file.
Delete: Remove the selected area.
8. Viewing Results
Results of the calculation for the selected area will be shown in the tool window.
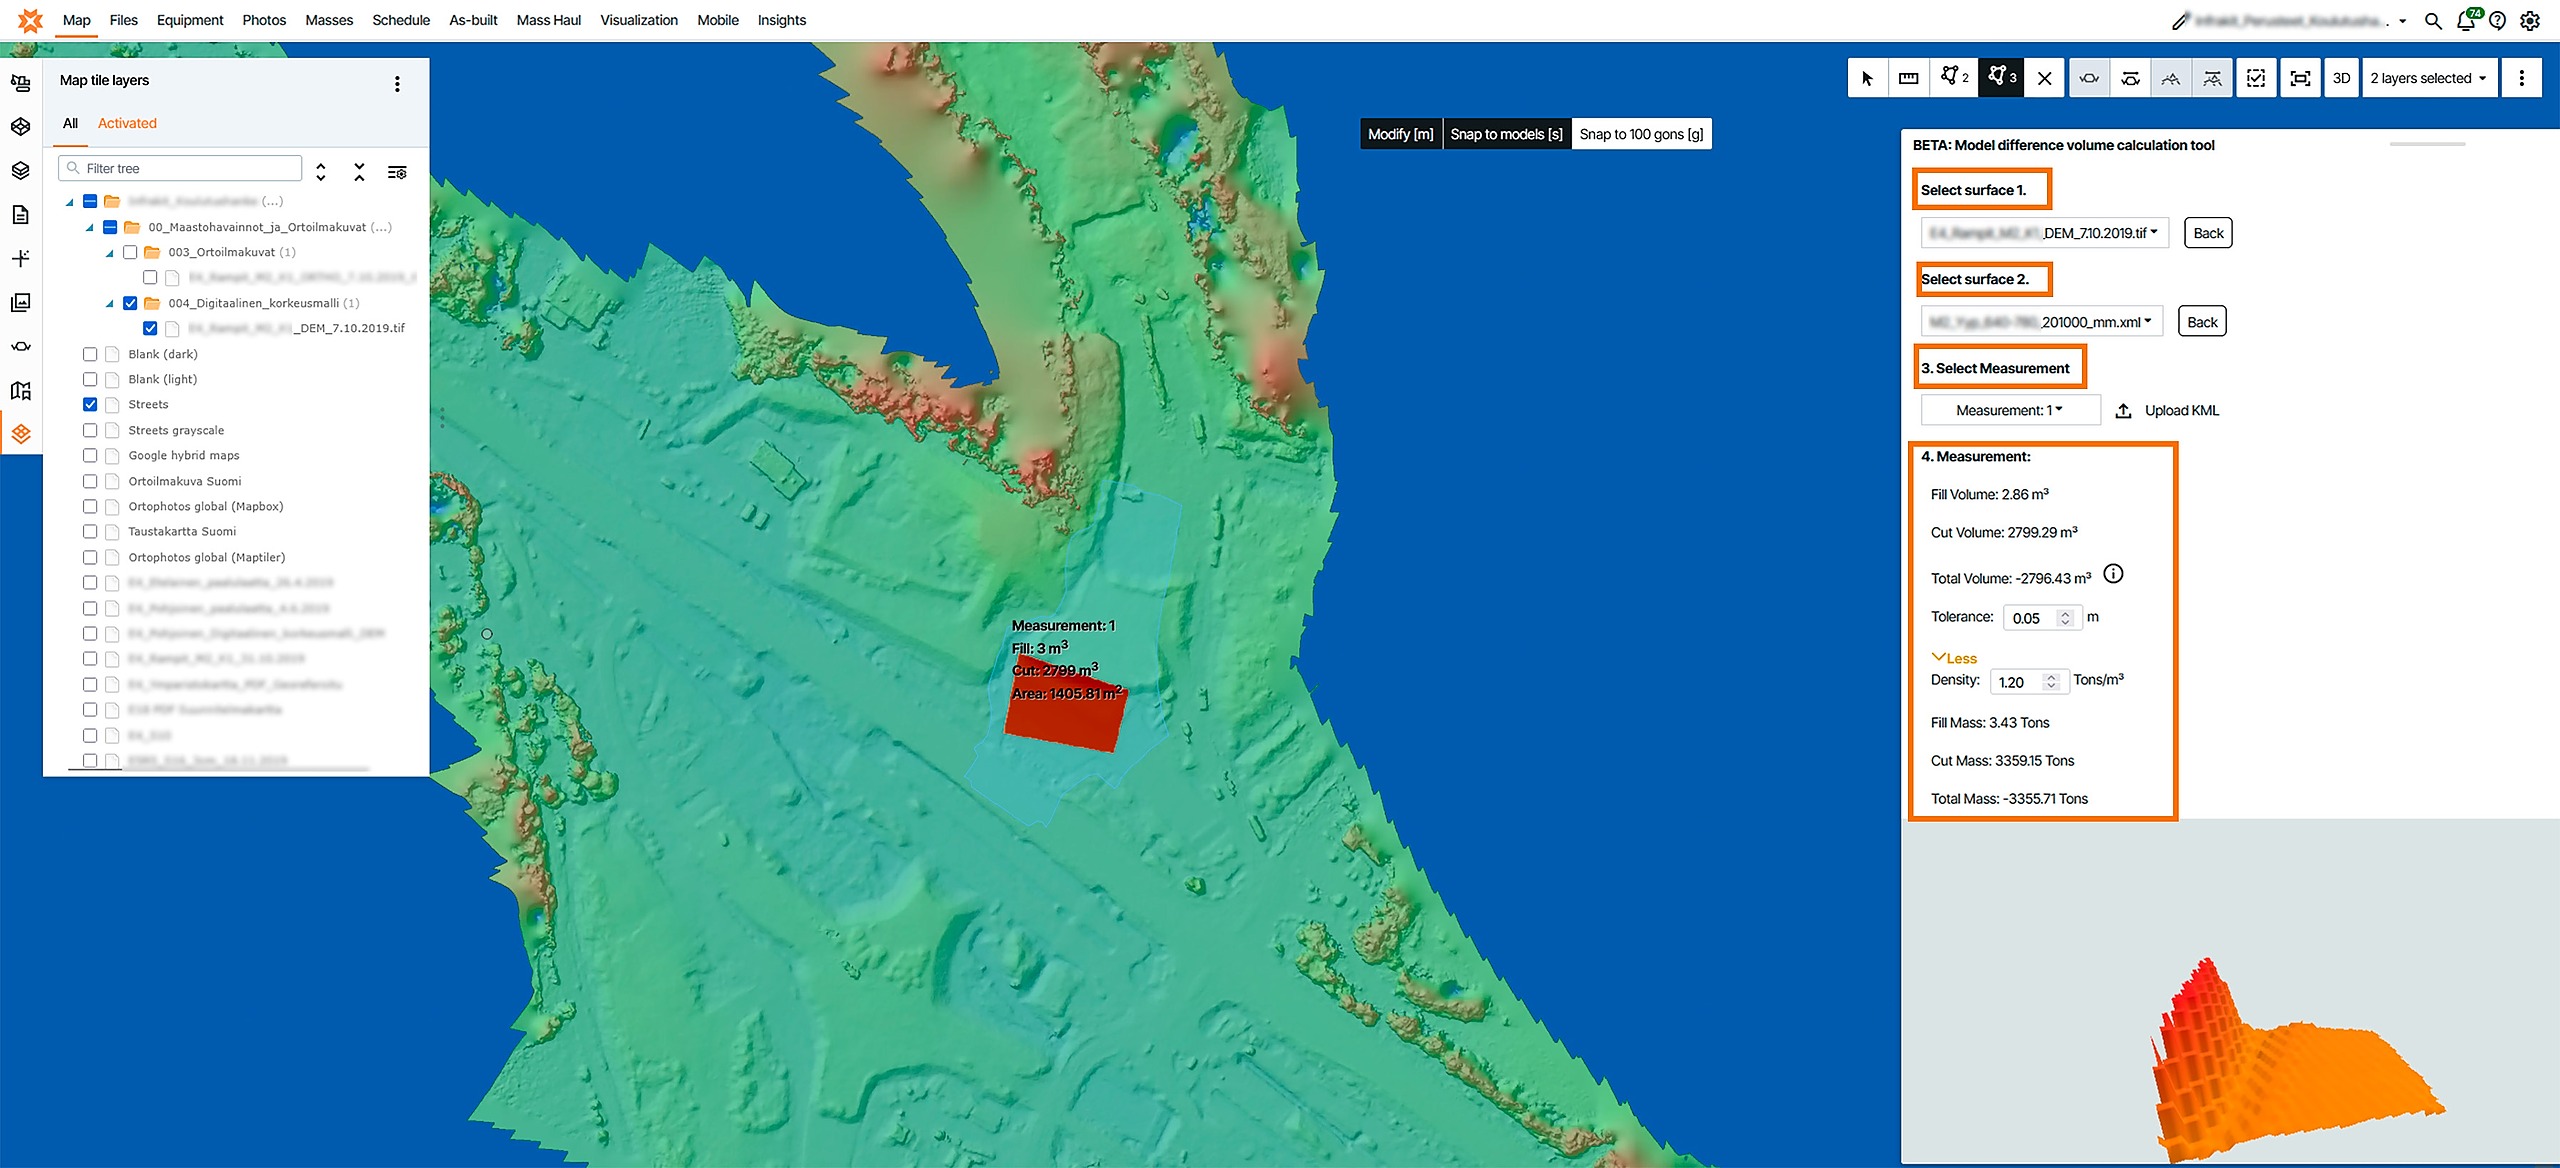
9. Model difference
Click on the DEM tool icon to open the tool and select Model difference.
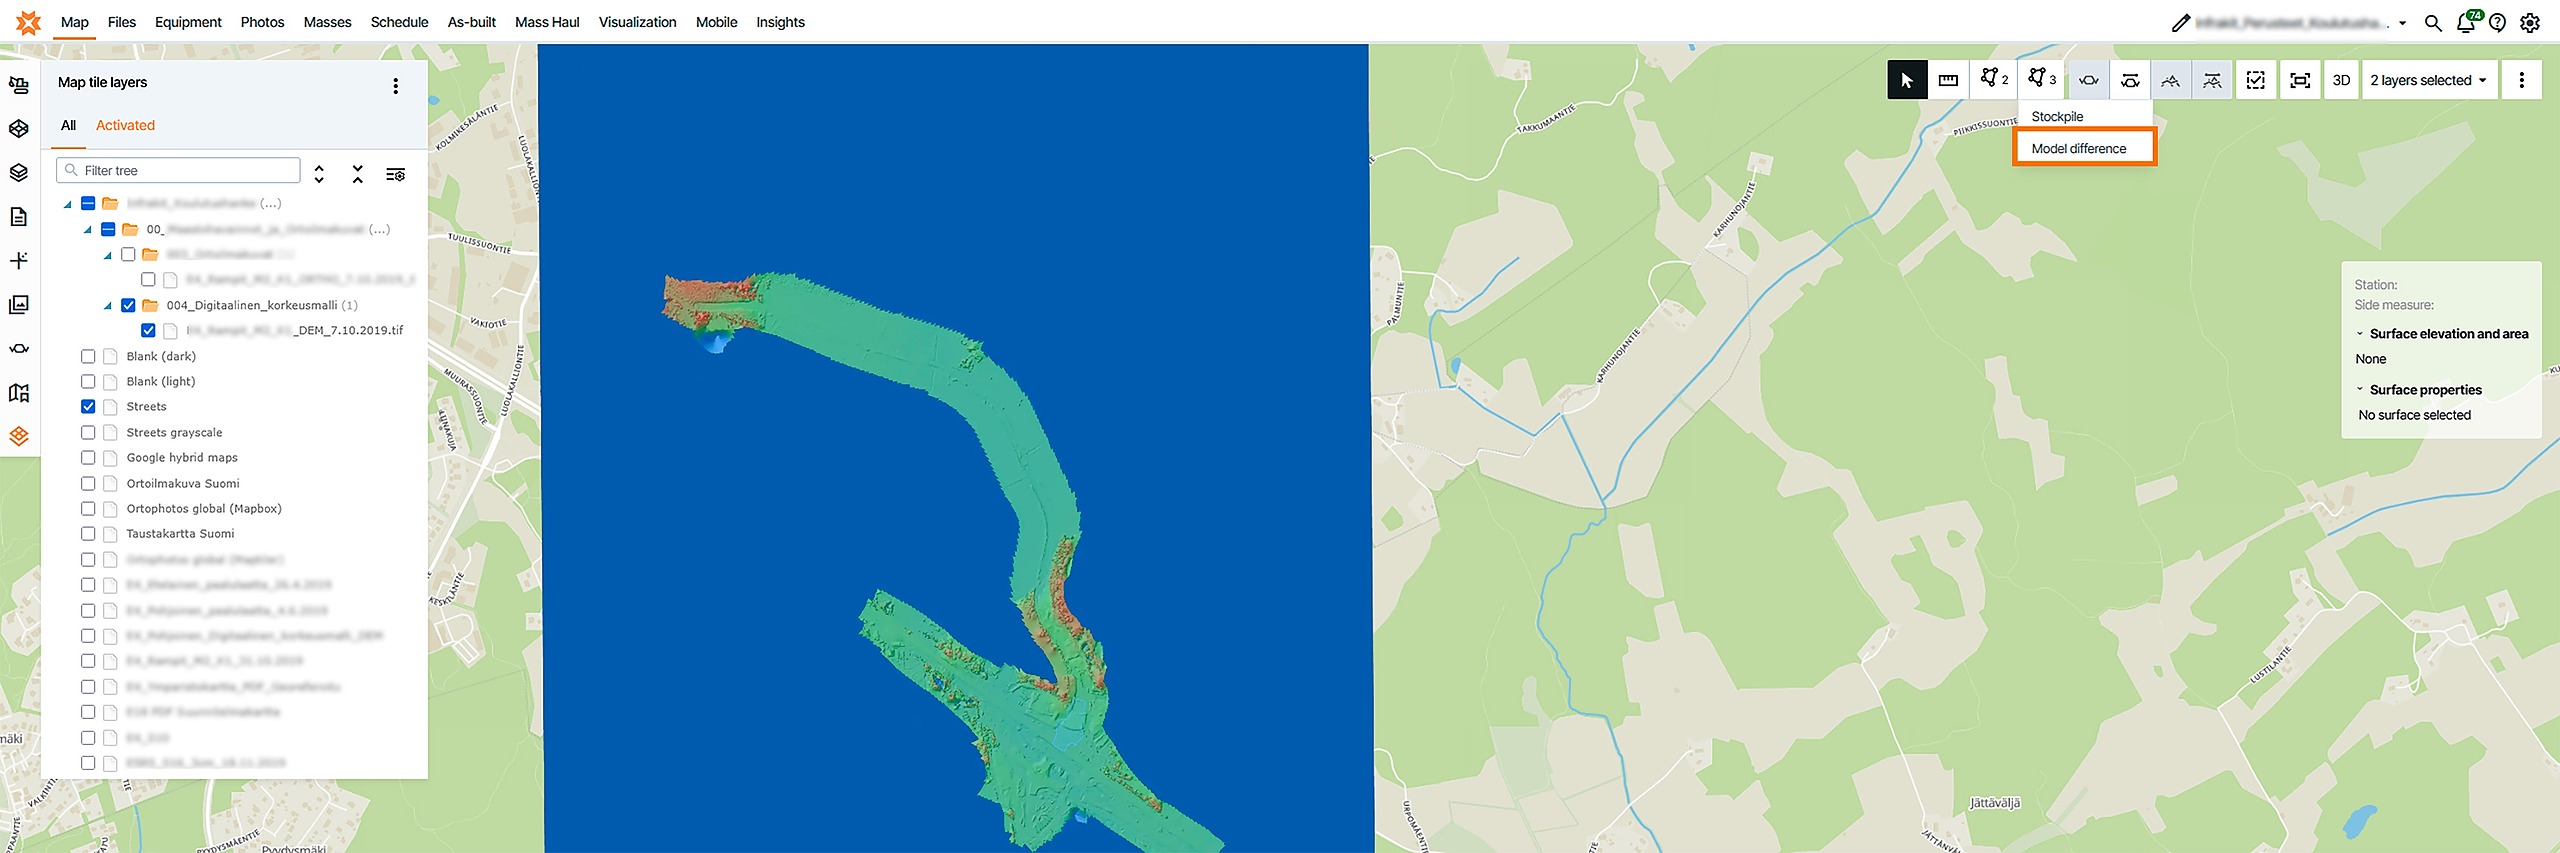
Select surface 1. From this option you select wanted DEM
Select surface 2. Here surface model, also remember to activate surface model.
Tolerance: Set the tolerance to exclude mass within a specified range from cut/fill calculations.
Density (Optional): Expand the box by clicking "> More" and set density for the mass in the calculation.
Draw an Area: After selecting the DEM model and surface model, draw an area on the map by clicking points. Double-click to close the area.
Select Measurement. This option is available after user has done measurement. Then you can select Measurement 1 or Measurement 3 if there is multiple measurements.
In the "Select Measurement" dropdown, select an measurement area or click "Upload KML" to upload a KML file as a measurement area.