1. Access Project Templates
Navigate to Admin page -> Manage Organizations.
Select your organization from the left-hand panel.
Go to the Project templates tab.
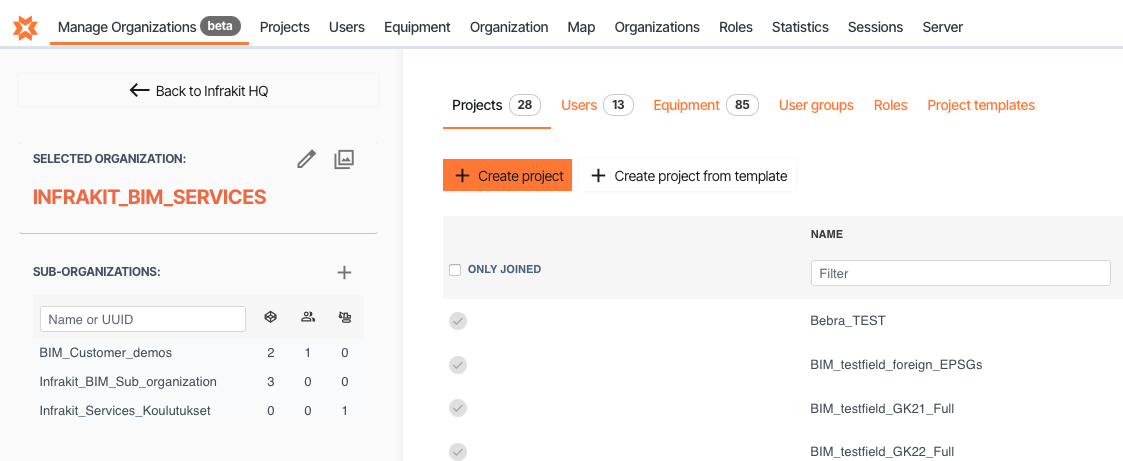
Here you can view, create, edit, or delete templates.
2. Create a New Project Template
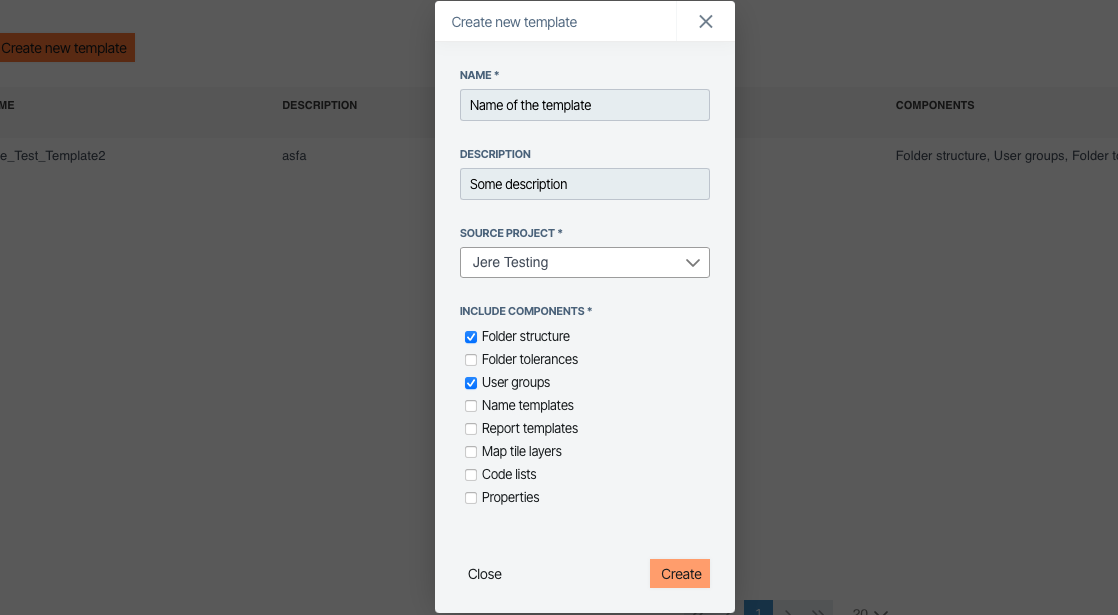
Click + Create new template.
Fill in the following fields:
Name – a clear name for your template.
Description – (optional) add details about what the template is for.
Source project – choose an existing project to base the template on.
Select the components you want to include in the template, such as:
Folder structure
Folder tolerances
User groups
Name templates
Report templates
Map tile layers
Code lists
Properties
Click Create to save the template.

3. Edit an Existing Template
In the template list, click the pencil icon next to the template name.
Update the name, description, source project, or included components.
Click Save.
4. Create a New Project from a Template
Go to the Projects tab in Manage Organizations.
Click + Create project from template.
Enter the Project name.
Select the Project template you want to use.
Click Create.
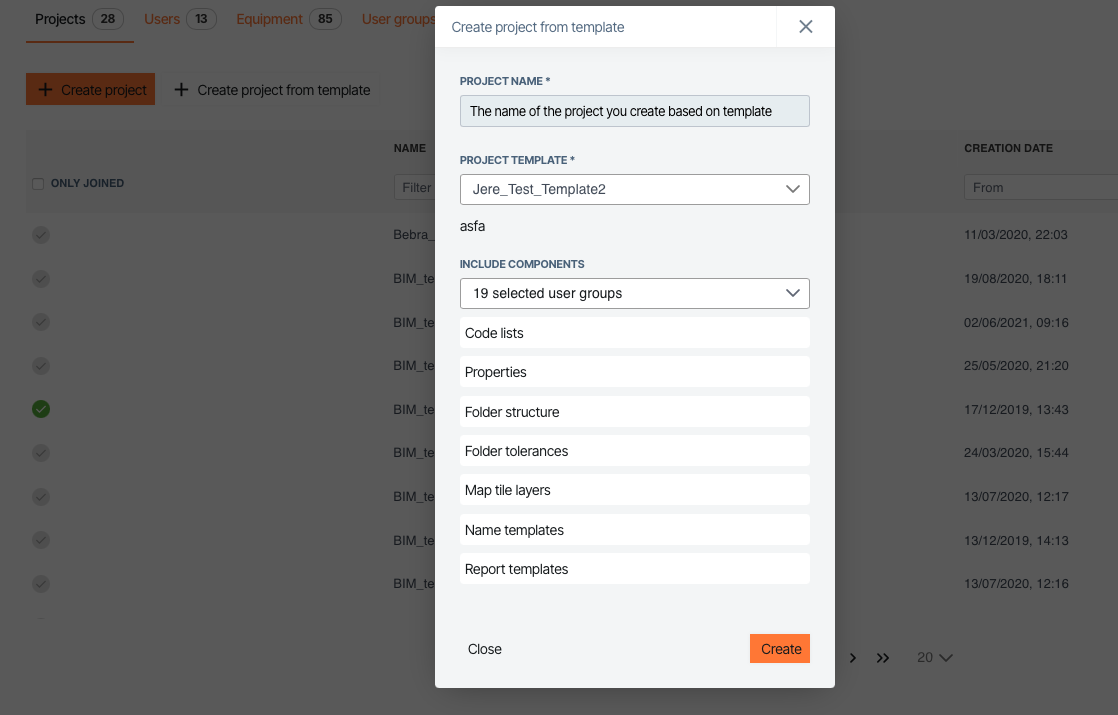
The new project will be created with the chosen structure and settings from the template.
5. Manage Templates
Edit (pencil icon) – update the template details.
Delete (trash bin icon) – remove the template if no longer needed.
✅ Tip: Use templates to ensure all your projects follow the same standards (e.g., folder naming, tolerances, roles). This makes collaboration easier and reduces mistakes.